Dinner

Recipe: Crispy Golden Arancini

Join me on a bite-sized adventure ….

Who doesn't love a good food story? Let me take you on a journey through the warm, golden, and utterly satisfying world of Crispy Golden Arancini. These delectable rice balls are more than just a meal—they’re an edible hug, perfect for any occasion, from a cozy dinner to a festive party platter. Whether you’re a seasoned cook or a curious foodie, this recipe promises fun, flavour, and a sprinkle of kitchen magic.

What are Arancini?

Originating from Sicily, arancini are proof that Italians truly understand the art of comfort food. These crispy, golden nuggets of joy are traditionally made with leftover risotto, stuffed with savory fillings, and deep-fried to perfection. Think of them as a hybrid between a rice ball and a deliciously crunchy surprise package. think of it as the “Italian Kinder Surprise”. And the best part? They’re incredibly versatile, allowing you to put your own spin on the filling.

Now, let’s dive into creating these spheres of crispy golden goodness step by step!

Pro Tips for Arancini Success

  • Chill Time is Key: Don’t rush the cooling process. The rice and filling need to be cold to form proper balls that won’t fall apart.

  • Oil Temperature Matters: Keep the oil at 350°F for perfectly crisp and golden results.

  • Customize the Filling: Experiment with different cheeses, vegetables, or even a dollop of pesto in the center for a unique twist.

The Process

1. Cook the Rice

Sauté onions in olive oil and butter, then add tomato paste, broth, and rice. Cook until fluffy, stir in cheese, and spread on a tray to cool.

2. Make the Filling

Sauté diced veggies, then brown the beef. Add tomato paste, peas, and water for a glossy, flavorful mixture. Chill it for easy handling.

3. Shape and Stuff

Scoop rice, add filling and mozzarella, and shape into balls. Be firm but gentle to keep them intact.

4. Coat and Fry

Dip in beaten eggs, roll in breadcrumbs, and fry until golden and crisp.

Simple steps for a crispy, cheesy delight! Now, let’s get rolling. 🍴


Crispy Golden Arancini

Prep time: 15 minutes
Cook time: 40 minutes
Cooling time: 1 hour 20 minutes|Total time: 2 hours 15 minutes 
Servings: 8 Arancini

Ingredients

For the Rice:
1/4 cup olive oil
1/4 of a large onion, diced
1/2 cup unsalted butter, divided
1 tablespoon tomato paste
4 cups chicken broth (or vegetable)
2 1/4 cup arborio rice
1 cup freshly grated Pecorino (or Parmegiano Reggiano)

For the Filling:
1/4 cup olive oil
1 carrot, peeled and diced
1 stalk celery, diced
1/2 onion, diced
1 lb (approx 500g) lean ground beef
1/2 cup tomato paste
1/2 cup frozen peas
1/3 - 1/2 cup water
Salt and pepper to taste

For the Crispy Coating and Assembly:
2 eggs, beaten
Plain bread crumbs 
1 ball fior di latte fresh mozzarella, diced into tiny cubes
Shredded mozzarella

Instructions

Cook the Rice:

  • Heat a large pot on medium heat and add the olive oil and chopped onion and continuously stir while cooking for 5 minutes or until the onion is soft, with a sweet scent and transparent in colour. 

  • Add 1/4 cup butter, tomato paste and stir and cook for one minute to melt the butter. Slowly pour in the chicken/vegetable broth, stir, and bring to a boil.

  • Add the rice, stir, reduce the heat to a simmer and cover with a lid. Cook the rice until the water is gone and the rice is fluffy. This may take anywhere from 10-15 minutes or follow the cook time on the package.

  • When the rice is cooked, add the remaining 1/4 cup of butter, grated cheese, and stir until it’s incorporated. 

  • Now spread the hot rice straight onto a large rimmed baking sheet in an even layer using a spatula or the back of a wooden spoon and allow the rice to cool at room temperature rest for one hour. 

Cook the Filling:

  • In a large frying pan add the olive oil, celery, onions, and carrot and while stiring cook on medium heat for 10 minutes, or until vegetables have softened and fork tender. 

  • Add the ground beef the to vegetable mixture until it is browned, about 10 minutes.

  • Pour in the peas, add the tomato paste, salt and pepper to tase,  water and stir to combine and coat the meat mixture. Reduce the heat to a simmer and cook for about 20 minutes. Add extra water if you find the mixture is dry. You want to keep it glossy and not sticking to the spoon.

  • Transfer the cooked meat mixture to a large bowl it to cool in the refrigerator for at least one hour.

Forming the Arancini:

  • Take your chilled rice onand form a pocket/bowl shape in the palm of your non dominate hand; scoop a generous amount of the meat mixture and drop it into the centre of the pocket of rice, top with a sprinkle of fresh and shredded mozzarella.

  • Take another scoop of rice and place it on top of the rice and mixture in your other hand and cupping your hands together begin to form a ball. You want to ensure you are using enough pressure to keep it together without squeezing it and causing the filling to spill out. 

  • Place the formed Arancini on a parchment lined baking tray.

  • Set up your dredge station by adding the beaten eggs to a shallow bowl and breadcrumbs to another. Roll each Arancini in the eggs and then into the breadcrumbs making sure to cover the entire rice ball with breadcrumbs. Set them aside back onto the lined tray and repeat until you have coated them all.

  • In a large pot heat your canola oil to 350°F on medium heat. Using a slotted spoon gently add a couple of Arancini in at a time (depending on the size of your pot), making sure they are not touching and have enough room to move around.

  • Fry each rice ball for about 5-7 minutes, or until they are crispy when tapped with a spoon and golden brown.

  • Enjoy it with a few scoops of fresh tomato sauce or plain. Both are delicious. 

Print Friendly and PDF

Recipe: Buttery Lemon Salmon

Indulge in this delightful Buttery Lemon Salmon, perfect for any occasion. This dish features salmon fillets seared to perfection and bathed in a rich, zesty garlic lemon butter sauce. Simple yet full of vibrant flavours, it’s an impressive dish that’s ready in under 30 minutes, ideal for busy weeknights or special gatherings. Fresh lemon juice and zest enhance the salmon’s natural taste, while a hint of garlic and fresh parsley bring out its best qualities.

A plate of pan-seared salmon, golden appearance served over fluffy white rice and sautéed rapini and asparagus. The scene includes small dishes with spices, and subtle background elements like lemons and an olive oil bottle on a kitchen counter.

Buttery Lemon Salmon

Prep Time: 5 minutes
Cook Time: 15 minutes
Total Time: 20 minutes
Servings: 4

Ingredients

For the Salmon:
4 salmon fillets (6-8 ounces each), skin-on or skinless
Salt and black pepper, to taste
2 tablespoons olive oil
1 teaspoon paprika (optional, for added depth of flavour)

For the Garlic Lemon Butter Sauce:
4 cloves garlic, minced
1/4 cup fresh lemon juice (approximately 2 lemons)
Zest of 1 lemon
1/2 cup unsalted butter
2 tablespoons fresh parsley, finely chopped
Salt and black pepper, to taste

Instructions

  • Step 1: Prepare the Salmon
    Pat the salmon fillets dry with paper towels. Generously season both sides with salt, black pepper, and paprika if using.

  • Step 2: Sear the Salmon
    In a large oven-safe skillet, heat 2 tablespoons of olive oil over medium-high heat.

  • Place the salmon fillets in the skillet, skin-side down if applicable.

  • Sear for 3-4 minutes without moving the fillets to create a golden-brown crust.

Step 3: Make the Garlic Lemon Butter Sauce

  • Melt the butter in a separate saucepan over medium heat.

  • Add the minced garlic and sauté for 1-2 minutes until fragrant.

  • Mix in the lemon juice and zest, letting the sauce simmer for 2-3 minutes until slightly reduced and thickened.

  • Season with salt and black pepper to taste, adjusting as needed.

  • Serve the salmon with a generous drizzle of the garlic lemon butter sauce, garnished with fresh parsley. Enjoy!

Notes

  • Store leftovers in an airtight container in the fridge for up to 3 days.

  • Feel free to add any fresh or dry herbs you like to the butter sauce. Make it your own.

Print Friendly and PDF

Recipe: Roasted Tomato Bisque

There’s something magical about soup—especially when it’s a velvety, rich tomato bisque. As the days grow shorter and the air gets cooler, this Roasted Tomato Bisque is the perfect way to warm up and nourish your soul. The combination of roasted vine-ripened tomatoes, fragrant garlic, sweet shallots, and fresh basil gives this dish a depth of flavour that’s hard to beat. Whether you’re craving a hearty lunch or a cozy dinner, this soup is the perfect go-to recipe.

Let’s walk through why this Roasted Tomato Bisque is going to be your new favourite.

Why Roasting the Tomatoes Makes All the Difference

What sets this tomato bisque apart from others is the roasting process. Roasting tomatoes concentrates their natural sweetness, caramelizing the sugars and bringing out that deep, rich flavour. Paired with garlic and shallots, the roasted tomatoes offer an almost smoky essence that gives the soup an extra layer of complexity.

Not only does roasting enhance the flavour, but it’s also super easy. Simply halve the tomatoes, toss them into a baking dish along with garlic, shallots, and a drizzle of olive oil and balsamic glaze, then pop them in the oven. In 30-40 minutes, you’ve got a beautifully caramelized base that will make your bisque shine.

Building Flavour in the Dutch Oven

While your tomatoes are roasting, you can start building the flavour base for the soup. In a large Dutch oven, sauté diced onions, carrots, and celery. This trio—known as mirepoix—adds a subtle sweetness and savoury foundation to the soup. After a quick sauté, canned San Marzano tomatoes, russet potatoes, and chicken broth join the party, simmering until everything is tender.

One of the key ingredients here is the Italian seasoning, which brings a delightful herbaceous note that pairs perfectly with the roasted tomatoes. Just a pinch of cayenne and black pepper adds a subtle kick, balancing the sweetness of the vegetables.

Blending It All Together

Once the vegetables are tender and the flavours have melded together, it’s time to bring everything together. Add the roasted tomatoes and blend it all into a silky-smooth texture using an immersion blender. This step ensures every bite is filled with rich, velvety goodness.

To finish off the soup, stir in a cup of heavy cream. The cream adds a luscious richness to the bisque, making it creamy without overpowering the fresh tomato flavour.

Serving Suggestions

Now comes the best part—serving the soup! Ladle the bisque into bowls and top it with your favourite garnishes. Croutons add a delightful crunch, while freshly grated Parmesan or slices of creamy brie take this dish to the next level. A few torn basil leaves not only add a burst of freshness but also tie the whole dish together.

Pair this bisque with a classic grilled cheese or enjoy it on its own with a warm baguette. Either way, it’s guaranteed to be a hit.

Why You’ll Love This Recipe

  • Simple ingredients: You probably have most of these items in your pantry already!

  • Rich, deep flavours: The roasted tomatoes and caramelized veggies give this soup its signature taste.

  • Customizable toppings: Whether you’re team croutons or brie, this bisque is a canvas for your favourite add-ons.

  • Perfect for meal prep: Make a big batch and enjoy it throughout the week!

Roasted Tomato Bisque is the perfect blend of comfort and sophistication. Whether you're hosting a dinner party or looking for a comforting solo meal, this soup is versatile, packed with flavour, and easy to prepare. The roasted tomatoes truly elevate the dish, and when paired with fresh, simple ingredients, the result is nothing short of spectacular.

Give this recipe a try and let the cozy flavours of roasted tomato bisque warm your day. Don't forget to comment. Let me know if you’ve tried the recipe and share your creations!

Happy Soup Season!

Roasted Tomato Bisque

Prep Time: 15 minutes
Cook Time: 45 minutes
Total Cook Time: 1 hour
Servings: 6 

Ingredients

For the Roasted Tomatoes:
1lb of Vine Ripe Tomatoes, halved
1 large shallot, quartered
3 garlic cloves, smashed and peeled
4 basil leaves, torn
Olive Oil
2 tsp balsamic glaze
Salt and pepper to taste

Into the Dutch Oven:
2 tbsp of olive oil
1 yellow onion, diced
2 of each: large carrots, celery stalks. Peeled and roughly chopped into 2 inch pieces
1 large russet potato, peeled and diced
796 ml can of san marzano or plum tomatoes
4 cups chicken broth
1 tbsp Italian seasoning
1/2 tsp kosher salt
1 pinch of each: cayenne and black pepper
1 cup heavy cream

Toppings (optional):
Croutons
Freshly grated parmesan Or a few slices of creamy brie
Fresh basil

Instructions

  • Preheat your oven to 400°F. Line a small rimmed baking dish with parchment paper, add the halved tomatoes, shallots, garlic, basil, (pack the tomatoes in, no spaces) drizzle olive oil, balsamic glaze, a sprinkle of salt, mix to coat everything and into the oven for 30-40 minutes.

  • While the tomatoes roast, add olive oil, onions, carrots, celery and salt to a large dutch oven, saute for 5 minutes or until the onions are translucent. Add in the canned tomatoes, potato, broth, Italian seasoning, salt, cayenne and black pepper stir and bring to boil. Lower the heat to medium low and simmer for 40 minutes or until the veggies are fork tender.

  • Add the roasted tomatoes to the pot, remove it from the heat, with an immersion blender, blitz it all up until smooth and no lumps. Add the cream stir and serve it up!

Print Friendly and PDF

Recipe: Slow Cooker Beef Stew

Indulge in Cozy Comfort: Unlocking the Magic of Slow Cooker Beef Stew

As the temperatures drop, there's no better way to embrace the season than with a bowl of hearty slow cooker beef stew. In this blog post, we'll explore the art of slow cooking and share a mouthwatering recipe that promises both convenience and deliciousness. Get ready to elevate your comfort food game and create a culinary experience that's perfect for chilly nights and laid-back weekends.

Why Slow Cooker Beef Stew?

Discover the secret to unlocking the full potential of your slow cooker – transforming tough cuts of beef into succulent, flavorful perfection. With minimal effort, you can achieve a rich, savory stew that tantalizes the taste buds. Dive into the convenience of set-it-and-forget-it cooking, allowing you to enjoy a warm, satisfying meal without the fuss.

The key ingredients that elevate this slow cooker beef stew to culinary masterpiece status include:

  • Quality Beef Chuck: This cut is well-marbled and, when slow-cooked, becomes fork-tender, infusing the stew with rich flavor.

  • Flavourful Broth: A good-quality broth enhances the overall depth and savoury character of the dish.

  • Red Wine: For an extra layer of complexity. Ust it to deglaze the pan after browning the beef. This step contributes a nuanced richness to the stew.

  • Aromatics - Onion and Garlic: These aromatic ingredients provide a flavourful base.

  • Root Vegetables - Carrots and Potatoes: Add sweetness and heartiness. These vegetables not only contribute flavour but also absorb the savory essence of the stew.

  • Celery: Add celery stalks for a mild, herbal note that complements the other ingredients.

  • Frozen Peas: Add a burst of color and freshness. This maintains their vibrant green colour and ensures a pop of sweetness in every bite.

  • Herbs - Bay Leaves, and Thyme: Enhance the stew's aroma and flavour . These herbs contribute a fragrant and earthy dimension to the dish.

  • Tomato Paste/Puree: Intensify the richness and deepen the color of the stew. This adds a subtle tangy element that balances the savory flavorus.

Final Touch and Serving Suggestions:

  • Garnish with Fresh Herbs: Just before serving, sprinkle a handful of fresh chopped parsley or thyme over the stew. This adds a burst of color and a pop of freshness.

  • Crusty Bread, Biscuits, or Dinner Rolls: The bread is perfect for soaking up the flavourful broth.

  • Creamy Mashed Potatoes: For an extra layer of comfort, spoon the slow cooker beef stew over a bed of creamy mashed potatoes.

  • Side Salad: Balance the richness of the stew with a simple side salad. A light vinaigrette or lemon-based dressing can provide a refreshing contrast to the hearty main course.

  • Wine Pairing: If you've used red wine in your stew, consider serving the same wine alongside the meal. A robust red wine, like a Cabernet Sauvignon or Merlot, complements the savoury flavours of the beef.

Embrace the warmth and comfort of the season with this ultimate slow cooker beef stew recipe. Perfect for busy schedules and lazy weekends, this dish is a celebration of simplicity and flavour – your taste buds will thank you!

Slow Cooker Beef Stew

Prep Time 20 minutes
Cook Time 8 hours
Total Time 8 hours 20 minutes
Servings: 6

Ingredients

1.5 kg (3.3 lbs) stewing beef (about 1 inch cubes)
1/4 cup flour for the beef
1/4 cup olive oil 
4 carrots, peeled sliced into ½ inch rounds
4 celery stalks, diced
1 medium onion, diced
5 small russet potatoes, peeled and diced into 1/2 inch cubes
3-4 garlic cloves, minced
1 cup red wine (if you drink it you can cook with it)
2 tbsp worcestershire
1 cup tomato puree
4 cups reduced sodium beef stock
1 handful fresh thyme
2 bay leaves
1/2 tsp black pepper
2 cups frozen peas (optional)

For the roux
1/4 cup butter
1/4 cup AP flour

Instructions

  • In a large bowl add the stewing beef and ¼ cup flour, toss to coat. 

  • Set your slow cooker to saute mode. If your slow cooker doesn’t have this feature, use a frying pan. Add your olive oil, beef and brown the chunks. It should only take about 2-3 minutes. Work in batches if you need, to avoid crowding the pan or slow cooker.

  • Remove the beef using a slotted spoon and set aside.

  • To the slow cooker or same pan,add your wine and stir and scrape all the bits from the bottom of the pan. Let that simmer for 1-2 minutes and add it to your slow cooker if using a pan. 

  • Turn the slow cooker off, add all your ingredients (except the flour and butter for the roux) and mix to combine. Cover and set your it to low, for 8 hours. Alternatively, you can set it to high for 4-5 hours. 

  • Make the roux by adding the flour and butter to a small pot and cook on low, whisking continuously until smooth, this should take about 3-4 minutes. 

  • During the last 30 minutes of cook time add the roux and frozen peas to your slow cooker, stir, cover and let it continue to cook until it’s complete the cooking time.

  • Top with fresh parsley and serve with fresh crusty bread or  homemade biscuits.

Print Friendly and PDF

Recipe: Crunchy Pumpkin Spice Granola

Savor the Season with Crunchy Pumpkin Spice Granola!
As the leaves change colors and the crisp autumn air settles in, it's time to indulge in the warm and inviting flavours of the season. Kitchen Confession presents our newest creation: Crunchy Pumpkin Spice Granola.
This delightful blend is crafted with care, combining wholesome oats, crunchy nuts, and a perfect balance of seasonal spices. Each bite takes you on a sensory journey, combining the comforting taste of pumpkin with the familiar warmth of cinnamon, nutmeg, and cloves.
Fall in love all over again with pumpkins as this delicious granola infuses the essence of the season into your breakfast routine. Whether topping your yogurt, sprinkling over a warm bowl of oatmeal, or simply enjoying it by the handful, this granola adds a delightful, autumnal crunch to every bite.
Not only does our Crunchy Pumpkin Spice Granola taste incredible, but it also boasts a list of nutritious ingredients. Packed with fiber, protein, and natural sweetness, this granola embodies the perfect balance between indulgence and health.
So, step into the autumn spirit and let our Crunchy Pumpkin Spice Granola awaken your taste buds. Experience the magic of the season as every mouthful transports you to cozy fireside chats, vibrant foliage, and the simple joy of cooler days. It's time to celebrate fall with a delectable blend that captures the very essence of this enchanting time of year.

Crunchy Pumpkin Spice Granola

Prep Time 5 minutes
Cook Time 20-30 minutes
Total Time 35 minutes

Ingredients

3 cups old fashioned oats
1/2 cup milled flaxseed
1/2 cup sliced almonds
1/2 cup chopped pecans
1/3 cup pumpkin seeds
2 teaspoons pumpkin pie spice
1/2 teaspoon salt
1/3 cup honey
1/3 cup maple syrup
1/2 cup pumpkin puree
1/4 cup coconut or avocado oil
2 teaspoons vanilla
1 cup dried blueberries

Instructions

  • Preheat the oven to 350 degrees F and line a baking sheet with parchment paper.

  • In a large bowl combine the oats, flaxseed, almonds, pecans, pumpkin seeds, pumpkin pie spice and salt.

  • In another bowl combine the honey, maple syrup, pumpkin puree, oil, and vanilla. 

  • Add the wet mixture to the dry mixture and stir to combine until everything is coated. Spread onto the prepared baking sheet in an even layer and bake for 20 to 30 minutes stirring halfway through the cook time until golden around the edges. Let cool completely on the pan before breaking up and stir in dried fruit. Store in a container at room temperature for up to 2 weeks.

Print Friendly and PDF

Roasted Garlic and Butternut Squash Soup

If you're craving a cozy bowl of comfort on a chilly evening, look no further than this Roasted Garlic and Butternut Squash Soup recipe. The rich, earthy flavors of roasted garlic and sweet butternut squash come together in a velvety-smooth soup that's perfect for warming both body and soul. Roasting the garlic and butternut squash before blending them creates a depth of flavor that's simply irresistible. Top it off with some roasted pumpkin seeds for the ultimate autumnal indulgence. This soup is not just a meal; it's a hug in a bowl, guaranteed to satisfy your fall cravings.

Roasted Garlic and Butternut Squash Soup

Prep Time: 10 minutes

Cook Time: 1 hour 

Total Time: 1 hour 10 minutes

Serves: 6

Ingredients

1 large butternut squash halved, seeded and scored

1 honey crisp apple, halved

1 vidalia  onion, peeled and quartered

2 heads garlic, tops cut off

2 tablespoons extra virgin olive oil, plus extra to drizzle over garlic. 

3 sprigs thyme, stems remain ved

1 tsp paprika

1/2 teaspoon ground nutmeg 

1/2 teaspoon ground ginger 

3 tablespoons salted butter

5 cups vegetable stock

1/2 cup of heavy cream

Instructions

  1. Preheat oven to 400°F. Line a baking sheet with parchment paper.

  2. To a baking dish or rimmed sheet pan add the squash, onion, garlic to the baking sheet, cut sides facing up. Brush the cut sides of the vegetables with olive oil and season with paprika, salt, pepper and thyme. 

  3. Cut the tops off your garlic bulbs and place them onto of a piece of aluminum foil (large enough to warp the garlic). Drizzle some olive oil over top, a pinch of salt and pepper then fold all corners together and twist to seal the package. Place the two garlic parcels onto the baking sheet.

  4. Turn the squash and apple cut-side down onto the sheet pan and roast for 30-40 minutes, until the squash is fully cooked. If the onion and garlic are roasted before the squash, remove them from the sheet pan and return the squash to the oven and allow it to cook for an additional 10 minutes if needed. 

  5. Remove from oven and allow to the squash and roasted garlic to cool. Then scoop out the roasted squash, squeeze out the roasted garlic, remove the peel from the apple and add everything including the onion into the bowl of a food processor or powerful blender (I used my Vitamix). Blend until smooth.

  6. In a large stockpot, pour in the squash puree, add butter, ginger, nutmeg, and vegetable stock. Bring to a boil and simmer gently for 15-20 minutes. Remove from heat and whisk in the heavy cream.

  7. Garnish with a dollop of sour cream, a drizzle of spicy chilli oil, and a sprinkle of pumpkin seeds and serve immediately. 

Author: Mary Mammoliti / Kitchen Confession / kitchenconfession.com

Print Friendly and PDF

Recipe: Butternut Squash and Kale Cavatelli

It’s spring but someone forgot to remind Mother Nature of the temperature change. Even though it’s a little less like spring outside it doesn’t stop me from craving the light bright meals that remind me of the season. One dish that's perfect for this time of year is Butternut Squash and Kale Cavatelli. This pasta dish is packed with healthy veggies and comforting tiny pasta. If you still need a reason to try this recipe here are a few more reasons as to why you should give this recipe a try:

  • Butternut Squash is a Nutritional Powerhouse

  • Butternut squash is a great source of fiber, vitamins A and C, and potassium. Not only does it add a sweet and nutty flavor to the dish, but it also provides important nutrients that support your overall health.

  • Kale is a Superfood

  • Kale is another healthy ingredient in this dish that provides a variety of health benefits. Kale is high in antioxidants, vitamin K, and iron. It's also a great source of fiber and can help support healthy digestion.

  • Cavatelli is a Delicious and Versatile Pasta

  • Cavatelli is a type of pasta that's perfect for this dish. Its small size and shape make it easy to combine with the other ingredients, and its chewy texture adds a great contrast to the soft butternut squash. Plus, you can easily substitute other types of pasta if you prefer.

  • The Flavors of Fall

  • Roasting the butternut squash adds a nutty and sweet flavor, while the kale provides a slightly bitter taste that balances out the dish. The addition of Parmesan cheese adds a salty and savory kick to the dish.

Butternut Squash and Kale Cavatelli is easy to make, packed with healthy ingredients, and puts an instant smile on your face :) Give it a try andlet me know what you think. I love hearing from you.

Butternut Squash and Kale Cavatelli

Prep Time 20 minutes
Cook Time 25 minutes
Total Time 45 minutes
Servings 4 servings

Ingredients

  • 1 medium butternut squash, deseed and cut into 1/2 inch cubes

  • 2 cups firmly-packed chopped kale

  • 4 unpeeled cloves garlic

  • 6 tablespoons extra-virgin olive oil

  • 1 tablespoon fresh minced thyme

  • Salt and pepper to taste

  • 1/2 cup chicken stock

  • 2 tablespoons unsalted butter

  • 1/4 tsp red pepper flakes

  • 1 16 oz. bag (8 cups) of cavatelli, cooked according to package instructions

  • 1/3 cup grated Parmesan cheese

Instructions

  • Preheat oven 400F and place butternut squash in a single layer on a rimmed baking sheet, leaving room for the kale and garlic. Drizzle olive oil, thyme, and salt and pepper to taste over everything, toss to coat and roast for 25-30 minutes until squash and garlic is tender and kale is crispy. Remove skins from garlic, finely mash into a paste, and toss into butternut squash/kale.

  • Divide the roasted squash and add 1/2 to a small bowl, top with chicken stock and blend into a pure using an immersion blender, set aside.

  • In a large pan add butter, the remaining half roasted butternut squash, kale, garlic paste, squash puree and heat through.

  • Pour in the cooked cavatelli and tossing until everything is combined and cook for 2 minutes. Remove from heat, season with additional salt and pepper is needed, mix in the parmegiano reggiano and enjoy!

Print Friendly and PDF

Recipe: Creamy Corn Chowder in 10 Minutes!

This Corn Chowder is possibly the most effortless hearty soup I have made in a long time. It requires barely any prep, and involving not much more than opening a can, minimal chopping and cute soup bowls to serve it in :)

This corn chowder recipe came to fruition after had been recipe testing mini chocolate cookies all morning before I knew it was time for lunch. I started scouring my pantry and fridge for inspiration and 15 minutes later, a few cans, a couple of rogue veggies in the crisper, and a quick rummage in the freezer I ended with a mighty tasty Creamy Corn Chowder that I couldn’t get enough of.

Here’s what you’ll need:

  • Frozen corn

  • Celery

  • Carrots

  • Shallots

  • Heavy cream or 2% milk

  • Medium size pot

  • Cutting board

  • Knife, spoon, can opener, measuring cup

  • Thick cut bacon or Olive oil

  • 1 can of creamed corn

A shallow bowl filled with corn chowder with a spoon in the bowl

Corn Chowder in 10 Minutes

Prep Time: 5 minutes
Cook Time: 5 minutes
Total Time: 10 minutes
Servings: 2 

Ingredients

3 slices thick cut bacon OR 1 tablespoon olive oil
1 large shallot, diced
2 stalks celery, diced
1 carrot, peeled and diced
1 14 oz can creamed corn
1 cup heavy cream (or 2% milk)
1 cup frozen corn
Salt and pepper to taste

Instructions

  1. In a medium pot cook the bacon over medium-low heat until fully cooked and crisp, about 2 minutes. Using tongs, remove the bacon from the pot and place on a paper towel lined plate. Once it’s cooled you can chop or crumble this into the soup.

  2. In the same pot, add the shallots, celery and carrots, stir and cook until fragrant and transparent, about 3-4 minutes. Add the bacon, creamed corn, cream (or milk) and frozen corn, bring to a simmer and cook for 5 minutes.

  3. Season with salt and pepper and enjoy!

Print Friendly and PDF

Recipe: Quick Chunky Beef Chili

Over the years I’ve made many pots of chili but this quick and chunky chili recipe is my absolute favourite. I like to add fresh jalapeños, cheese, sour cream, green onion, and forget the spoon just use crispy tortilla chips instead!

Frequently Asked Questions:

CAN YOU FREEZE CHILI?

Yes, chili is the perfect freezer meal. Divide the cooked chili it into single portions and let it cool. Label the container with the contents and date, then transfer to the freezer. You can keep your chili in the freezer for about three months.

To reheat, simply let the chili thaw in the refrigerator over night and reheat in a pot over low heat, adding water if needed, until warm, or microwave on high for 2 minutes.


HOW LONG SHOULD YOU COOK CHILI?

You’ll want to let this chili simmer for a minimum of 30 minutes, but it’s something that you can leave simmering gently for up to a couple of hours. Chili is one of those dishes that tastes better the longer it cooks. If you do plan to let your chili simmer for a longer period of time, make sure to cover the pot with a lid so it doesn’t dry out. Check it occasionally to make sure all the liquid hasn’t evaporated. If it has, simply add a little water or beef broth.

Quick Chunky Beef Chili

Prep Time 5 minutes
Cook Time 30 minutes
Total Time 35 minutes
Author Mary Mammoliti | Kitchen Confession

Ingredients

1 1/2 pound lean ground beef
2 tablespoon olive oil
1 medium onion chopped
2 tablespoons tomato paste
1 red bell pepper, diced
1 teaspoon Worcestershire sauce
1 teaspoon soy sauce
1 1/2 teaspoons unsweetened cocoa powder
2 tablespoons chili powder
1 teaspoon garlic powder
1 teaspoon ground cumin
1 teaspoon smoked paprika
1/2 teaspoon cayenne pepper, optional
1 (19 fl oz/540 ml) can red kidney beans, drained & rinsed
1 (19 fl oz/540 ml) can pinto beans, drained & rinsed
1 (28 fluid ounce) can fire-roasted diced tomatoes with juices
1 cup beef broth (add more if you like)
Salt & pepper to taste

Toppings (optional)

Shredded cheddar cheese
Sour cream 
Sweet Potato Tortilla Chips

Instructions

  1. Add olive oil to a large pot over medium-high heat.

  2. Add the beef to the pot and cook for 5 minutes, breaking it up as you go, until brown.

  3. Pour in the onion and red bell pepper and sauté for 5 minutes or until softened.

  4. Stir in the tomato paste, Worcestershire sauce, soy sauce and stir until tomato paste has coated the beef mixture.

  5. Add the beans, diced tomatoes, beef broth, cocoa powder, chili powder, garlic powder, cumin, paprika, and cayenne pepper.

  6. On high heat bring the ingredients to a gentle boil, reduce the heat, cover leaving a slight opening and let it simmer for 30 minutes, stirring occasionally.

  7. Taste and add more salt & pepper if needed, serve with desired toppings and enjoy.

Print Friendly and PDF

Recipe: Easy Dinner Rolls

Gimme ALL the carbs! These fluffy, buttery dinner rolls are what you need to make today! Don’t wait for the holidays to enjoy these little balls of dough will bring to your day :)

EASY DINNER ROLLS

Prep Time: 10 minutes
Rise Time: 3 hours
Cook Time: 20 minutes
Total Time: 3 hours 30 minutes
Serves: 24

Ingredients

1 cup warm water (105° F. to 115° F)
2 packages active dry yeast 4 1/2 teaspoons)
1/2 cup salted butter, melted
1/2 cup granulated white sugar
3 large eggs, room temperature
1 teaspoon sea salt
4 to 4 1/2 cups all-purpose flour
additional melted butter to brush overtop, optional

Instructions

  1. Combine the warm water and yeast in the bowl of a stand mixer. Let the mixture stand until yeast is foamy, about 5 minutes.

  2. With the dough attachment , stir in butter, sugar, eggs and salt. Add in flour, 1 cup at a time. The dough should no longer be sticky. You may need a little extra flour. Lightly oil a clean bowl and place the dough in the Centre. Cover with plastic wrap and refrigerate for 2 hours or up to 4 days.

  3. Using butter, coat the inside of a 9×13 inch rimmed baking dish. Turn the chilled dough out onto a lightly floured board. Using a kitchen scale take the total weight of the dough in ounces and divide by 24 ( should equal to 1.8 ounces per ball. Roll each piece into a smooth round ball; place balls in even rows (4 rows by 6 rows) in the prepared pan. Cover with a dish towel and let dough balls rise until doubled in volume, about 1 hour. You can leave them to rise longer if you need to.

  4. Preheat oven to 350° F. Bake until rolls are golden brown and cooked through, 15-20 minutes. If they are browning too quickly on top, tent foil over the rolls until finished baking. Brush warm rolls with melted butter, if desired. Break rolls apart to serve.

Notes:

  • *Before adding the yeast, use an instant-read thermometer to check the temperature of the water (it's important that it's in the temperature range indicated)

  • *These rolls may be baked early in the day and re-warmed when ready to serve.

Print Friendly and PDF

Recipe: Sour Dough Bread Crouton

Just four magical ingredients bring these little bites of crunchy heaven to life. Okay maybe not really magical but they sure do taste out of this world! Okay, i’ll stop now :)

Eat these on their own, top a soup or salad with them or gift them to friends and family. Anyway you choose to enjoy these one thing is for certain, they will a new staple in your recipe rotation.

Happy Munching!

A round white bowl filled with golden crispy croutons. A large silver serving spoon resting on a rimmed baking sheet to the left of the bowl and a white cast-iron pot in the top right corner. The photo was taken on the black stovetop.

Sourdough Croutons

Prep Time: 5 minutes
Cook Time: 20 minutes
Total Time: 25 minutes
Serves: 8
Author: Mary Mammoliti / Kitchen Confession

INGREDIENTS

  • 4 cups bread (approx. 1 large baguette cut into ¾ inch cubes)

  • 1/3 cup extra virgin olive oil

  • 2 teaspoons Italian seasoning

  • 1 teaspoon garlic powder

  • 1 teaspoon kosher salt

  • Black pepper (to taste)

INSTRUCTIONS

  1. Preheat oven to 375°F.

  2. Pile bread cubes onto a large rimmed baking sheet and drizzle with olive oil, sprinkle Italian seasoning, garlic power, salt and pepper. Toss to coat.

  3. Spread the bread cubes out in a single layer and bake until golden, about 15-20 minutes, mixing halfway through.

  4. Remove from oven, and allow croutons to cool.

Notes

  • Allow croutons cool completely and store in a sealed container or resealable bag.

  • Homemade croutons will keep for up to two weeks.

Print Friendly and PDF

Recipe: Roasted Garlic And Butternut Squash Soup

HOLY GOURD! It’s officially “Sweater Weather” here in Canada and that means welcome back soup season! This roasted garlic and butternut squash soup checks all the cozy autumn boxes for me. Drizzle a little chili oil over top and bring that warm comforting hug factor to the dish.

Now go on and make this show stopping soup. If you’re feeling like you need a little crunch, check out my crispy sour dough bread crouton recipe. Enjoy!

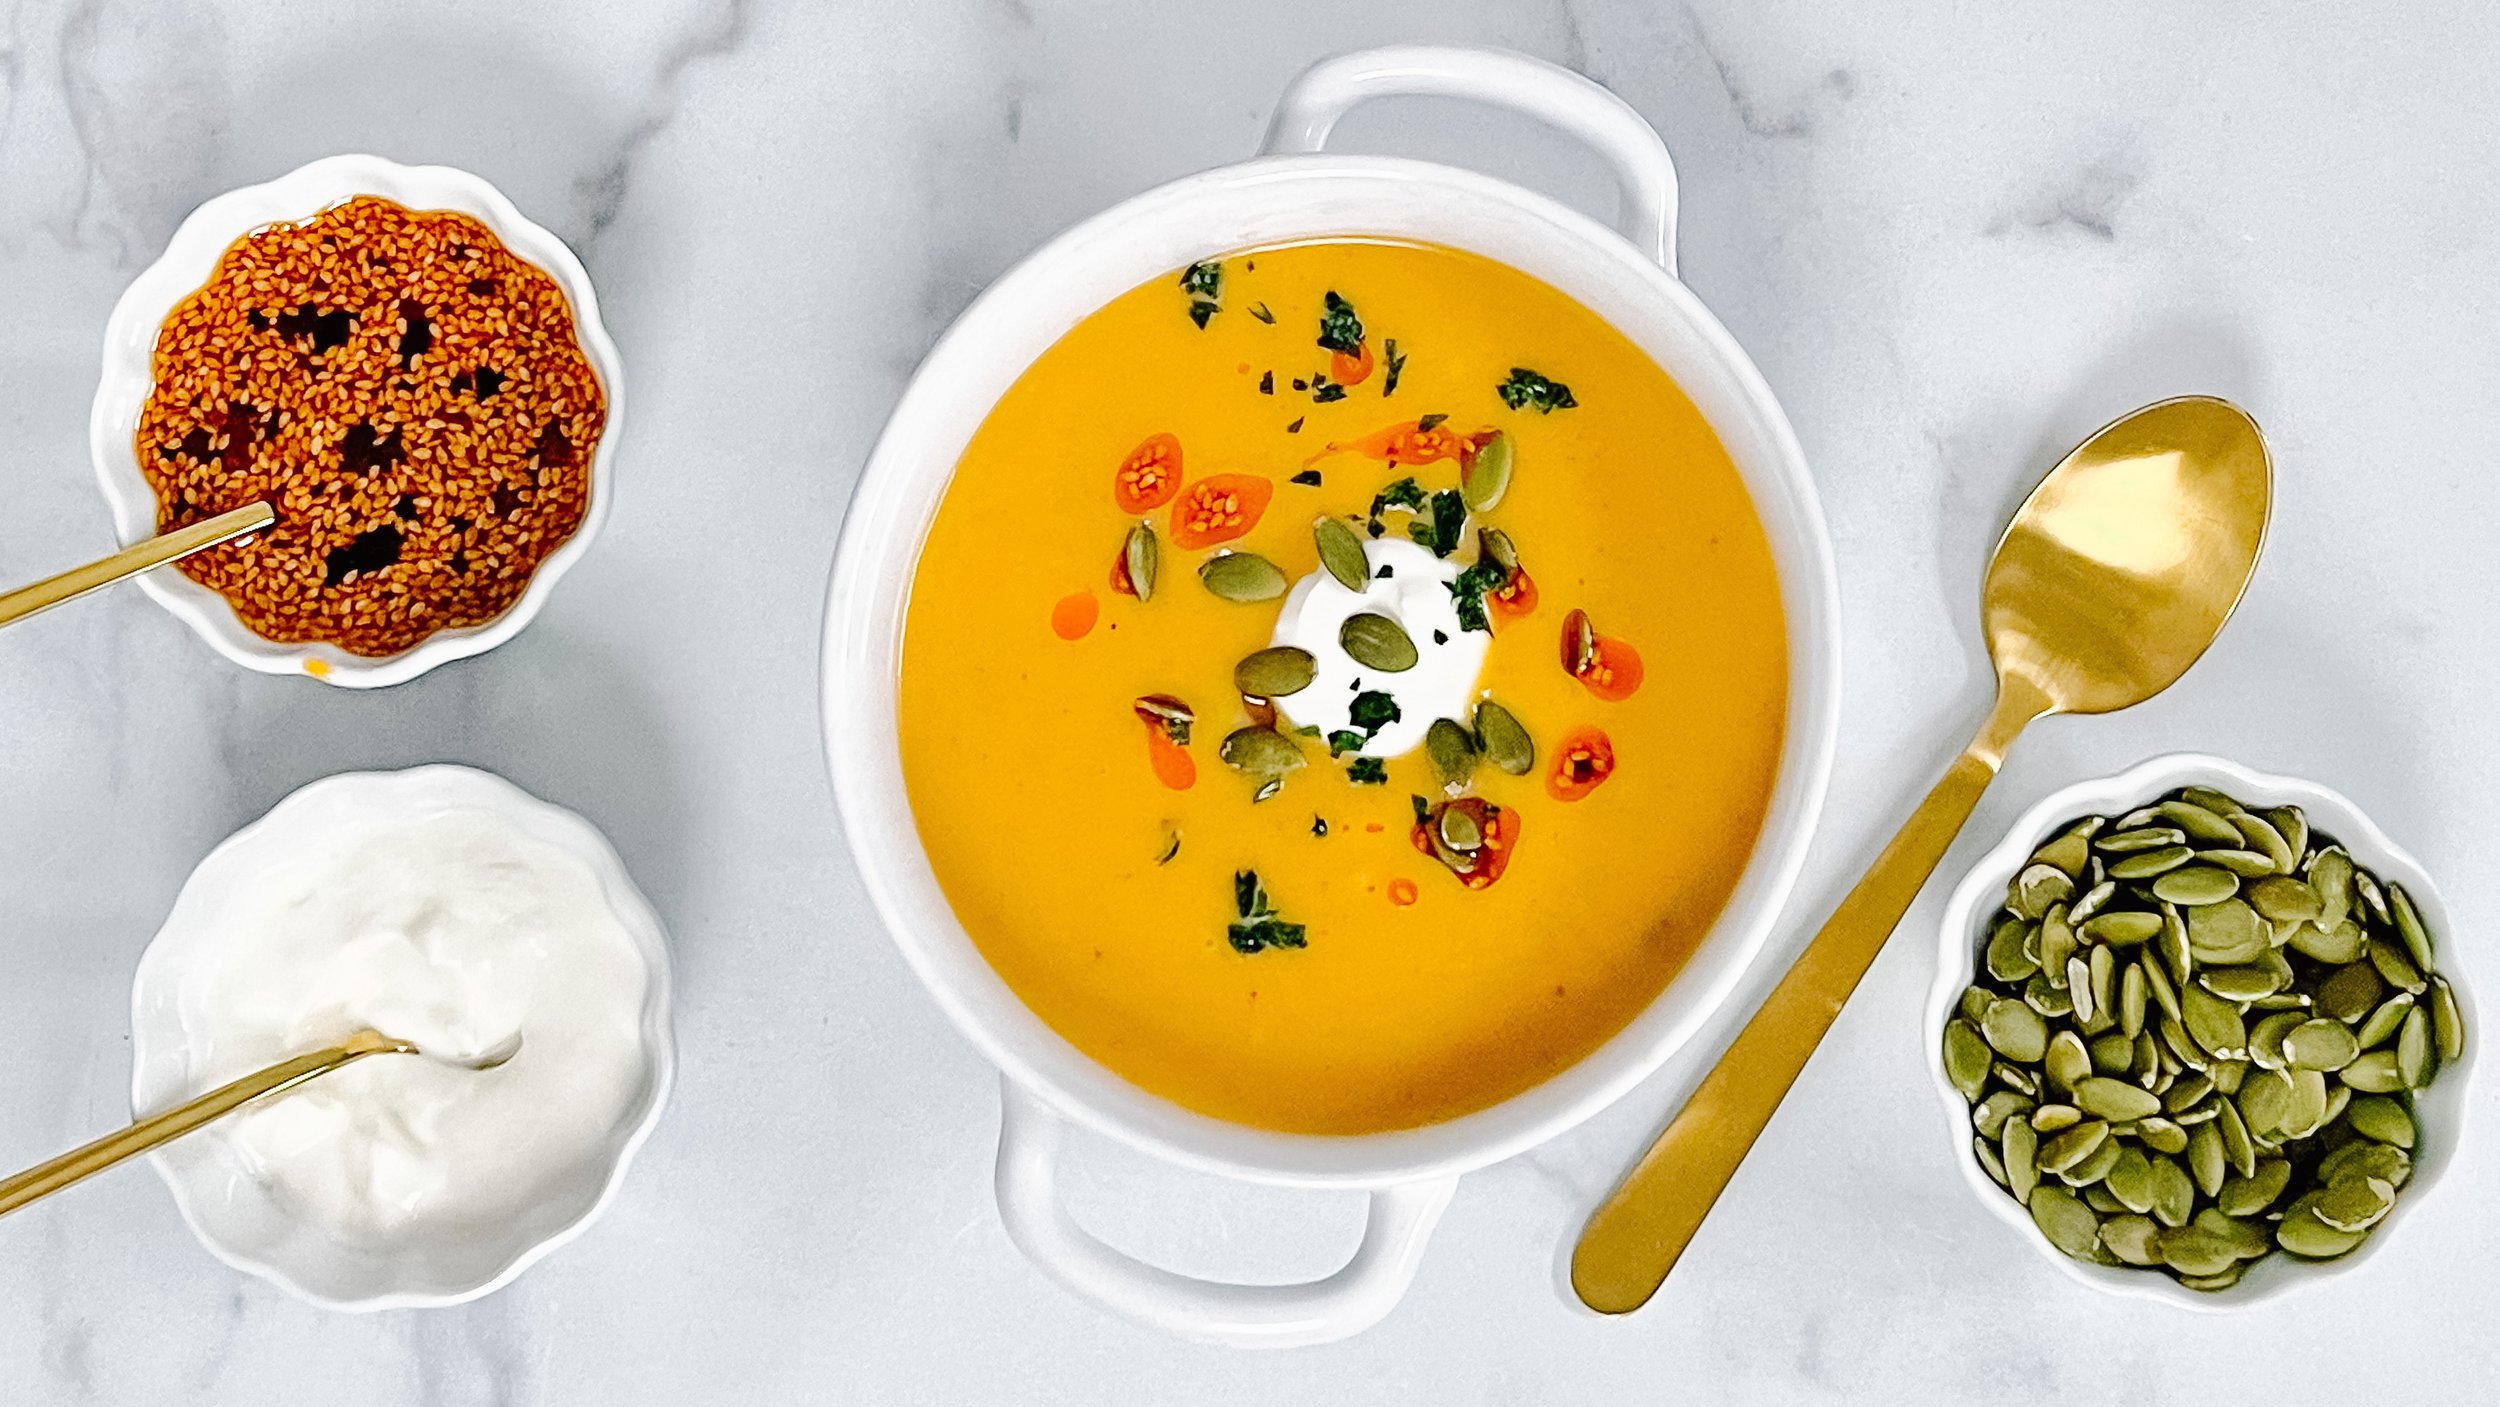
A bowl of soup in the centre topped with a drizzle of spicy chilli oil, a dollop of sour cream, a sprinkle of shelled pumpkin seeds and a few flakes of fresh parsley.Three smaller bowls around the soup with topping options and a gold spoon.

Roasted Garlic And Butternut Squash Soup

Prep Time: 10 minutes
Cook Time: 1 hour
Total Time: 1 hour 10 minutes
Serves: 6
Author: Mary Mammoliti / Kitchen Confession / kitchenconfession.com

INGREDIENTS

  • 1 large butternut squash halved, seeded and scored

  • 1 honey crisp apple, halved

  • 1 vidalia  onion, peeled and quartered

  • 2 heads garlic, tops cut off

  • 2 tablespoons extra virgin olive oil, plus extra to drizzle over garlic.

  • 3 sprigs thyme, stems remain ved

  • 1 tsp paprika

  • 1/2 teaspoon nutmeg

  • 1/2 teaspoon ground ginger

  • 3 tablespoons salted butter

  • 5 cups vegetable stock

  • 1/2 cup of heavy cream

INSTRUCTIONS

  1. Preheat oven to 400°F. Line a baking sheet with parchment paper.

  2. To a baking dish or rimmed sheet pan add the squash, onion, garlic to the baking sheet, cut sides facing up. Brush the cut sides of the vegetables with olive oil and season with paprika, salt, pepper and thyme.

  3. Cut the tops off your garlic bulbs and place them onto of a piece of aluminum foil (large enough to warp the garlic). Drizzle some olive oil over top, a pinch of salt and pepper then fold all corners together and twist to seal the package. Place the two garlic parcels onto the baking sheet.

  4. Turn the squash and apple cut-side down onto the sheet pan and roast for 30-40 minutes, until the squash is fully cooked. If the onion and garlic are roasted before the squash, remove them from the sheet pan and return the squash to the oven and allow it to cook for an additional 10 minutes if needed.

  5. Remove from oven and allow to the squash and roasted garlic to cool. Then scoop out the roasted squash, squeeze out the roasted garlic, remove the peel from the apple and add everything including the onion into the bowl of a food processor or powerful blender (I used my Vitamix). Blend until smooth.

  6. In a large stockpot, pour in the squash puree, add butter, ginger, nutmeg, and vegetable stock. Bring to a boil and simmer gently for 15-20 minutes. Remove from heat and whisk in the heavy cream.

  7. Garnish with a dollop of sour cream, a drizzle of spicy chilli oil, and a sprinkle of pumpkin seeds and serve immediately.

Print Friendly and PDF

Recipe: Lemon Garlic Salmon Pasta

Salmon Pasta is what’s happening tonight. Quick, Easy and ready in Under 30 Minutes. ⁣

I’m working on reducing my Simple Carbohydrates so I decided to make this dish with gluten free pasta and vegan butter. ⁣*this recipe serves 6-8

Flaky pink salmon, al dente chickpea fusili, wilted spinach and crisp green capers on a beautiful white double plate on top of a white and grey marble counter.

Flaky pink salmon, al dente chickpea fusili, wilted spinach and crisp green capers on a beautiful white double plate on top of a white and grey marble counter.

Lemon Garlic Salmon Pasta

Prep Time:
Cook Time:
Total Time: 30 minutes
Serves: 6-8
Author: Mary Mammoliti / Kitchen Confession

INGREDIENTS⁣

  • 1 package of Maria’s Homestyle Chickpea Fusilli⁣

  • 1 lb. salmon fillet⁣

  • 1 teaspoon garlic, minced⁣

  • 1 tablespoon @miyokoscreamery vegan butter⁣

  • 1 teaspoon dried basil⁣

  • 1 teaspoon dried oregano⁣

  • Salt and pepper to taste⁣

  • 4 - 5 handfuls of spinach⁣

  • Zest + juice of one lemon⁣

  • 2 teaspoons capers⁣

INSTRUCTIONS

  1. Cook the pasta according to package directions

  2. Add butter to a large pan. Season salmon with salt and pepper and place in pan. On medium low heat cook for 3 minutes. Flip and cook for an additional 3 minutes until done. Remove from pan and set aside. ⁣

  3. Add garlic and spinach to the pan and cook for 1 minute until spinach is wilted. ⁣

  4. Once the pasta is cooked, drain and toss with spinach, garlic, basil and oregano. Season with salt and pepper to taste⁣

  5. Add lemon juice, zest and capers to the pasta and toss to mix⁣

  6. Flake the salmon into bite-size pieces and gently toss salmon with the pasta⁣


Print Friendly and PDF

Recipe: Grilled Mushroom Ricotta Sandwich

It’s the first day of school and I’m sure there were tears shed, parents rejoicing and teachers settling in for another year.

So let’s Celebrate OR Eat Your Emotions (whichever one works for you 😁)⁣⁣

Try my Grilled Mushroom Ricotta Sandwich! This would be the Italian relative to the North American Grilled Cheese.⁣⁣

PHOTO DESCRIPTION: A golden brown sliced sandwich filled with creamy white ricotta cheese and caramelized mushrooms. The bread is stacked and a few crumbs and a dollop of ricotta cheese give the picture a sense of imminent consumption.

PHOTO DESCRIPTION: A golden brown sliced sandwich filled with creamy white ricotta cheese and caramelized mushrooms. The bread is stacked and a few crumbs and a dollop of ricotta cheese give the picture a sense of imminent consumption.

Grilled Mushroom Ricotta Sandwich

Prep time: 5 minutes
Cook time: 10 minutes
Total time: 15 minutes
Servings: 1
Author: Mary Mammoliti / Kitchen Confession

INGREDIENTS 

  • Kosher salt⁣

  • 1 small onion thinly sliced

  • 4 mushrooms thinly sliced

  • 1 tablespoon extra-virgin olive oil⁣

  • Oregano to taste

  • Ricotta cheese

  • 2 slices of crusty bread (sour dough, whole wheat)

INSTRUCTIONS

  1. On medium- high heat sauté your sliced mushrooms, a small sliced onion, some salt, pepper, and oregano in some EVOO and cook that down until the onions are soft and the mushrooms are golden (about 5 -7 minutes) pour into a bowl and set aside.⁣⁣

  2. Wipe down the pan and toast two slices of crusty bread (sourdough, whole grain etc) and lightly butter one side of each slice of toast. ⁣⁣

  3. Place the buttered side down top with a few generous scoops fresh ricotta cheese, top with the sautéed mushrooms and onions, cap it off with the second slice of toast (buttered side out. ⁣⁣

  4. Place on the hot pan and grill for a minute, flip, and cook for an additional minute. ⁣⁣

  5. Remove from the pan, cut in half. Take a giant bite and let the excess spill out and down your face. Don’t worry I won’t tell if you won’t 😉

Print Friendly and PDF

Recipe: One Pot Spicy Sausage Penne

Well hello you sexy bowl of Spicy Penne and Sausage. Picture it, feel it, make it :) This ONE POT SPICY SAUSAGE PENNE PASTA is what we need on a Monday and the first day back to work after losing an hour of sleep. I’m an exhausted mess this morning. I was still awake at 11:30pm and “rave” hours for me! Then 5:30 am rolls around and I can’t find the snooze button on the alarm because he’s up and calling first dibs on the shower - love you Frank (kisses) Can we go back please? I already miss that hour. Tell me your thoughts on daylight savings time because I.JUST.CAN’T!


IMG_5722.jpeg

One Pot Spicy Sausage Penne

Prep time: 15 minutes 
Cook time: 15 minutes 
Total time: 30 minutes 
Author: Mary Mammoliti | Kitchen Confession 

Ingredients 

  • 2 tbsp olive oil

  • 4 Italian Sausage links

  • 1 onion, diced

  • 2 cloves garlic

  • 1 tsp salt

  • 1/2 tsp black pepper 

  • 1/2 to 1 tsp red chili flakes

  • 1 (796mL) can diced tomatoes

  • 1 (680mL) jar tomato purée 

  • 1 1/2 cups low sodium beef broth 

  • 1 lb dried penne rigate

Topping Options

  • Chopped fresh basil 

  • Grated Parmesan 

Instructions 

  1. In a large pot, heat 2 tbsp olive oil on med-high heat. Add turkey sausage, searing for about 2-3 minutes per side. This step maintains the shape of the sausage when slicing it in the next step.

  2. Using tongs, remove sausage and when cool, slice into bite-sized pieces. Meanwhile, add the onion to the pot and sauté for 1-2 minutes until translucent and garlic and continue to cook for about a minute or until fragrant.

  3. Add sausage pieces back into pan, add salt, pepper and red chili flakes and sauté for another 2-3 minutes. Add diced tomatoes, tomato sauce and beef broth and bring to a boil, cover, lower heat to simmer and cook for 15 minutes.

  4. Add penne to the pot, stir and cover with a lid and cook, stirring occasionally, for another 8-10 minutes until pasta is al dente - fork tender and most of the liquid is absorbed.

  5. Plate your pasta, top with a generous amount of freshly grated parmesan and fresh basil

Print Friendly and PDF