Holiday Recipes

Recipe: Chocolate Caramel Cookie Sticks

Holiday baking countdown starts NOW!

Get ready to sleigh the season with Chocolate Caramel Cookie Sticks—crispy, chocolatey, and pure magic. Trust me, you’ll be thanking me later.

Snack on one (or a few—no judgment) while streaming past episodes of Dish with Mary on AMI+ now, and mark your calendar: the NEW season drops Feb 2025! 

Chocolate Caramel Cookie Sticks

Servings: 20 - 24

Ingredients

1/3 cup (80g)unsalted butter, room temperature 
1/4 cup (75g) butterscotch or salted caramel sauce
1 cup (120g) all purpose flour 
1 1/2 cups milk chocolate chips

Instructions

  • In a medium bowl, using a fork whisk butter until smooth and creamy. Stir in the butterscotch or caramel sauce. Add the flour and mix until combined and dough forms. If the dough is too sticky, add a bit more flour until a smooth silky dough ball forms. Cover with plastic wrap and refrigerate the dough for a minimum 30 minutes to overnight. The longer it rests in the refrigerator the more flavour is infused into the dough.

  • Preheat the oven to 350F 

  • Roll out dough into a rectangular, about 1/4 inch thick. Then cut the dough into strips, about 1/2 inch in width. Lift the strips and place them on a parchment lined baking sheet leaving a small space in-between each strip. 

  • Place in the oven on the middle rack and bake for 10 mins or until edges are very lightly browned. 

  • Allow cookies to cool completely. 

  • Melt the Chocolate: 30-second bursts in a bowl at regular power, with a quick stir in between. Just make sure to keep heating in short bursts, as opposed to minutes-long intervals, to avoid potentially scorching. 

  • Dip each cookie stick into melted chocolate, top with sprinkles and refrigerate for 5-10 minutes until the chocolate is set.

Print Friendly and PDF

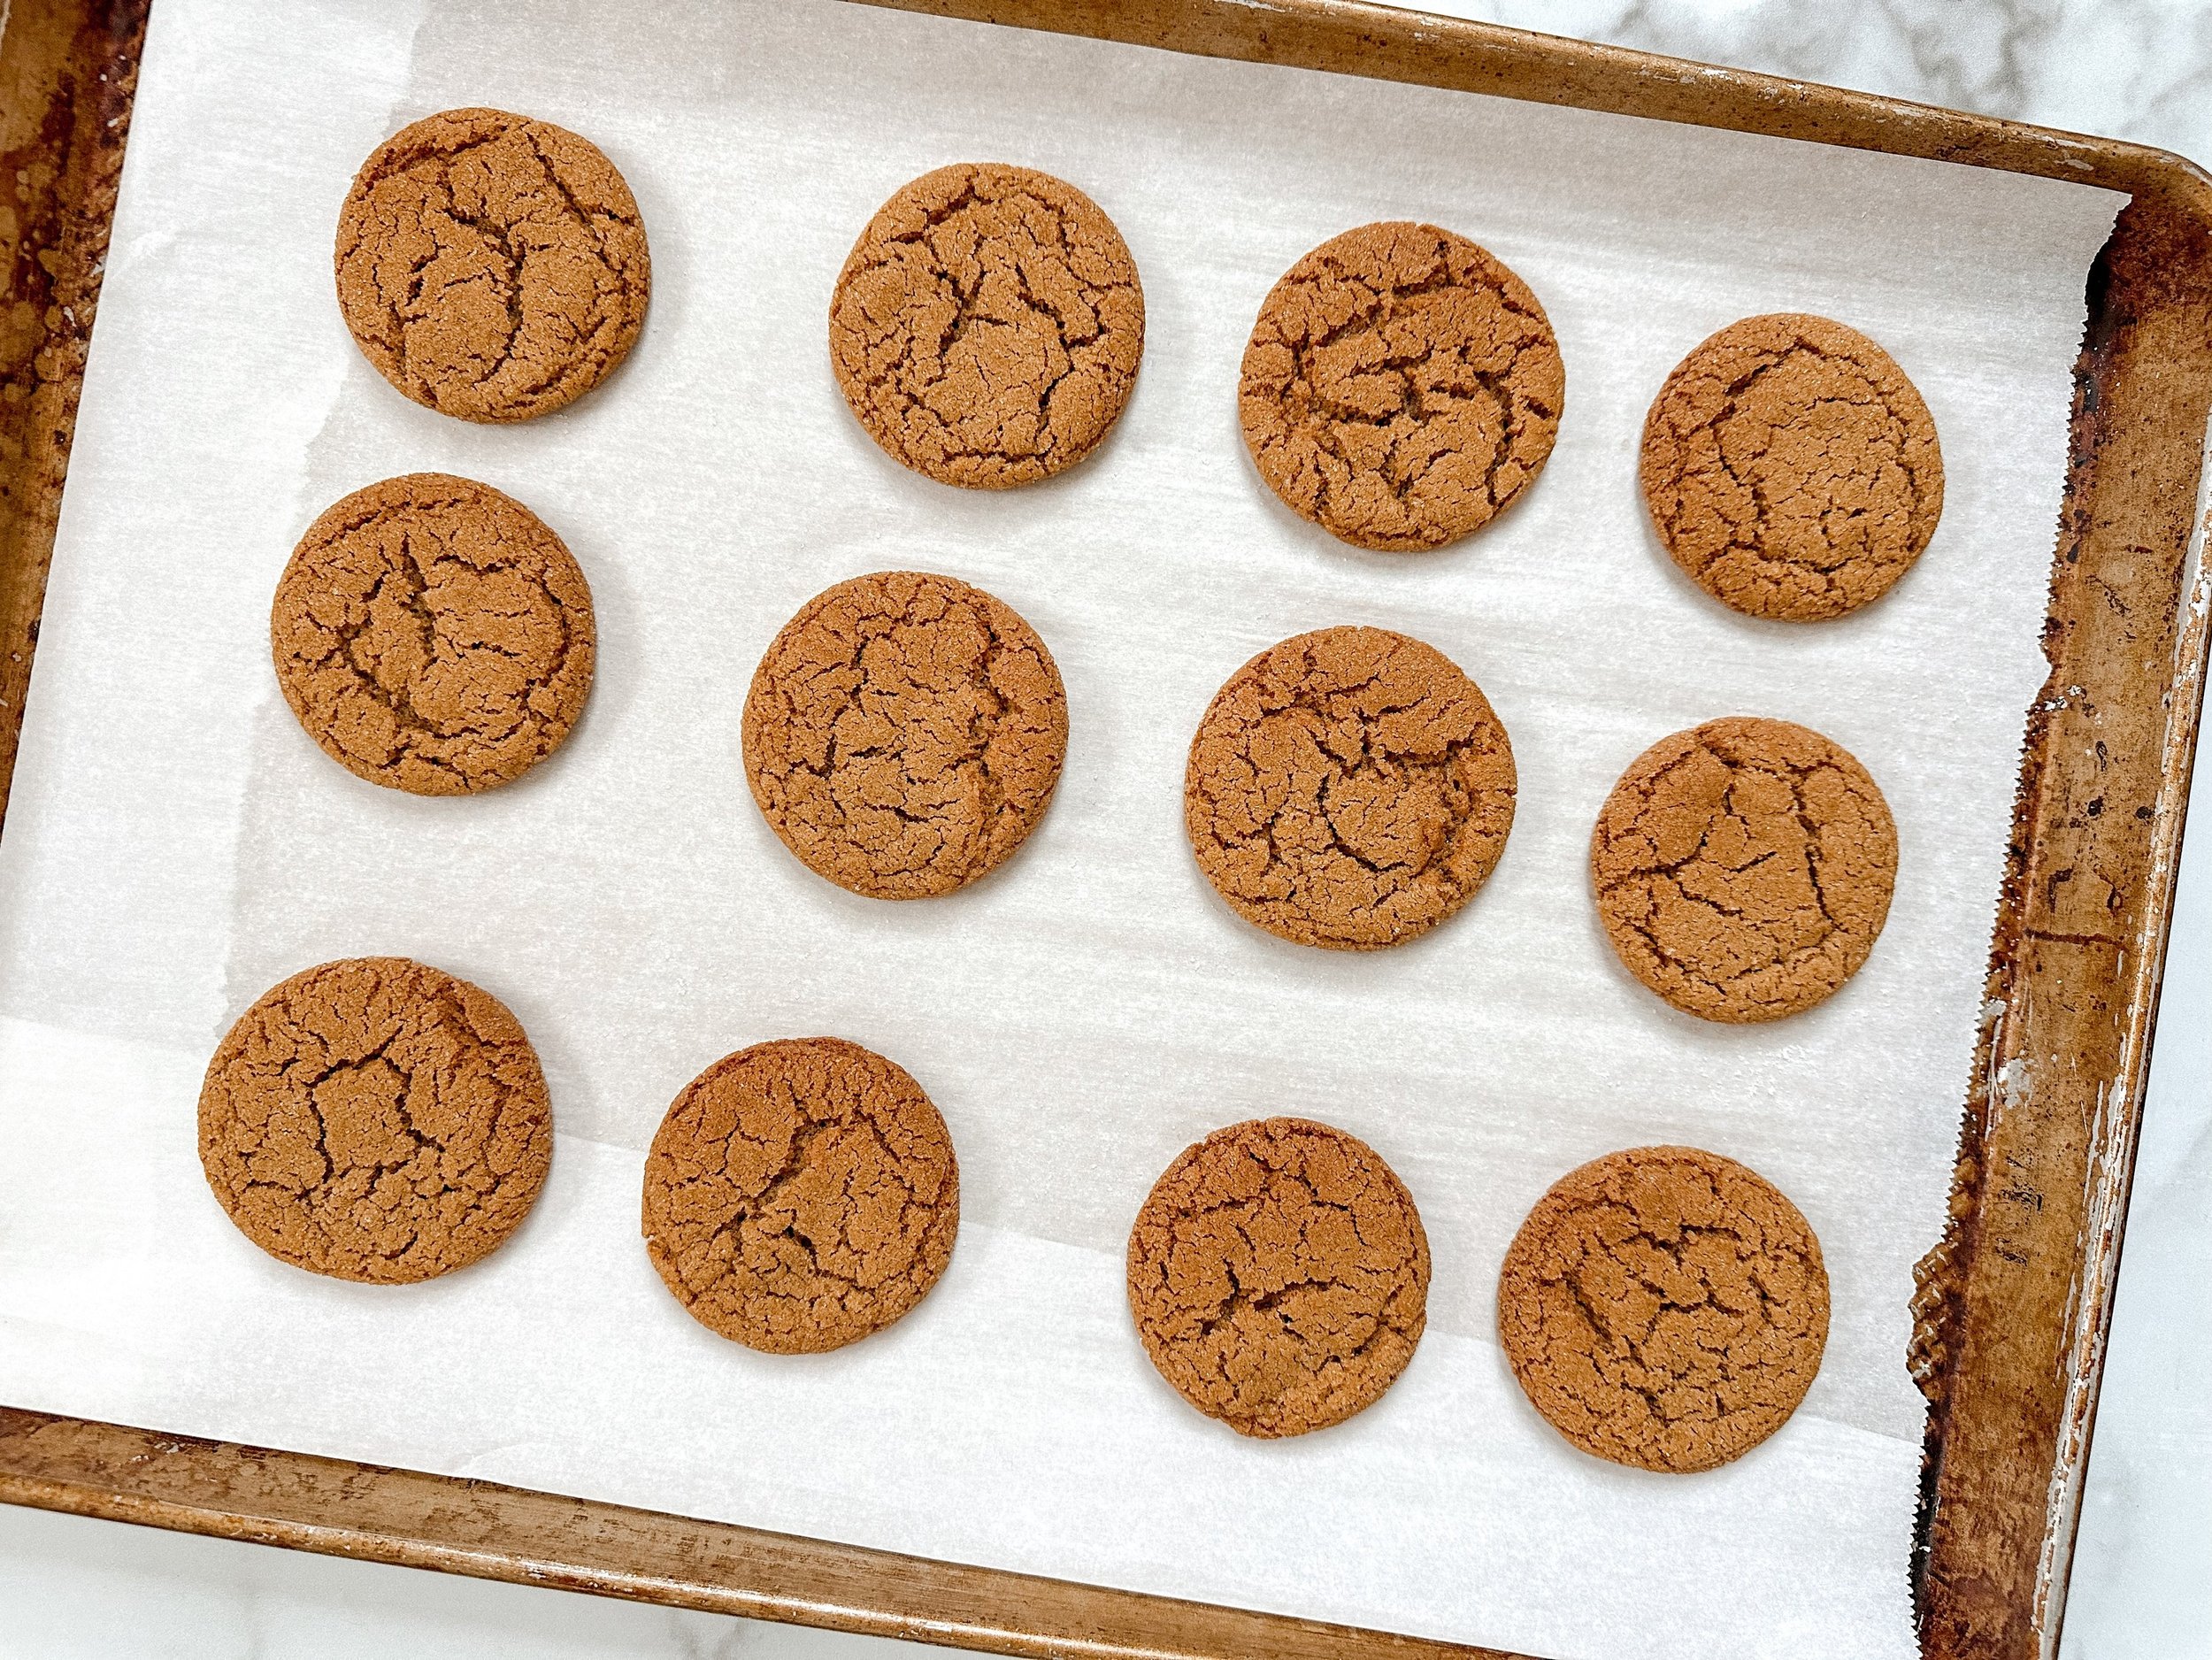
Recipe: Ginger Crackle Cookies

'Tis the season to indulge in the warmth of the holidays, and what better way to celebrate than with the timeless allure of ginger crackle cookies? These chewy, spicy, and downright delicious treats have earned their stripes as a Christmas classic, but truth be told, they're a year-round sensation that transcends seasonal boundaries.

Ginger Crackle Cookies

Total Time: 1 hour
Servings: 40 cookies

Ingredients

  • 2 1/4 cups all-purpose flour

  • 2 1/4 tsp ground ginger

  • 1 1/4 tsp baking soda

  • 1 tsp cinnamon

  • 1/4 tsp ground cloves

  • 1/2 tsp pink himalayan salt (any salt will work)

  • 3/4 cup unsalted butter , softened at room temperature

  • 1/2 cup granulated sugar

  • 1/2 cup packed light brown sugar

  • 1 egg at room temperature

  • 1/3 cup molasses

Extra

  • 1/4 cup granulated sugar for rolling the dough balls

Instructions

  • Preheat the oven to 350 degrees F. Line 2 rimmed baking sheets with parchment and set aside.

  • In a medium bowl, whisk together flour, ginger, baking soda, cinnamon, cloves and salt.

  • In the bowl of a stand mixer using the paddle attachment, beat butter, ½ cup granulated sugar and brown sugar on medium until smooth, about 3 minutes. Beat in egg and molasses until combined. Gradually add the flour mixture to the bowl on low and beat until just combined.

  • Using a 1-tbsp cookie scoop portion out the dough and roll into balls. Pour that extra ¼ cup granulated sugar into a shallow bowl and roll the dough balls in the sugar to coat and arrange 2 inches apart on the prepared baking sheets.

  • Into the oven and bake until edges are lightly browned, about 10 min. Let cool for 5 min, and transfer to a cooling rack.

Print Friendly and PDF

Recipe: Easy Dinner Rolls

Gimme ALL the carbs! These fluffy, buttery dinner rolls are what you need to make today! Don’t wait for the holidays to enjoy these little balls of dough will bring to your day :)

EASY DINNER ROLLS

Prep Time: 10 minutes
Rise Time: 3 hours
Cook Time: 20 minutes
Total Time: 3 hours 30 minutes
Serves: 24

Ingredients

1 cup warm water (105° F. to 115° F)
2 packages active dry yeast 4 1/2 teaspoons)
1/2 cup salted butter, melted
1/2 cup granulated white sugar
3 large eggs, room temperature
1 teaspoon sea salt
4 to 4 1/2 cups all-purpose flour
additional melted butter to brush overtop, optional

Instructions

  1. Combine the warm water and yeast in the bowl of a stand mixer. Let the mixture stand until yeast is foamy, about 5 minutes.

  2. With the dough attachment , stir in butter, sugar, eggs and salt. Add in flour, 1 cup at a time. The dough should no longer be sticky. You may need a little extra flour. Lightly oil a clean bowl and place the dough in the Centre. Cover with plastic wrap and refrigerate for 2 hours or up to 4 days.

  3. Using butter, coat the inside of a 9×13 inch rimmed baking dish. Turn the chilled dough out onto a lightly floured board. Using a kitchen scale take the total weight of the dough in ounces and divide by 24 ( should equal to 1.8 ounces per ball. Roll each piece into a smooth round ball; place balls in even rows (4 rows by 6 rows) in the prepared pan. Cover with a dish towel and let dough balls rise until doubled in volume, about 1 hour. You can leave them to rise longer if you need to.

  4. Preheat oven to 350° F. Bake until rolls are golden brown and cooked through, 15-20 minutes. If they are browning too quickly on top, tent foil over the rolls until finished baking. Brush warm rolls with melted butter, if desired. Break rolls apart to serve.

Notes:

  • *Before adding the yeast, use an instant-read thermometer to check the temperature of the water (it's important that it's in the temperature range indicated)

  • *These rolls may be baked early in the day and re-warmed when ready to serve.

Print Friendly and PDF

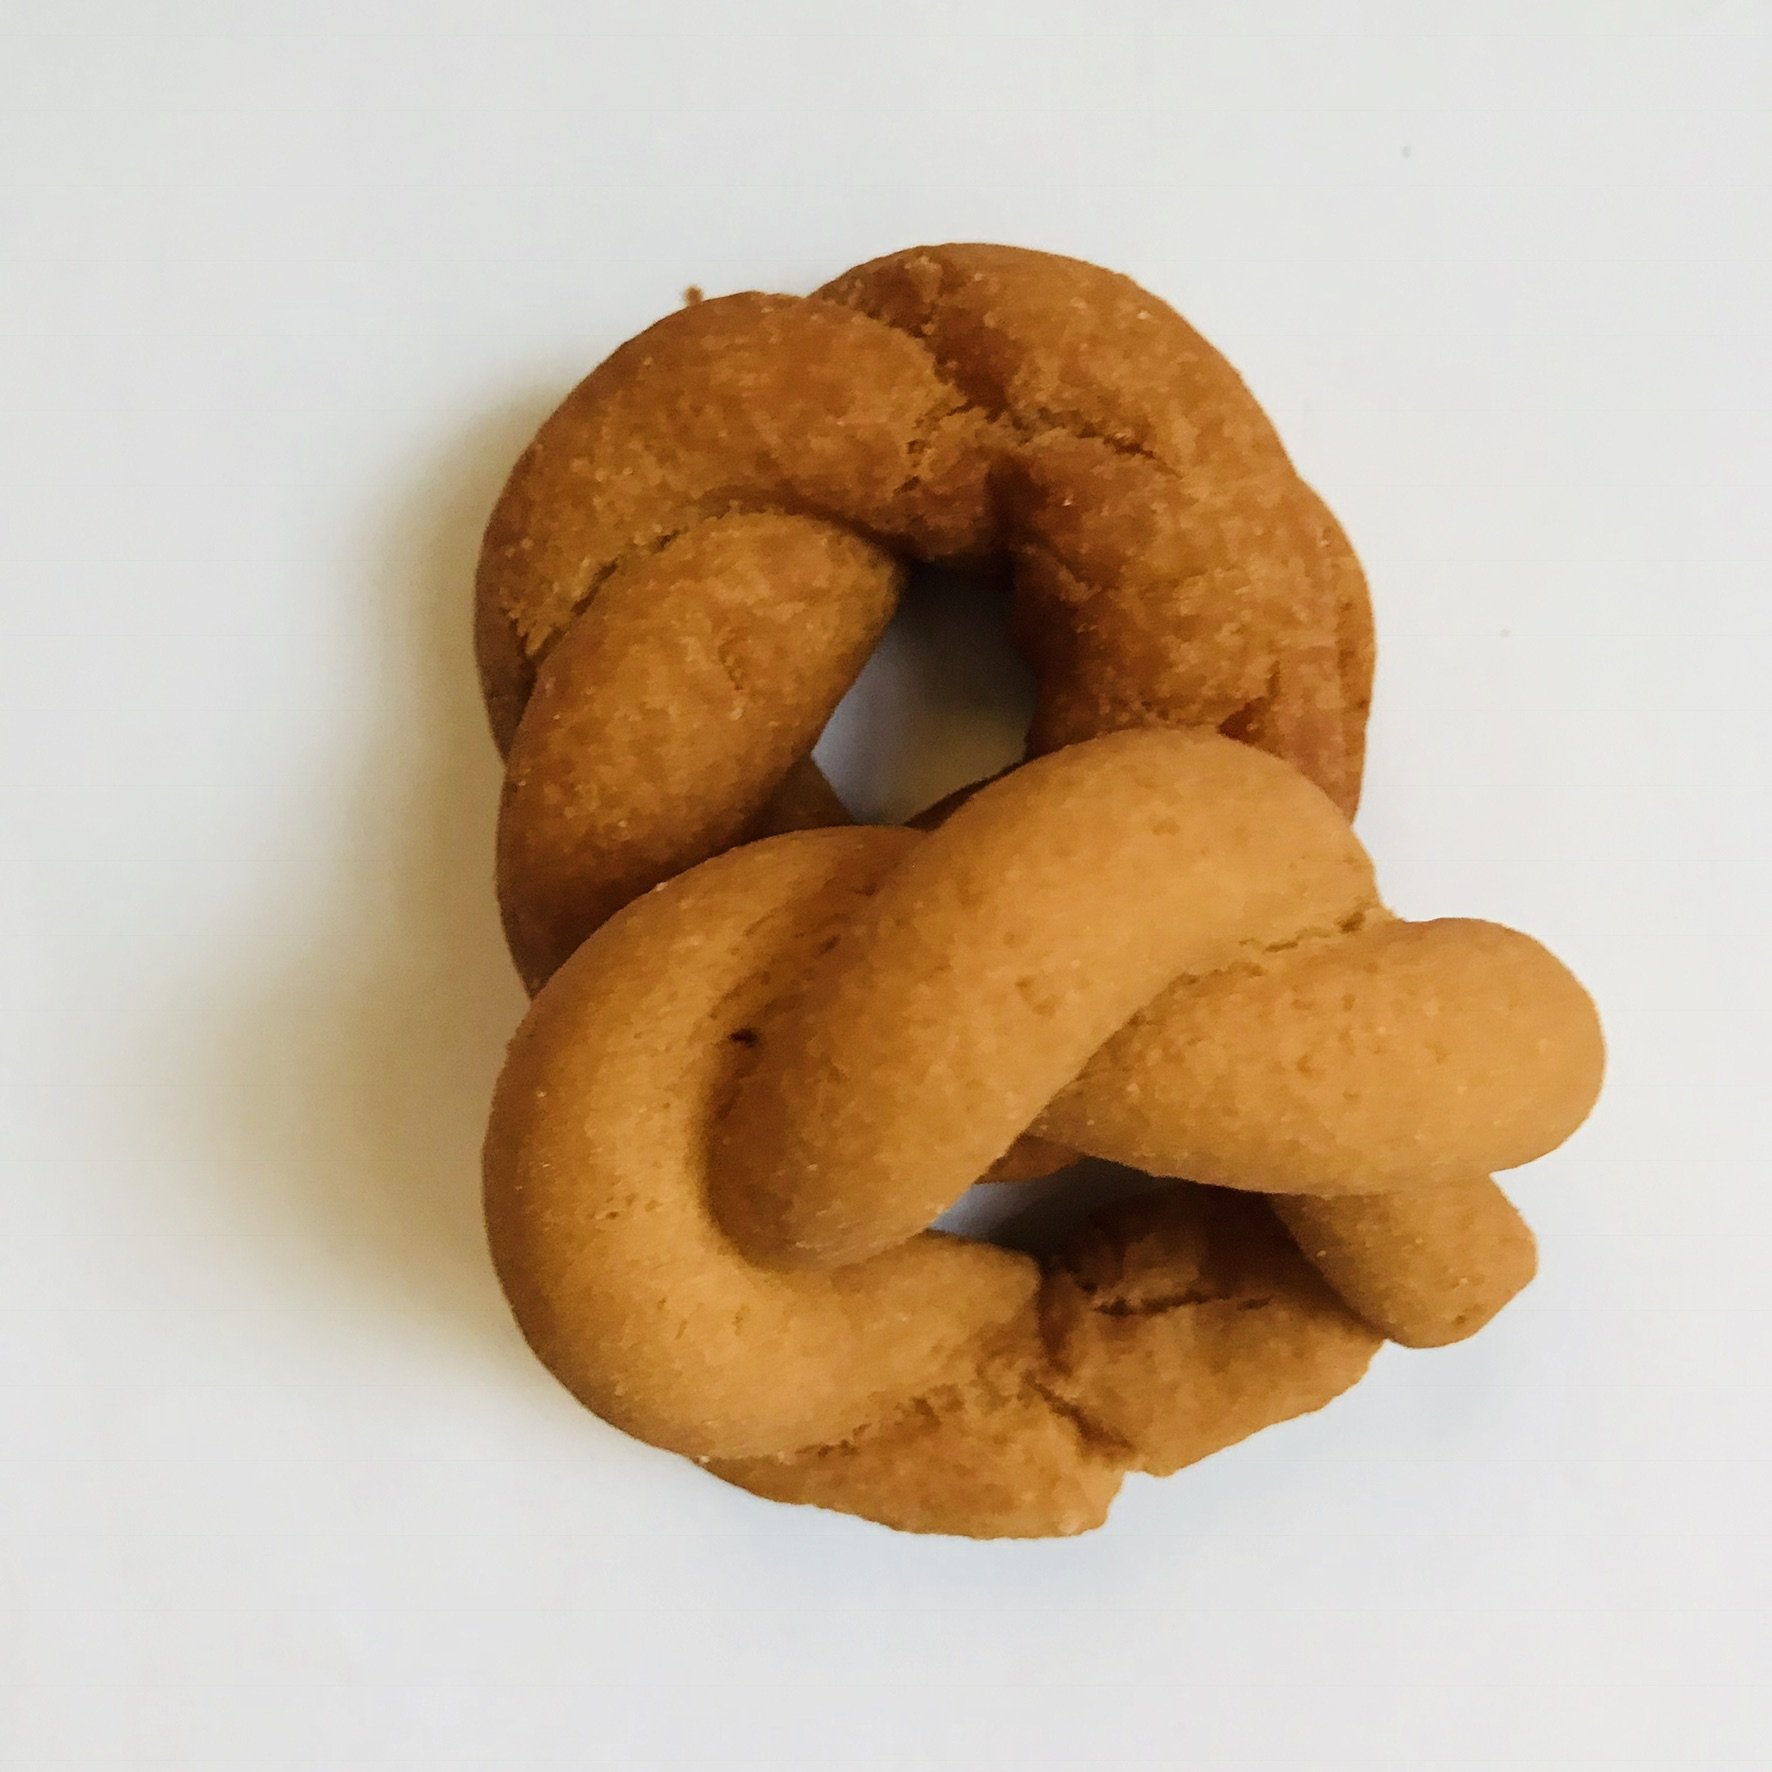
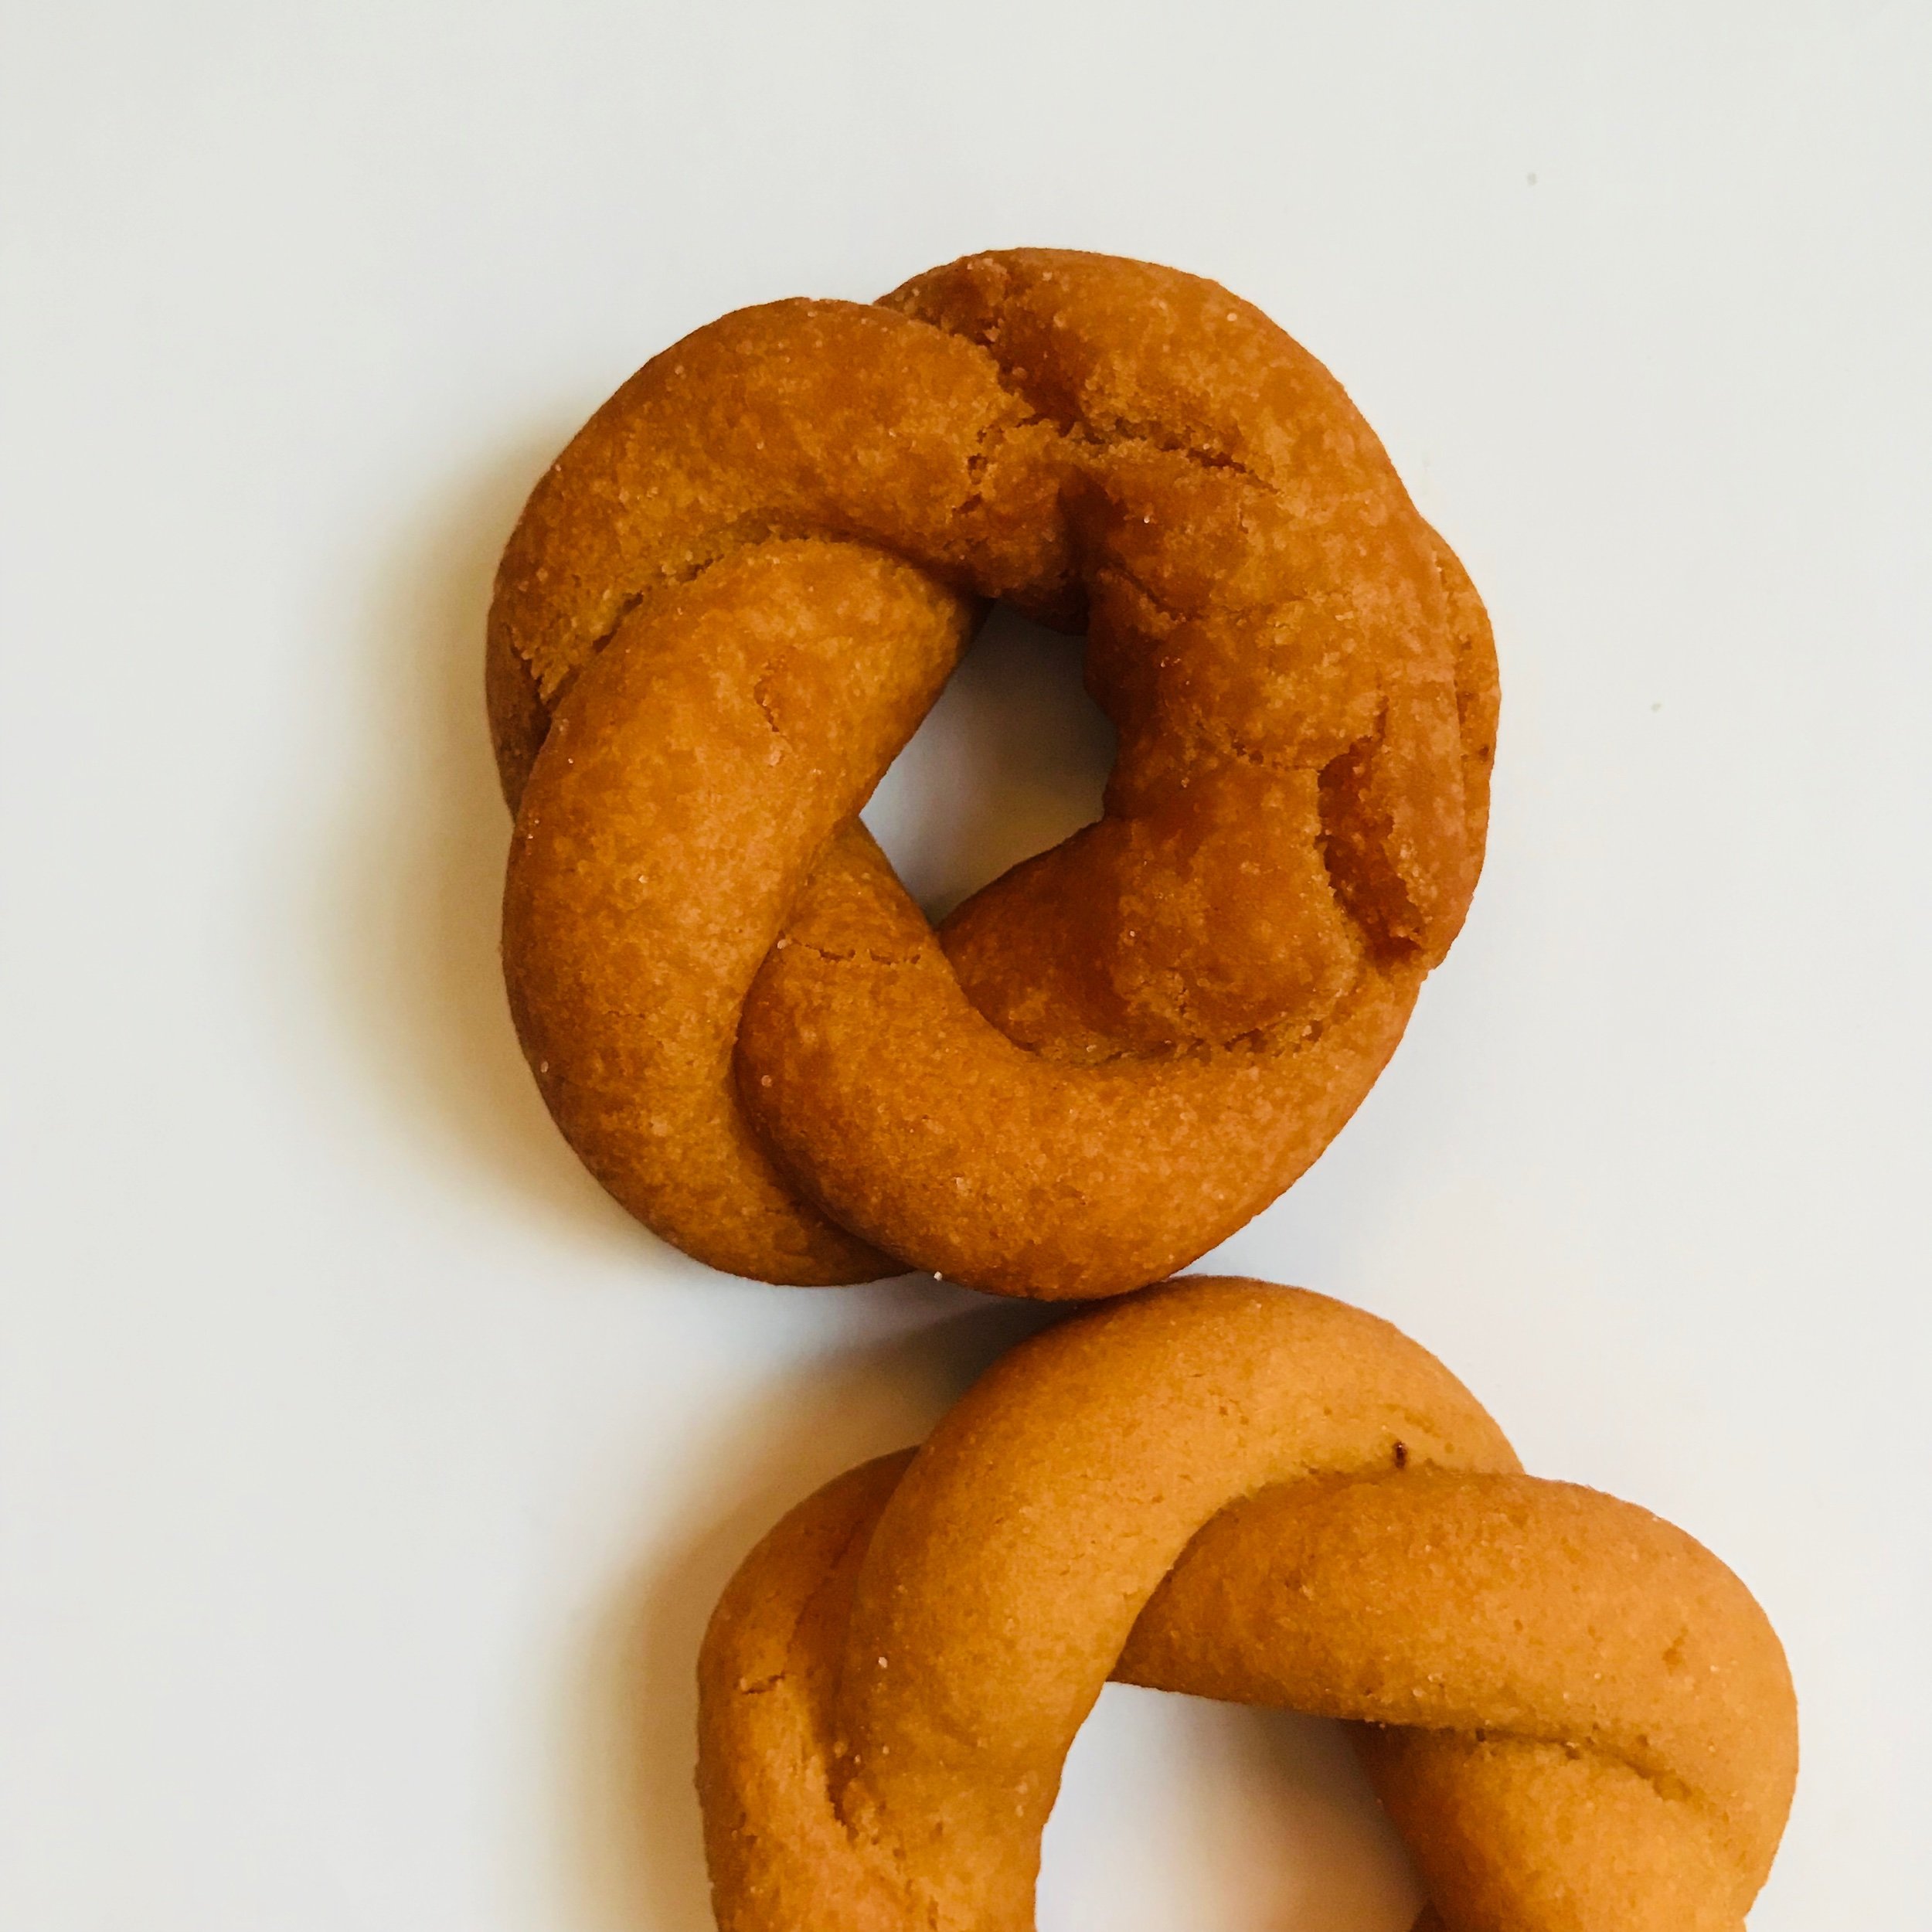
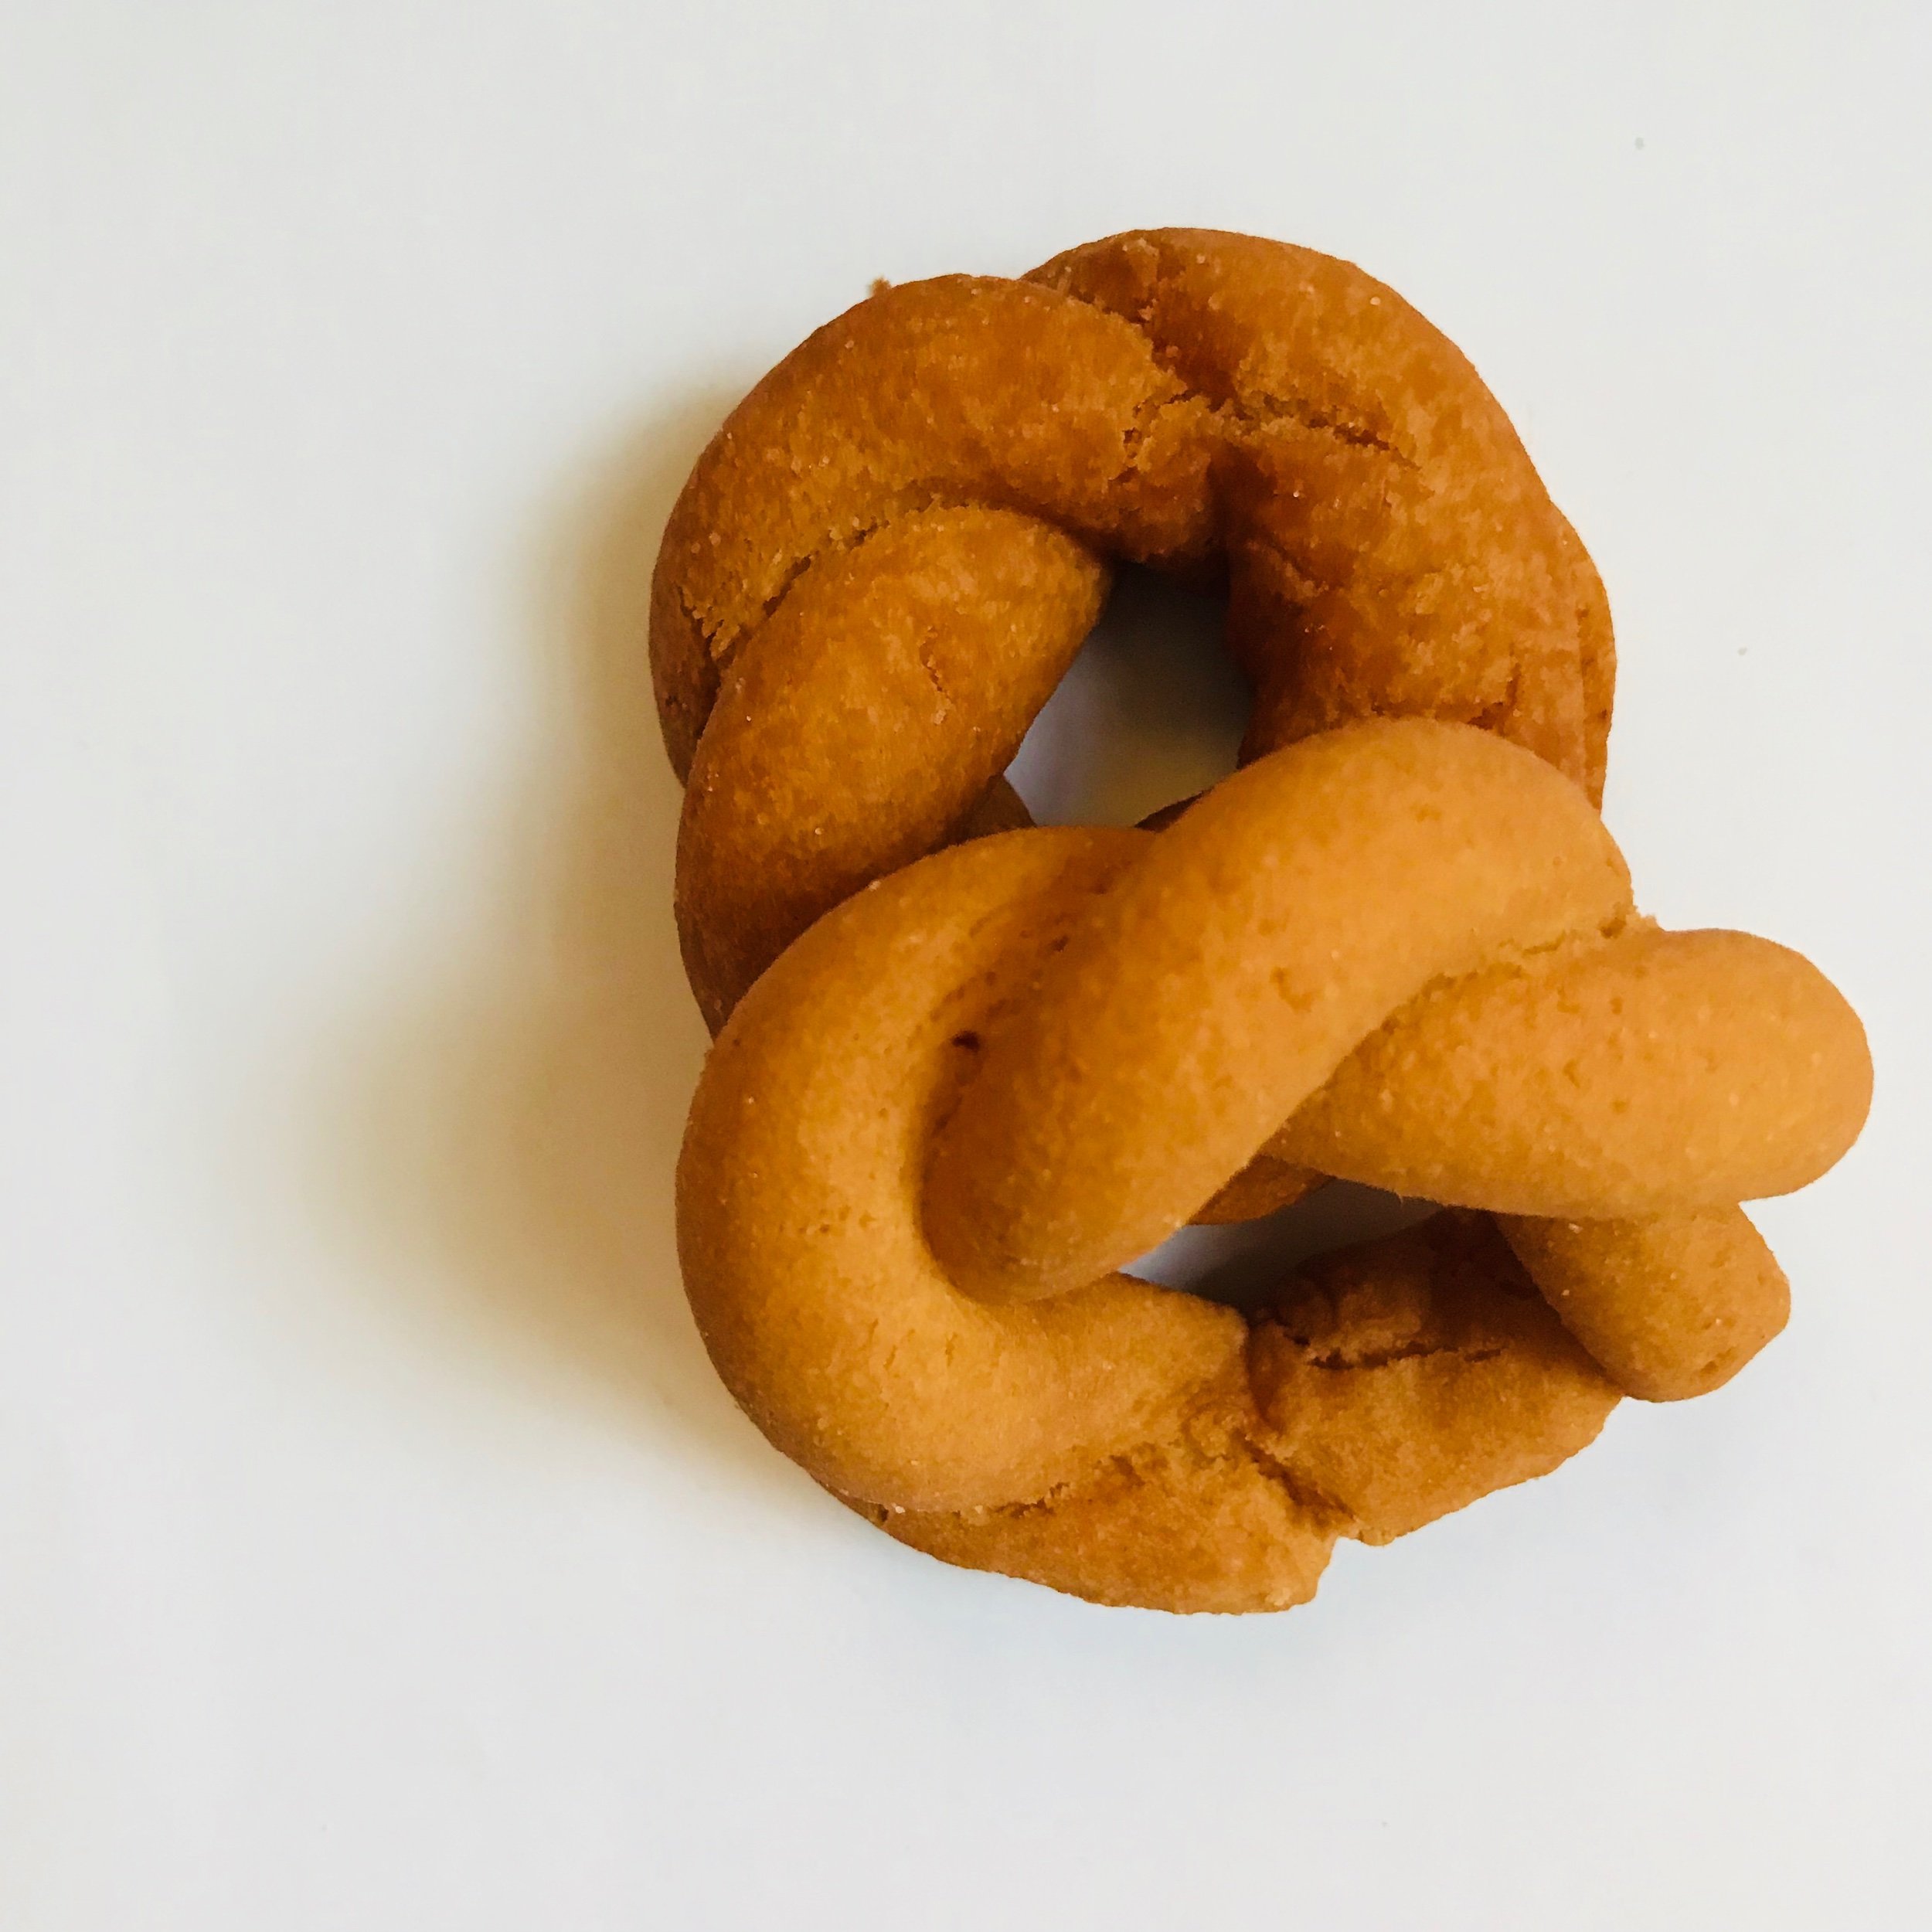
Recipe: Nacatole (Traditional Calabrese Cookies)

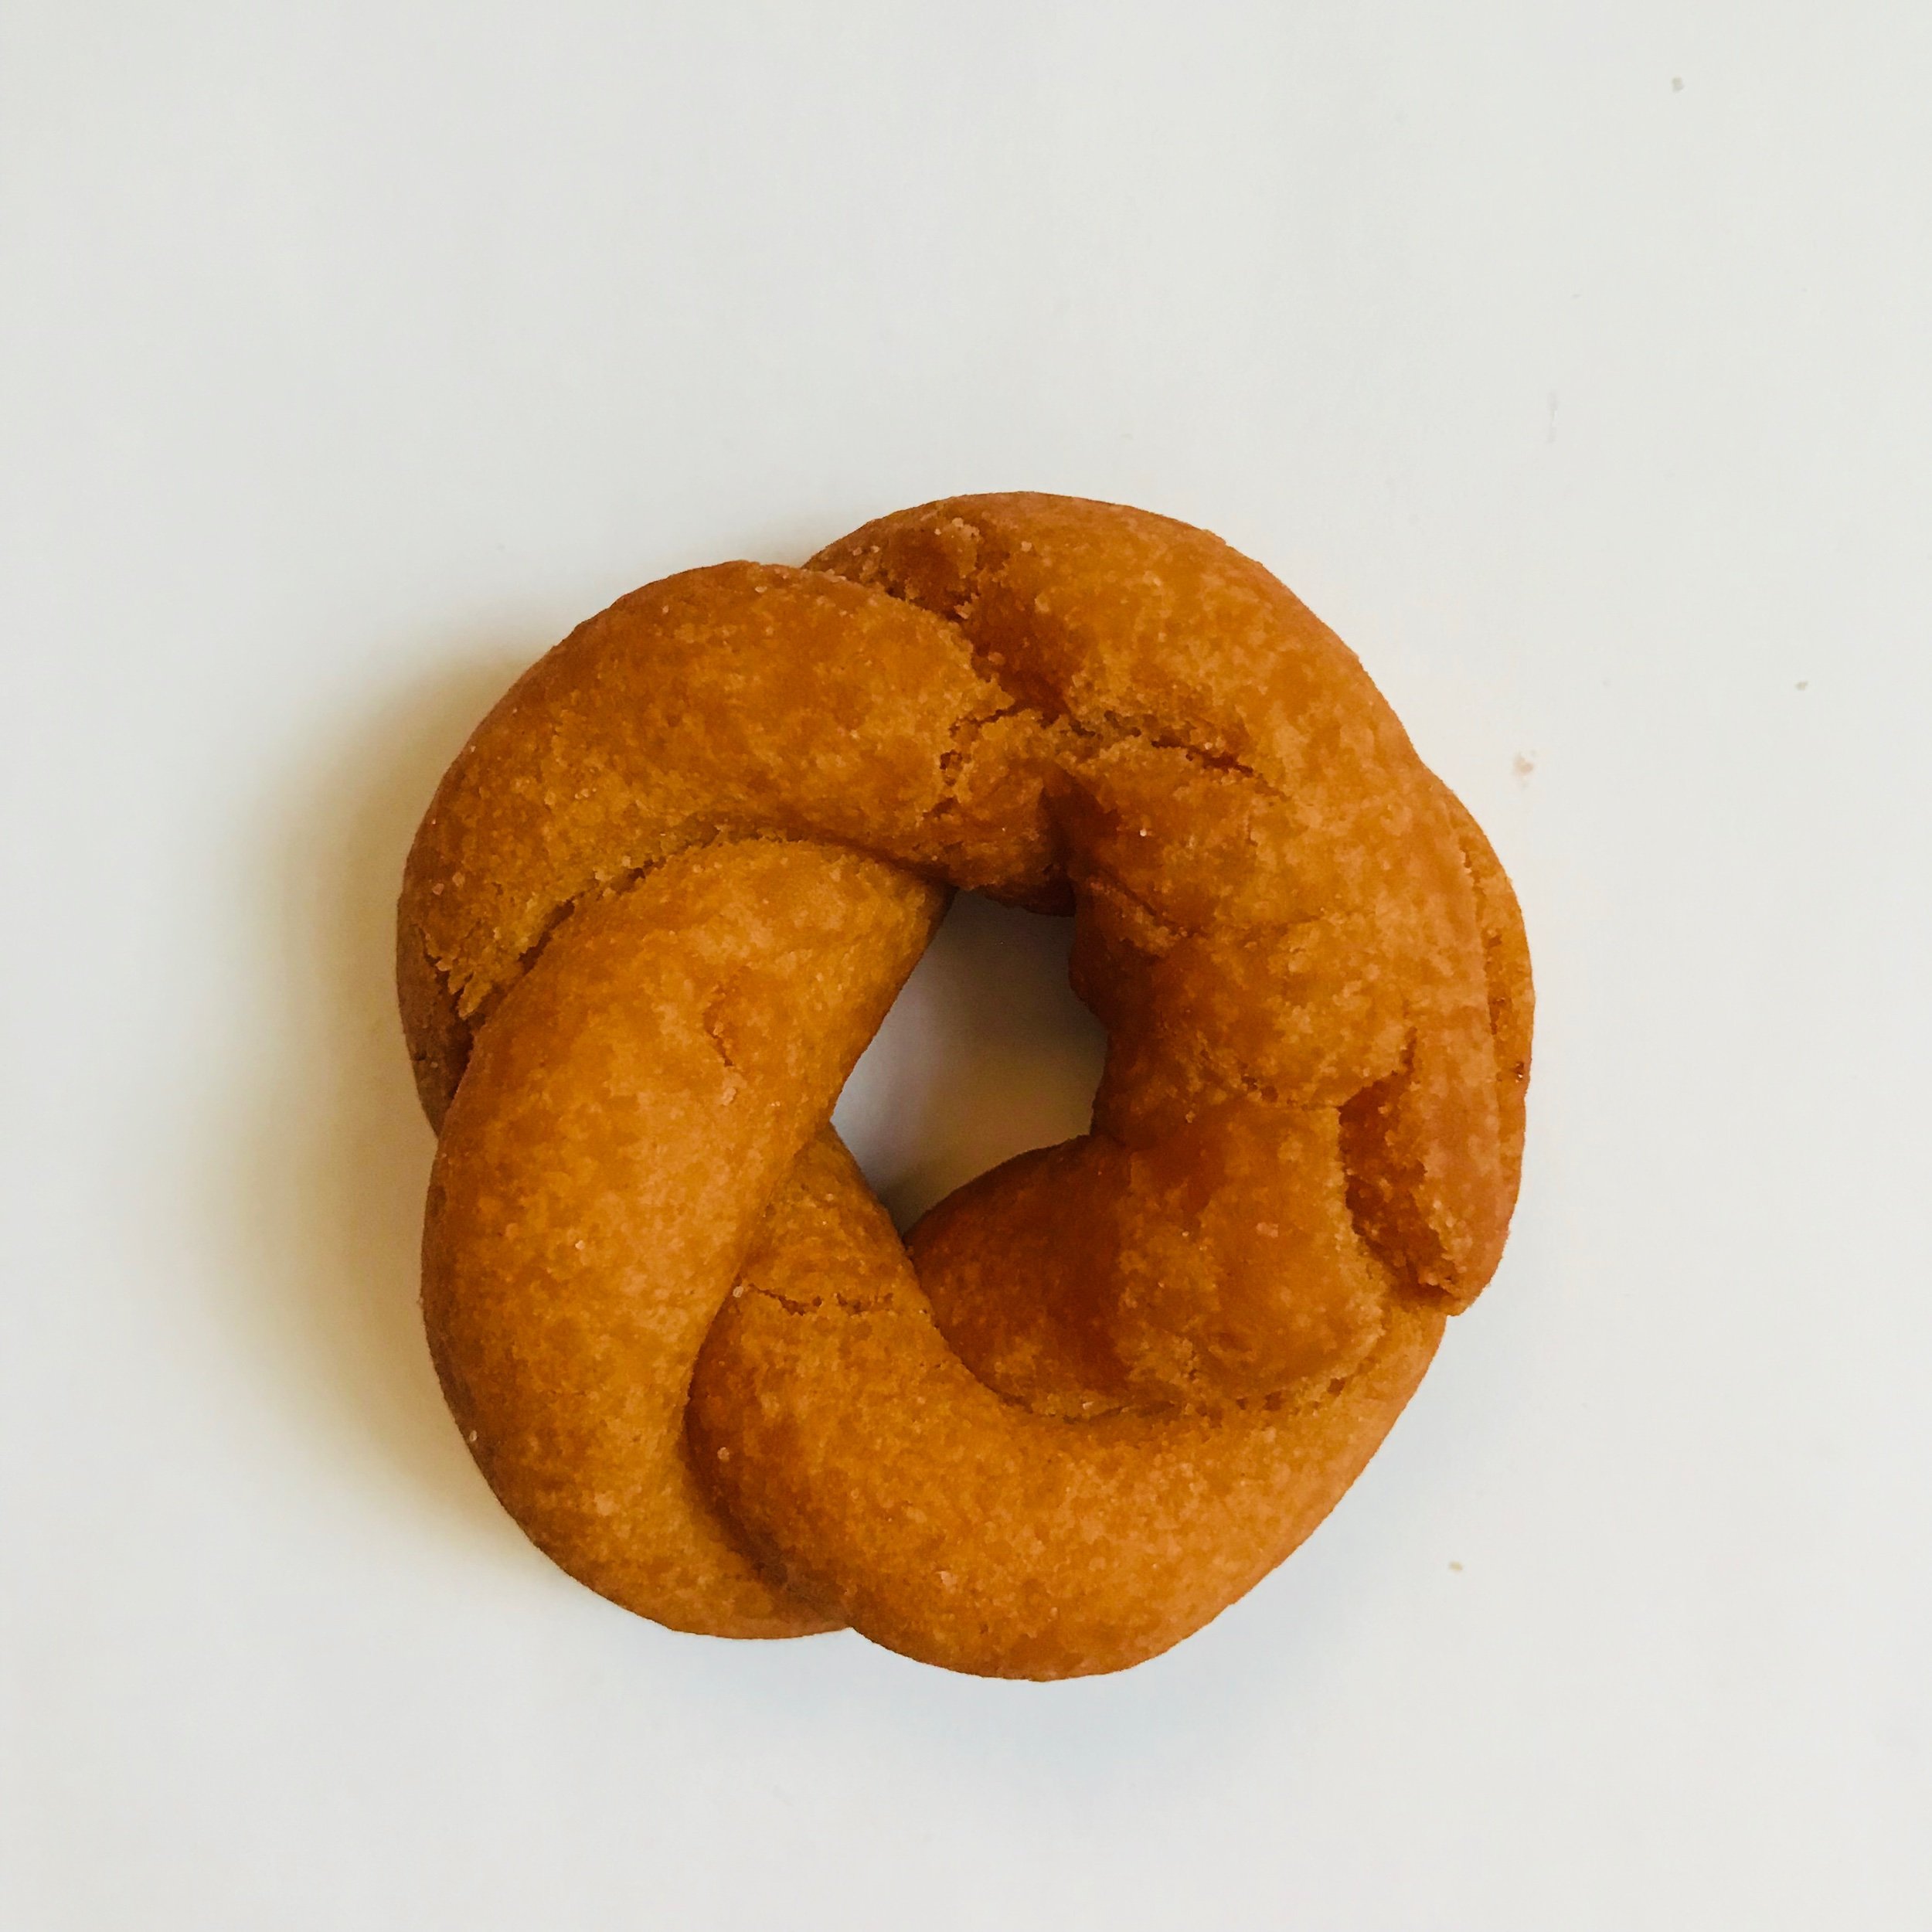
My parents were from the southern part of Italy - Calabria, and my Aunts/Cousins would make batches of these traditional cookies and deliver them to our home every Christmas.

I am now carrying on tradition and delivering them to you - virtually of course. I hope you enjoy them as much as we do.

Nacatole (An Italian Calabrese Traditional Cookie)

Serves: 45 - 55 wreaths

INGREDIENTS

  • 2 cups sugar

  • .6 large eggs

  • ¾ cup grapeseed oil

  • 5-6 cups all purpose flour

  • Grapeseed oil for deep frying

INSTRUCTIONS

  1. Add grapeseed oil to a large pot to about half full or a deep fryer and heat to 350 degrees F.

  2. In the bowl of a stand mixer add eggs and sugar. Using the whisk attachment whip until light and fluffy. Pour in the oil and mix to incorporate.

  3. Switch to the dough hook and begin adding flour on low speed until the dough pulls away from the sides of the bowl and easy to roll.

  4. Using 1 1/2 tablespoon scoop measure dough, roll into a long straw like shape, fold in half and twist. Connect the two ends to form a circular wreath.

  5. Using a slotted spoon, submerge one cookie at a time into the preheated oil and deep. The cookie should float to the top and turn golden in colour when ready.

  6. Use a slotted spoon to remove the golden wreath from the oil and place in a paper towel lined colander to cool. Allow to cool completely and enjoy! Cookies should be crispy on the outside, soft and fluffy on the inside.

NOTE

The traditional recipe uses vegetable oil, I use grapeseed oil because it’s a neutral-flavoured oil with a medium-high smoke point (390°F). You can use any oil as long as it has a high smoke point and neutral flavour, which means it won’t overwhelm or alter the taste of the cookies. Happy baking friends!

Print Friendly and PDF

Recipe: Citrusy Amaretti

To quote Janet Jackson “I'm in control, never gonna stop, Control, I like to have a lot. Control, ....”

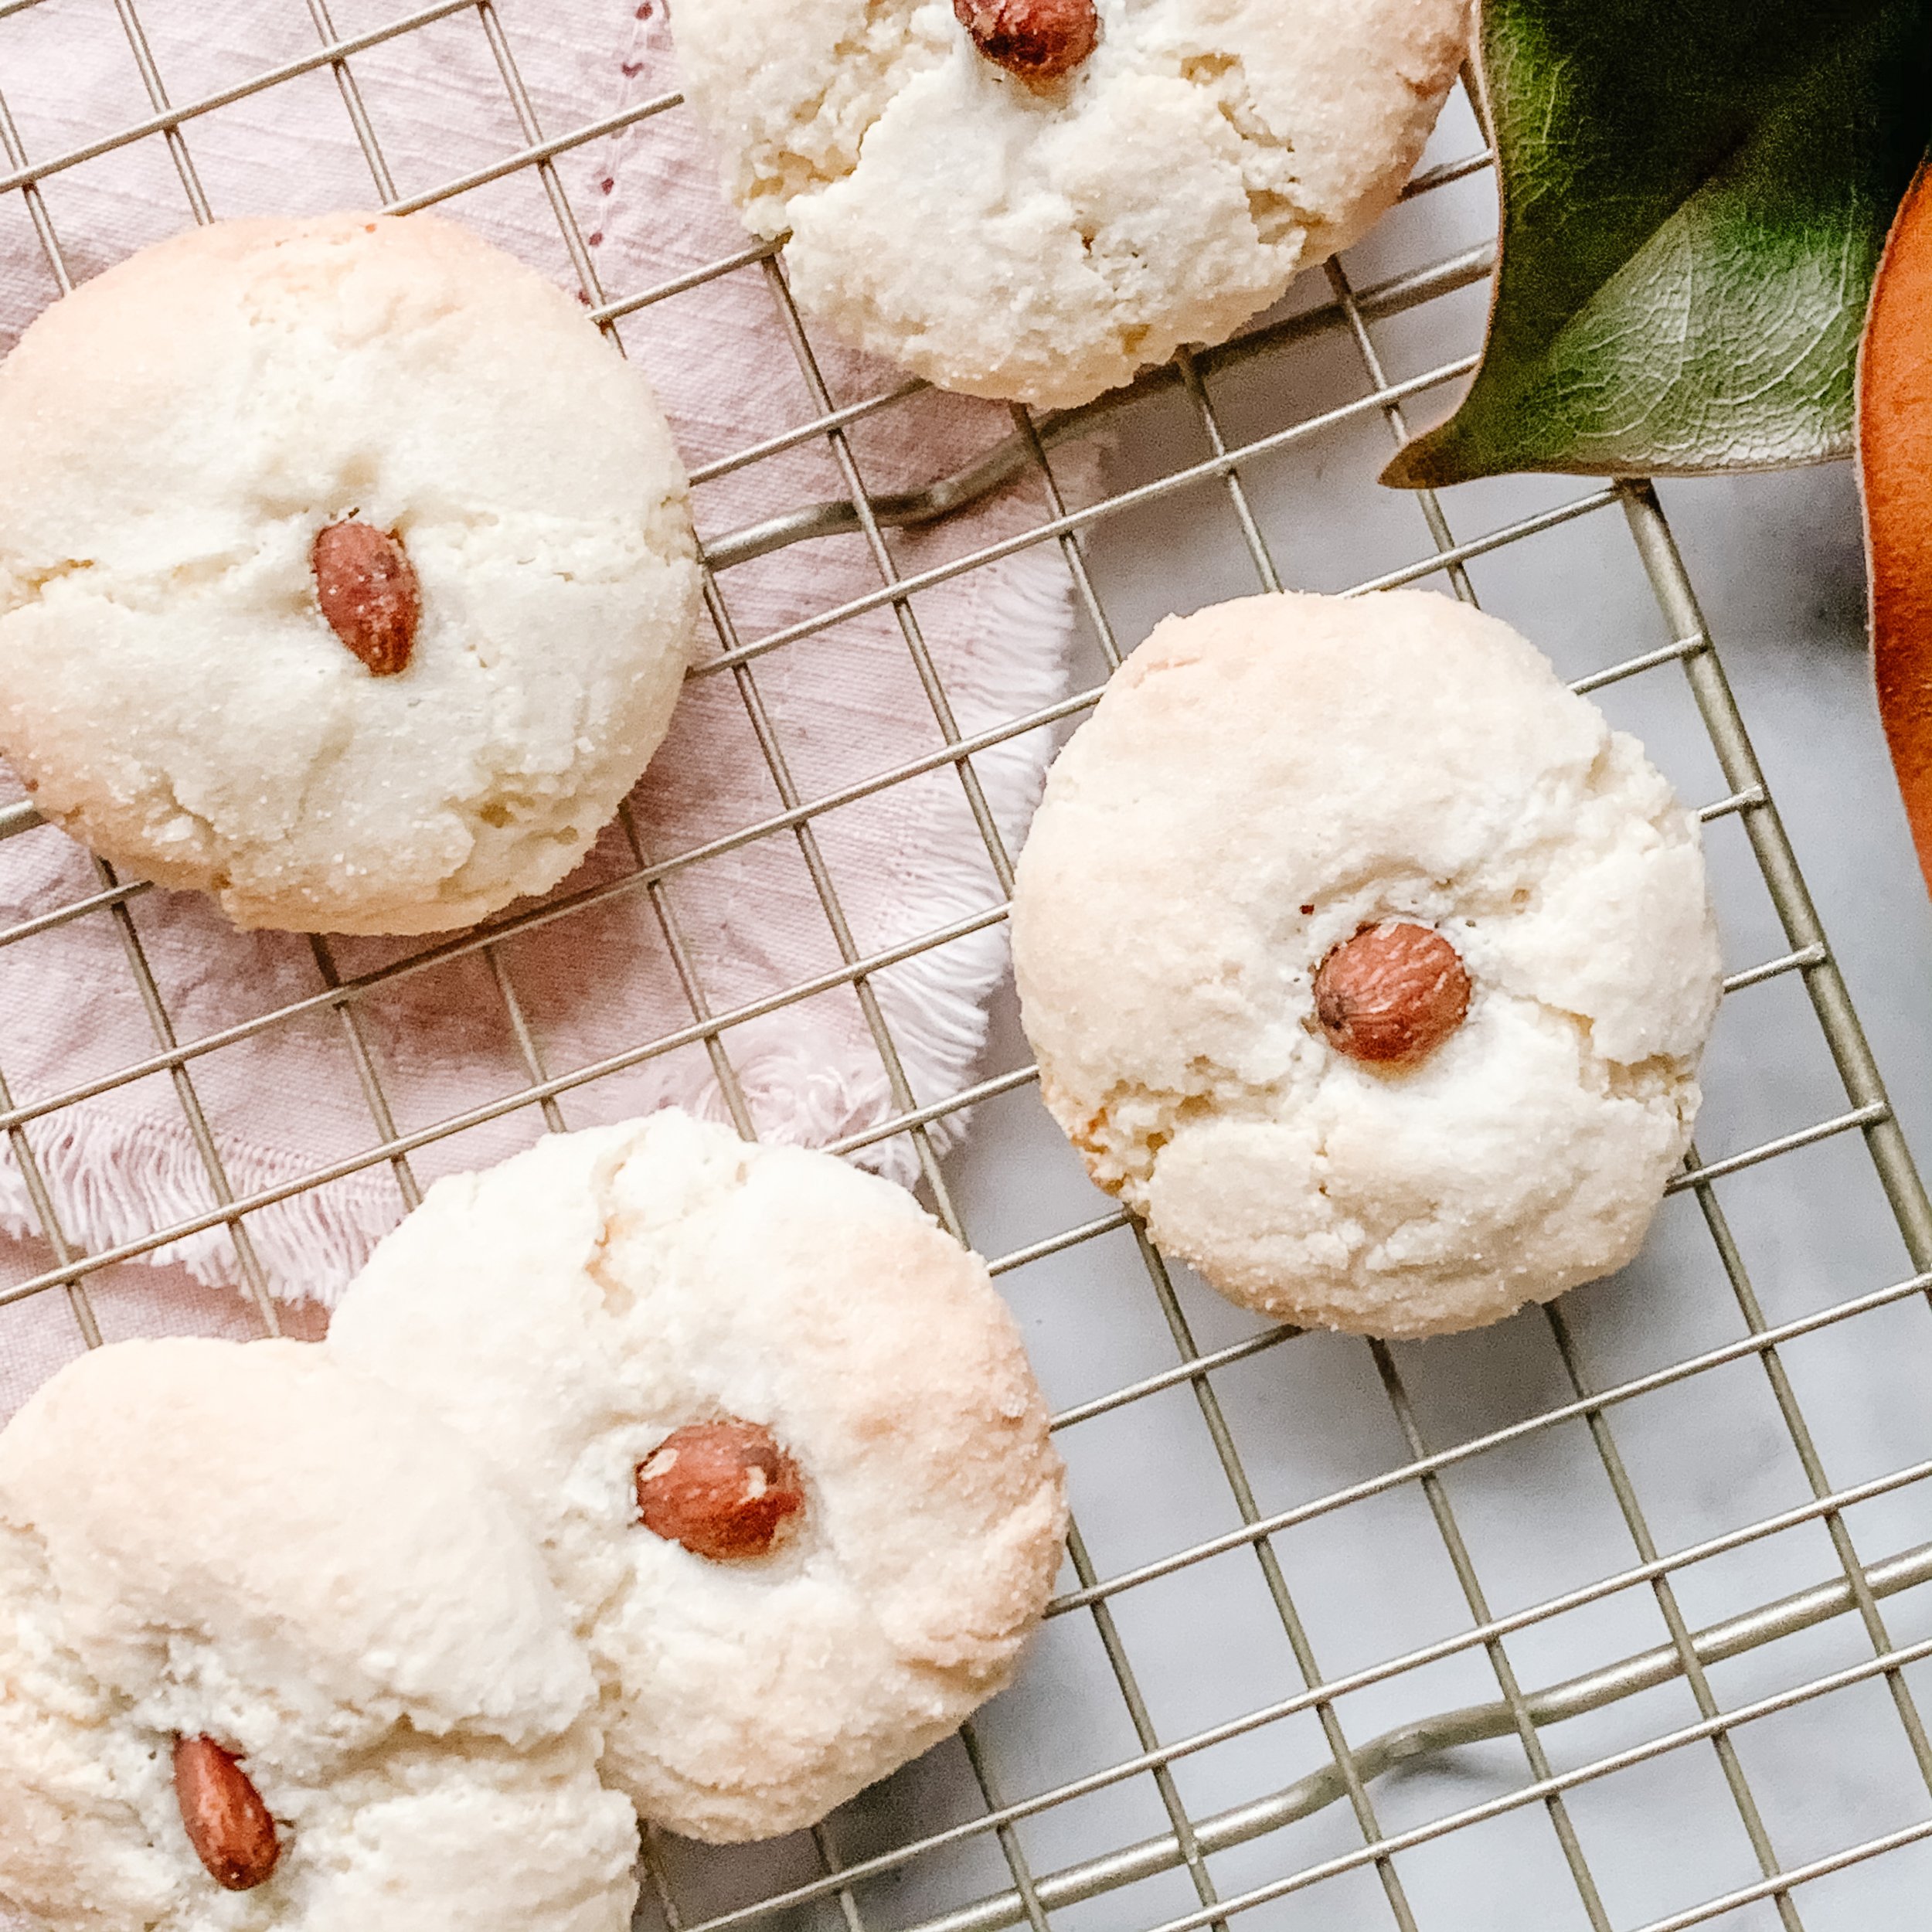
Ah, forget it! I don’t have control when it comes to these light and citrusy cookies. So freaking good!

It’s rude to talk with my mouth full so here ya go! Full recipe below :)

Citrusy Amaretti

Prep Time: 10 minutes
Total Time: 25 minutes
Serves: 23 to 25 cookies
Author: Mary Mammoliti | Kitchen Confession

Ingredients

  • 3 cups medium ground blanched almonds , (do not use almond flour)
    2/3 cup granulated sugar, and additional 1/3 cup for coating the cookies before baking.
    1 tbsp orange or lemon zest
    2 large egg whites
    1 tsp almond extract
    25 whole almonds for garnish

Instructions

  1. Position rack in centre of oven and preheat to 350F. Line a large baking sheet with parchment or use a slip mat.

  2. Pour egg whites into the bowl of a stand mixer, add 2/3 cup sugar and using the whisk attachment beat until light and fluffy and white in colour.

  3. Remove the bowl from the stand mixer and add the almond extract. Using a silicone spatula or wooden spoon stir.

  4. Mix citrus zest and ground almonds together and add it to your egg and sugar fluff. Mix all the ingredients together just until combined. (Dough will be sticky.)

  5. Pour 1/3 cup granulated sugar into a small bowl and scoop almond mixture and roll into approximately 1 inch balls then roll around in sugar to coat.

  6. Place cookies on a prepared baking sheet, 1 inch apart, gently push a whole almond in the centre of the ball and bake until edges are golden brown, 10 to 12 min. Transfer to a rack to cool.

Print Friendly and PDF

Recipe: Spicy Roasted Pumpkin Seeds

A snacker [someone who eats lightly or between meals], a snack [a small amount of food eaten between meals] .

Raise your have if you’re a snacker! 🙋🏻‍♀️ OH I SEE YOU! Now repeat after me - .

“I like good snacks and I can not lie,

You other snackers can't deny,

That when the food goes in an itty bitty plate,

And goes right in your face

You get sprung..”

.

No reason, I just wanted someone to sing with me. Now sit back and relax with a bowl of SPICY ROASTED PUMPKIN SEEDS

FullSizeRender.jpg

Spicy Roasted Pumpkin Seeds

INGREDIENTS

  • 2 cups pumpkin seeds

  • 1 1/2 teaspoons olive oil

  • 1/2 teaspoon garlic powder

  • 1/2 teaspoon cayenne

  • 1/4 teaspoon sea salt

  • 1/4 teaspoon paprika

  • parchment paper

INSTRUCTIONS

  1. Bake at 300 degrees for 40 minutes, taking them out and stirring/flipping halfway through. Let cool for a minute and enjoy!

Print Friendly and PDF

Oven Roasted Chestnuts

HOW TO ROAST CHESTNUTS

Ahh, the roasted chestnut! The quintessential winter treat!

Chestnuts are crunchy and bitter when raw, but become sweet, buttery, and soft when roasted. The scent of roasting chestnuts triggers so many wonderful food memories for me.

It’s comfort, love and laughter wrapped in a mahogany coloured shell. It does and will always remind me of the holiday’s sitting around a long table cloth topped dinner table with endless dishes of warm comforting foods served family style in the centre, and ending the meal with warm, out of the oven roasted chestnuts.

What does the charbroiled scent of a sweet roasted chestnut remind you of?

⁣Do you roast chestnuts or do you boil them? Do you love them, or hate them?

⁣If you LOVE them like we do then you’re in luck! I have the perfect oven roasted chestnut recipe for you to try. Frank and I have tried so many different ways to get the perfect roast and we finally did it (to be fair, he did it. I was quality control - someone had to taste test them :)

This recipe delivers easy to peel, sweet chestnuts every single time!

Oven Roasted Chestnuts

When choosing your chestnuts, make sure they are firm, solid and don’t give when squeezed. Take care when cutting the chestnuts. It’s easier if you use a serrated knife and work slowly. Peel chestnuts when they are still warm, as they become near impossible once cold.

Prep Time: 10 minutes
Cook Time: 26 minutes, and let them rest for 5 minutes
Total Time: 41 minutes
Serves: Well this my friends is up to you :)

Author: Mary Mammoliti | Kitchen Confession

INGREDIENTS

2 1/2 lbs fresh chestnuts
8 cups cold water
1/4 cup kosher salt, to soak chestnuts and more to sprinkle overtop prior to roasting

INSTRUCTIONS

  1. Preheat oven to 400°F.

  2. Using a sharp paring knife, cut a slit across the round side of each chestnut⁣.

  3. Add water and salt to a medium bowl and mix the salt well until it's dissolved a bit (doesn't need to be fully dissolved).

  4. Add the chestnuts to the water and mix them in the water for a few seconds. Using a slotted spoon scoop out the chestnuts and place onto a rimmed baking sheet and lightly sprinkle with kosher salt.

  5. Place the baking sheet in the oven on the middle rack and roast for 20 minutes. Remove from oven, shake the pan, return to the oven and roast for 5 minutes and then switch the oven to broil and continue to roast for 1 minute longer.

  6. Remove the roasted chestnuts from the oven, place them into a bowl and cover with a clean tea towel for 5 minutes.⁣ Peel and enjoy!

Why the salt water bath?

The salt water bath adds a nice subtle salty flavour to the finished roasted chestnuts.

Print Friendly and PDF

Rant: Last Minute Valentine's Day Ideas

Chocolates are delicious and flowers are sweet but why not change things up this Valentines day with an edible arrangement? Nothing says love like your favourite food. I've rounded up a few you can DIY.

Photo by ovbelov/iStock / Getty Images

Photo by ovbelov/iStock / Getty Images

Donut Bouquet

To make a DIY Donut Bouquet, you'll need: donut holes or donuts, wood skewers, tissue paper, chocolate chips, and ribbon. ...

Steps:

  1. Insert skewers into the donut holes. …

  2. when using soft donuts you will have to dip one end of the wooden skewer into the melted chocolate (white chocolate) poke it into the bottom of the donut and let dry (harden)

  3. Arrange the donuts into a bouquet, and secure in place with an elastic.

  4. Wrap the bouquet in tissue paper.

  5. Tie a ribbon around the base of the flowers. ...

  6. That's it!

Photo by smiltena/iStock / Getty Images

Photo by smiltena/iStock / Getty Images

Cookie Bouquet

Not an original idea but you can always joosh it up with a favourite cookie and the recipe or a cookie that's been in the family for decades. 

Image from Bacon Addict

Image from Bacon Addict

Bacon Bouquet

Can hold up unrefrigerated for a while and rolled bacon speaks to me on so many levels. Basically bacon roses are the gift that keeps on giving. 

What you'll need:

1 pack thick cut bacon, 1 bunch fake roses, toothpicks

Steps:

  1. Tear off all the petals of the rose until you're left with the stem. Try and expose as much of the centre stem/wire for the bacon roll to sit on.

  2. Take a strip of bacon and start at one end and roll it up tightly to form a rosette and secure it with two toothpicks as close to the bottom of one end to form an X with the toothpicks. Repeat with all the bacon and place them on top of a wire rack on top of a foil lined rimmed baking tray.

  3. Bake in a 375 degree oven for 45-55 minutes. Allow to cool and place it onto a stem and repeat until the whole bunch is complete.

Image from BREWQUET

Image from BREWQUET

Beer Bouquet

What you’ll need:

Six bottles of their favourite bottled beer, an ice bucket or burlap drawstring sack, bottle opener, tissue paper and ribbon.

Steps:

Place the bottles into the ice bucket, wrap the tissue around the ice bucket and keep it in place by tying a ribbon around it wit a bottle opener tied into the bow. 

Fruit Bouquets

They’ve been around for a while, can be delivered and if you like fruit this is the perfect gift for you. Fruit on a stick in the shape of flowers (use cookie cutters), cantaloupe spears and chocolate covered strawberries are cute and perfect for the health conscious valentine gift but if originality is your thing this is not it. This can be ordered online or phone from Edible Arrangements. If making at home you don't have to get too fancy but cut up your fruit, spear the fruit with wooden sticks (kabob sticks work), florist sponge placed inside a flowerpot and begin poking the fruit skewers into the floral sponge to create your bouquet.


Inexpensive DIY Candy Bouquet - Dollar Store Finds: 

What you’ll need:

A small square box, bag of marbles or floral pebbles, floral foam block, 3 sheets of coloured tissue paper, wooden skewer sticks, 1 bag  of chocolate bars, hot glue gun, and a heart ballon of your choice.

Steps:

  1. Place the bag of marbles in the bottom of the box to weigh it down. Layer the tissue paper onto of one another turning slightly with each one, place the floral foam in the centre and wrap the tissue around it and place it inside the box allowing the tissue to peek out of he top and spill over the sides of the box leaving the floral foam exposed. 

  2. Take one chocolate bar and lay a line of hot glue down the centre of the chocolate bar and place the skewer stick on top of the hot glue. 

  3. insert the balloon into the centre of the floral foam and begin to fill it in with all the chocolates. 

  4. That’s it!

Happy Valentine’s Day

Print Friendly and PDF

Recipe: Your Complete Thanksgiving Guide

Thanksgiving dinner menus will help you plan a fabulous meal. Build your menu around your traditional favourites or try a new Thanksgiving recipe, having a plan will make your meal prepping run smoothly. 

Question: Where do I begin?

Create Your Menu

Hosting Thanksgiving means you need a plan, and that means a menu. I want you to start planning now, go through your recipes, do a quick head count of how many people are going to attend. Next, start building a list of dishes you plan to make and then eliminate 1/2 of the list. You don’t need hassle back potatoes and mashed potatoes - pick one.

As the host you will always think you don’t have enough food. I’ve always said I would rather have more than not enough, I don’t want my guests to leave hungry. 

I guarantee your guests will only take a bit of each dish so no need for 2 pounds of peas and mushrooms. 

ONE WEEK Prior To The Event

Gather all your serving dishes; or make a list of all the dishes you need for that day and where to find them in your home. If you are missing something it gives you enough time to borrow or pick it up. You don’t want to be scrambling the day of when you have guests over.

Create your checklist; of tasks to be accomplished prior to your event and input them as events in your calendar.

Grocery Shopping; Create 2 grocery lists: 5 days before the meal buy Turkey (if buying frozen) and non-non-perishables, and 3 days before the meal for perishable items and any last minute things you need.

Question: How long does it take to defrost a Turkey? 

For every 5 pounds the turkey will take 24 hours to defrost in the refrigerator.

Example: A 20 pound frozen turkey will need 4 days of thawing in the refrigerator

Question: When should I buy a fresh Turkey?

If buying fresh, purchase your Turkey the day prior to the event.


TWO DAYS Prior To The Event Date

Prepare as much as you can before the big day.

Make your cranberry sauce and cut veggies. wash trim and halve Brussels sprouts, peel and slice carrots, snap green beans, celery, etc. Make salad dressings and wash and dry lettuce/greens for salad.

ONE DAY Prior To The Event

Peel, wash and cut potatoes into cubes. Soak in cold water, cover and place in the refrigerator over night. This eliminates some of the starch in the potatoes and crisp up nicely in the oven or place them in a slow cooker the day of and make mashed potatoes.

Prep your Turkey (step by step instructions below)

Set your table, take out your serving dishes, prepare your stuffing. You can also make your mashed potatoes and reheat them in the slow cooker/crock pot the day of. If you are roasting veggies you can cook them the night before and heat through just before you are serving the meal.

Question: Can I make dessert in advance?

Bake your pies the night before and refrigerate overnight. On the day of, remove the pie from the refrigerator, place on the counter to bring the pie to room temperature. Place the room temperature pie in the oven on low and heat through while you are enjoying your meal.

  • Frozen - ready in an hour, bake while you are having lunch or dinner. hot fresh out of the oven. top with ice cream

  • If you prefer homemade. Make the pie dough and roll out into pie plates 1 week before and freeze them.

  • A few cheats: Williams Sonoma has pre-made stuffing, add your liquid and it’s done. They also have pecan pie filling in a jar. Buy the ready made small tartlet crust from the grocery store and scoop the filing into each one and bake.


How long does it take to cook a Turkey?

Cooking times can vary

Calculate 13 minutes cooking time per pound would be a good estimate. Let me break it down a bit more, It should take a 14 lb. turkey 2 1/2 to 3 hours to cook.

Question: How do I cook a Turkey?

 Prep your turkey the night before

There is always an ongoing debate “do you wash raw meat” and when preparing your Turkey i’ll leave that up to you. I don’t and this is why; washing the turkey can contaminate your kitchen, the water can spray on your back splash, all over your sink. Cooking the Turkey to the right temperature will kill any bacteria that may be lingering in your turkey - you can’t wash that away.

To brine or not to brine? There are people who stand strongly on both sides of this question. So if you brine your turkey go ahead, but for me I don’t bother with the extra step. I get great tasting and moist turkey without.

Stuffing or no Stuffing? I can take it or leave it, I’m not big on stuffing but I do make it in a separate dish. I find the Turkey cooks faster without the stuffing but the stuffing is not as moist as it would be if it were in the turkey. So for this I say do as you want.


Print Friendly and PDF

Recipe: Step By Step Guide to Roasting a Turkey

There are many ways to cook a Turkey and admittedly, I’ve had a few fails until I found this method - yup, life changing! The results? The most tender, mouth watering, golden Roast Turkey you dream of making. I’m sure you have a tried and true recipe, the holy grail of Roast Turkey, and if that’s the case, Bravo! Do you and stick to what works for you. If it ain’t broke, don’t fix - am I right? This post is for the cook who wants to change things up, try something new, or hosting Thanksgiving for the first time.

Alright, enough chatter from me let’s get cooking!

WHAT YOU’LL NEED

Happy Thanksgiving! xoxox Mary

PHOTO DESCRIPTION: Fully roasted turkey with roasted potato and citrus garnish on a square white plate, placed on a checkered tea towel on top of a shiplap shite table.

PHOTO DESCRIPTION: Fully roasted turkey with roasted potato and citrus garnish on a square white plate, placed on a checkered tea towel on top of a shiplap shite table.

Time To ROAST THE TURKEY!

INGREDIENTS

  • 14-16 pound turkey, fresh or thawed

  • 1 teaspoon salt (omit if turkey has been brined)

  • 1 teaspoon pepper

  • 1 lemon, quartered

  • 1 medium onion, peeled and quartered

  • 1-2 sprigs fresh parsley

  • 1-2 sprigs fresh thyme

  • 1-2 sprigs fresh rosemary

  • 1-2 sprigs fresh sage

  • 2-3 tablespoons olive oil or melted butter

PREP THE TURKEY

  1. Take your Turkey out of the refrigerator 30-60 minutes before it goes into the oven to bring it to room temperature

  2. Remove the giblet bag from the cavity on the neck end.

  3. Dry the turkey with paper towel, into the cavity of the turkey add salt, pepper, and using your hand rub it into the cavity. Add the lemon, onion (reserving a quarter), fresh rosemary, thyme, sage, and parsley into the cavity.

  4. Overlap skin at cavity opening to cover as much of gap as possible; use toothpicks or small skewers, to hold skin in place. Tie legs together with twine.

  5. Insert remaining onion quarter under skin covering neck cavity. Tuck wing tips under turkey body, using them to hold skin over neck cavity in place.

  6. Brush the turkey all over with olive oil or melted butter, and a sprinkle of salt

  7. Tuck the wing tips under the turkey to prevent from burning, make sure both ends of the turkey are closed. Tie the legs with twine. Tip for the neck cavity, insert a quarter of an onion to keep the moisture in the cavity.

  8. Flip turkey over, breast side down, onto the rack in the roasting pan. Brush with olive oil so entire turkey is coated.

ROAST THE TURKEY

  1. Place the turkey into a 400 degree F oven (breast side down) for 1 hour, then reduce the temperature to 350 degree F and cook for an additional hour for turkeys 14 pounds or larger (45 minutes for smaller turkeys).

  2. After 1 hour remove from the oven and using silicone oven save gloves flip the turkey (breast side up) . If using a digital probe thermometer insert into the thickest part of the thigh. Return turkey to oven and set thermometer to sound at 165 degrees.

  3. To avoid over browning you can tent the turkey the last 45 to 30 minutes with aluminum foil. TIP: When using hearing in place of a visual indicator of doneness use the back of a wooden spoon and tap the skin if you hear a crunch you want to tent your turkey if it still has give no need to tent.

  4. If you do not have a digital probe thermometer. 30 minutes left on your timer insert an instant read thermometer into the thigh of the turkey and determine the raining cook time by how close the temperature is to 165 - 170 degrees F. Also check thickest part of breast--it should be 160 degrees. If not, return to the oven.

  5. Cooking times can vary. 13 minutes cooking time per pound is a good estimate. It should take a 14-16 pound turkey a total of 2-1/2 to 3-1/2 hours to cook. An 18 pound turkey takes closer to 4 hours. These times are ballpark and can vary; that's why using a thermometer is important for determining exactly when the turkey is done.

  6. When fully cooked, remove turkey from oven, cover with aluminum foil, and allow to rest undisturbed up to 30 minutes.

Print Friendly and PDF

Recipe: The Best Cranberry Sauce

This is probably the best and easiest Cranberry Sauce you will ever make. It’s Thanksgiving and as always my family and I give thanks and reminisce about Thanksgiving pasts - but today a bomb shell of truth was dropped directly on me.

Let’s begin by transporting you back to when I was 10-ish, and seated at a table covered in plates of food served family style. My dad at the head of the table, my brothers, sister and I settled on either side while my mom carried over this glorious golden bird. Could this be?

“We’re having turkey.” I mumbled under my breath.

“Maria, did you say something?”

“Is this turkey?” I asked, and a unanimous YES was the response around the table. .

YES! Thanksgiving Turkey - or that’s what I was lead to believe. TODAY I find out it was chicken! (Insert gasp here) CHICKEN! That means I didn’t have turkey until my early 20’s, I know, mind blown! .

This question goes out to all the PARENTS OUT THERE. What untruths have you told your children just so they would eat? Let’s see a show of hands in the comments.

Using only three ingredients, this jewel-toned side will give your main a run for the star of the meal.

Happy Thanksgiving to all! 


FullSizeRender.jpg

The Best Cranberry Sauce

Prep Time:  5 minutes 

Cook Time: 7 - 10 minutes 

Total Time: 15 minutes 

Serves:  8

Author: Mary Mammoliti | Kitchen Confession  

I N G R E D I E N T S

1 orange

1 (12-oz.) bag cranberries

¾ cup sugar

D I R E C T I O N S

Using a vegetable peeler, remove the zest from the orange. Thinly slice the zest and add it to a medium pot along with the sugar, ½ the bag of cranberries and ¼ cup water. Cook this over medium heat, stirring with a spoon until the cranberries have burst and it looks all jammy and wonderful, about 5 minutes. Add the other half of the cranberries and the chopped orange and keep cooking until the cranberries you just added start to burst, about 2 minutes. Remove from the heat and transfer this mixture to a serving bowl (or, an airtight container if you're making it in advance and refrigerate  

MAKE AHEAD

You can make this cranberry sauce five days in advance. The longer it sits the richer the flavour. Place in an airtight container and refrigerate. Give it a quick stir before serving.

Print Friendly and PDF

Recipe: Creamy Cauliflower Garlic Mash

Comment below if you love mashed potatoes!

What if I told you this wasn’t mashed potatoes. What if I said this warm plate of creamy garlic mash was actually made of cauliflower. Would you try it? Before you rethink your decision, give this recipe a try. Have a heaping spoon with some braised short ribs, or add it as a side with your Thanksgiving feast and lighten things up.

WARNING: Following the consumption of this Cauliflower Garlic Mash there may be sudden outbursts of joy, excessive smiling, and out of control requests for more.

Photo Description: Creamy Cauliflower Garlic Mash in a square serving dish on top of a white fringe cloth and 2 sunflowers in the bottom left corner.

Photo Description: Creamy Cauliflower Garlic Mash in a square serving dish on top of a white fringe cloth and 2 sunflowers in the bottom left corner.

Creamy Cauliflower Garlic Mash

 PREP TIME: 15 minutes
Cook TIME:
15 minutes
TOTAL TIME:
30 minutes
SERVES: 4
AUTHOR:
Mary Mammoliti / Kitchen Confession

INGREDIENTS

1 large head of cauliflower, cut into florets
4 cups chicken broth
4 cups water (more if needed to cover florets)
1 tablespoon unsalted butter
3 tablespoons extra virgin olive oil
2 large garlic cloves, minced
¼ cup 2% milk
salt and black pepper to taste

DIRECTIONS

  1. Place the cauliflower florets in to a large stock pot and cover with the chicken broth and water. Cook for 8-12 minutes or until fork tender. Drain and keep the in the colander and move onto next steps. You want to get as much water as possible out of the cauliflower.

  2. Pour the olive oil into the stock pot and sauté the garlic until fragrant. Remove from heat and return the cooked cauliflower back into the stock pot, add milk and butter. Using an emersion blender purée until smooth and creamy. Taste for salt and pepper.

  3. Garnish with chopped parsley, drizzle extra virgin olive oil over top and serve warm.

NOTES

Refrain from adding additional butter and/or milk to the mash, it will thin out too much.

Print Friendly and PDF

Recipe: Cranberry Eggnog Scones

Recipe: Cranberry Eggnog Scones

Today on Kelly and Company we talked about the post holiday aftermath left in our pantries and refrigerators. Dealing with the plethora of odds and ends of food occupying prime real estate in our refrigerators. Sharing with you a few ideas and recipes ….

Print Friendly and PDF

Recipe: Baked Panettone French Toast with Orange Maple Butter

Recipe: Baked Panettone French Toast with Orange Maple Butter

Panettone, a delicious, buttery, sweet Italian bread filled with raisins, and candied orange. Why not turn this sweet treat into an easy and perfect holiday breakfast with Baked Panettone French Toast with Orange Maple Butter.

Print Friendly and PDF