Fall

Roasted Garlic and Butternut Squash Soup

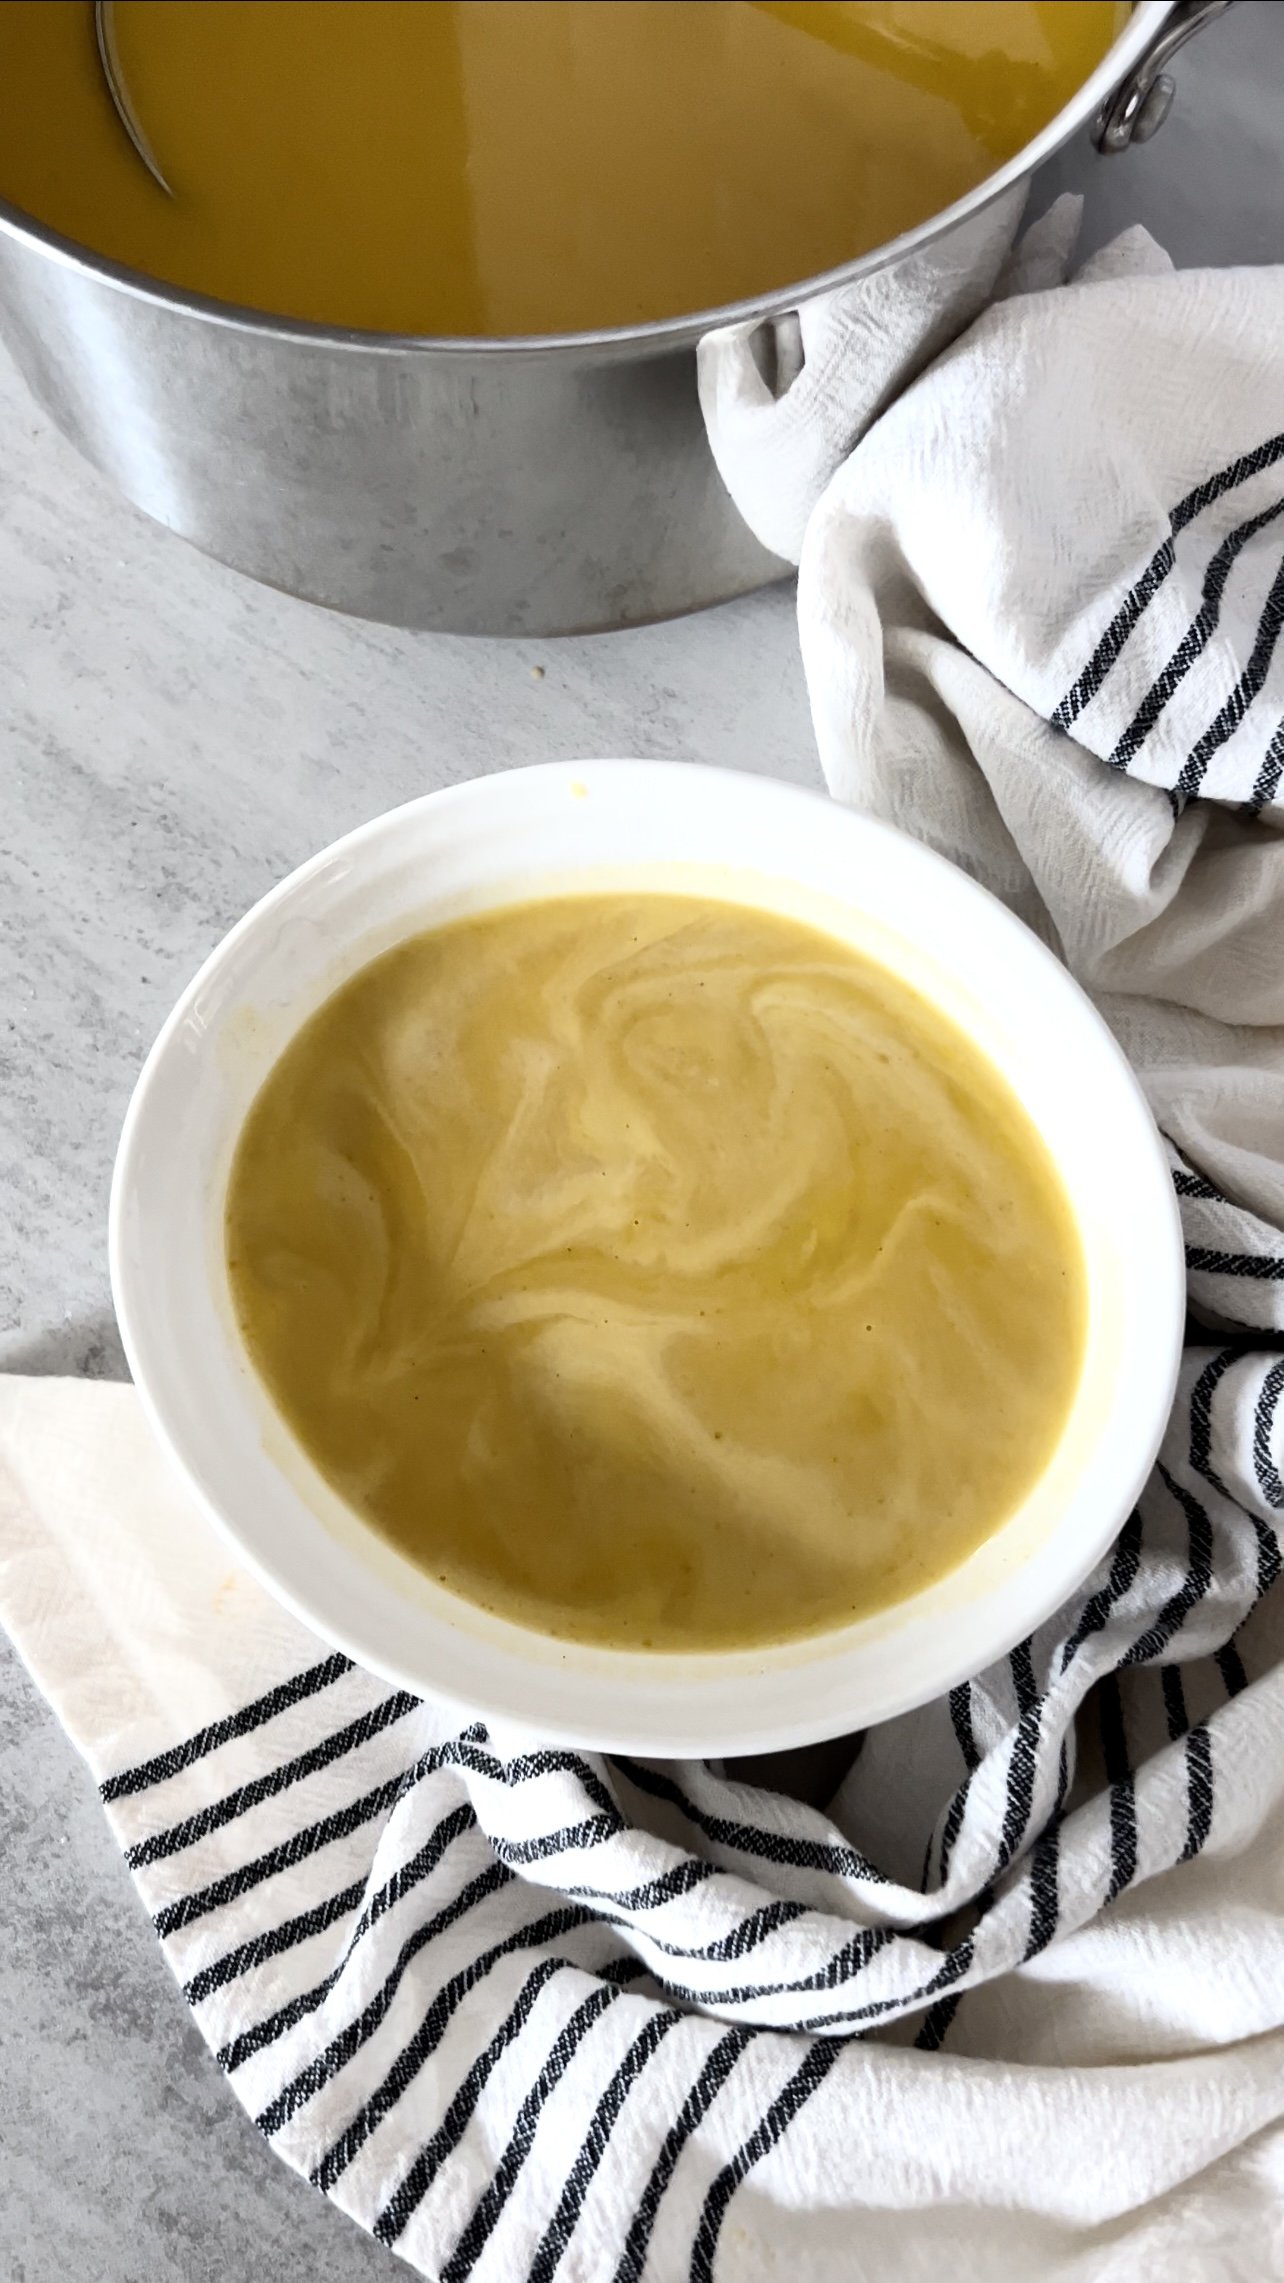
If you're craving a cozy bowl of comfort on a chilly evening, look no further than this Roasted Garlic and Butternut Squash Soup recipe. The rich, earthy flavors of roasted garlic and sweet butternut squash come together in a velvety-smooth soup that's perfect for warming both body and soul. Roasting the garlic and butternut squash before blending them creates a depth of flavor that's simply irresistible. Top it off with some roasted pumpkin seeds for the ultimate autumnal indulgence. This soup is not just a meal; it's a hug in a bowl, guaranteed to satisfy your fall cravings.

Roasted Garlic and Butternut Squash Soup

Prep Time: 10 minutes

Cook Time: 1 hour 

Total Time: 1 hour 10 minutes

Serves: 6

Ingredients

1 large butternut squash halved, seeded and scored

1 honey crisp apple, halved

1 vidalia  onion, peeled and quartered

2 heads garlic, tops cut off

2 tablespoons extra virgin olive oil, plus extra to drizzle over garlic. 

3 sprigs thyme, stems remain ved

1 tsp paprika

1/2 teaspoon ground nutmeg 

1/2 teaspoon ground ginger 

3 tablespoons salted butter

5 cups vegetable stock

1/2 cup of heavy cream

Instructions

  1. Preheat oven to 400°F. Line a baking sheet with parchment paper.

  2. To a baking dish or rimmed sheet pan add the squash, onion, garlic to the baking sheet, cut sides facing up. Brush the cut sides of the vegetables with olive oil and season with paprika, salt, pepper and thyme. 

  3. Cut the tops off your garlic bulbs and place them onto of a piece of aluminum foil (large enough to warp the garlic). Drizzle some olive oil over top, a pinch of salt and pepper then fold all corners together and twist to seal the package. Place the two garlic parcels onto the baking sheet.

  4. Turn the squash and apple cut-side down onto the sheet pan and roast for 30-40 minutes, until the squash is fully cooked. If the onion and garlic are roasted before the squash, remove them from the sheet pan and return the squash to the oven and allow it to cook for an additional 10 minutes if needed. 

  5. Remove from oven and allow to the squash and roasted garlic to cool. Then scoop out the roasted squash, squeeze out the roasted garlic, remove the peel from the apple and add everything including the onion into the bowl of a food processor or powerful blender (I used my Vitamix). Blend until smooth.

  6. In a large stockpot, pour in the squash puree, add butter, ginger, nutmeg, and vegetable stock. Bring to a boil and simmer gently for 15-20 minutes. Remove from heat and whisk in the heavy cream.

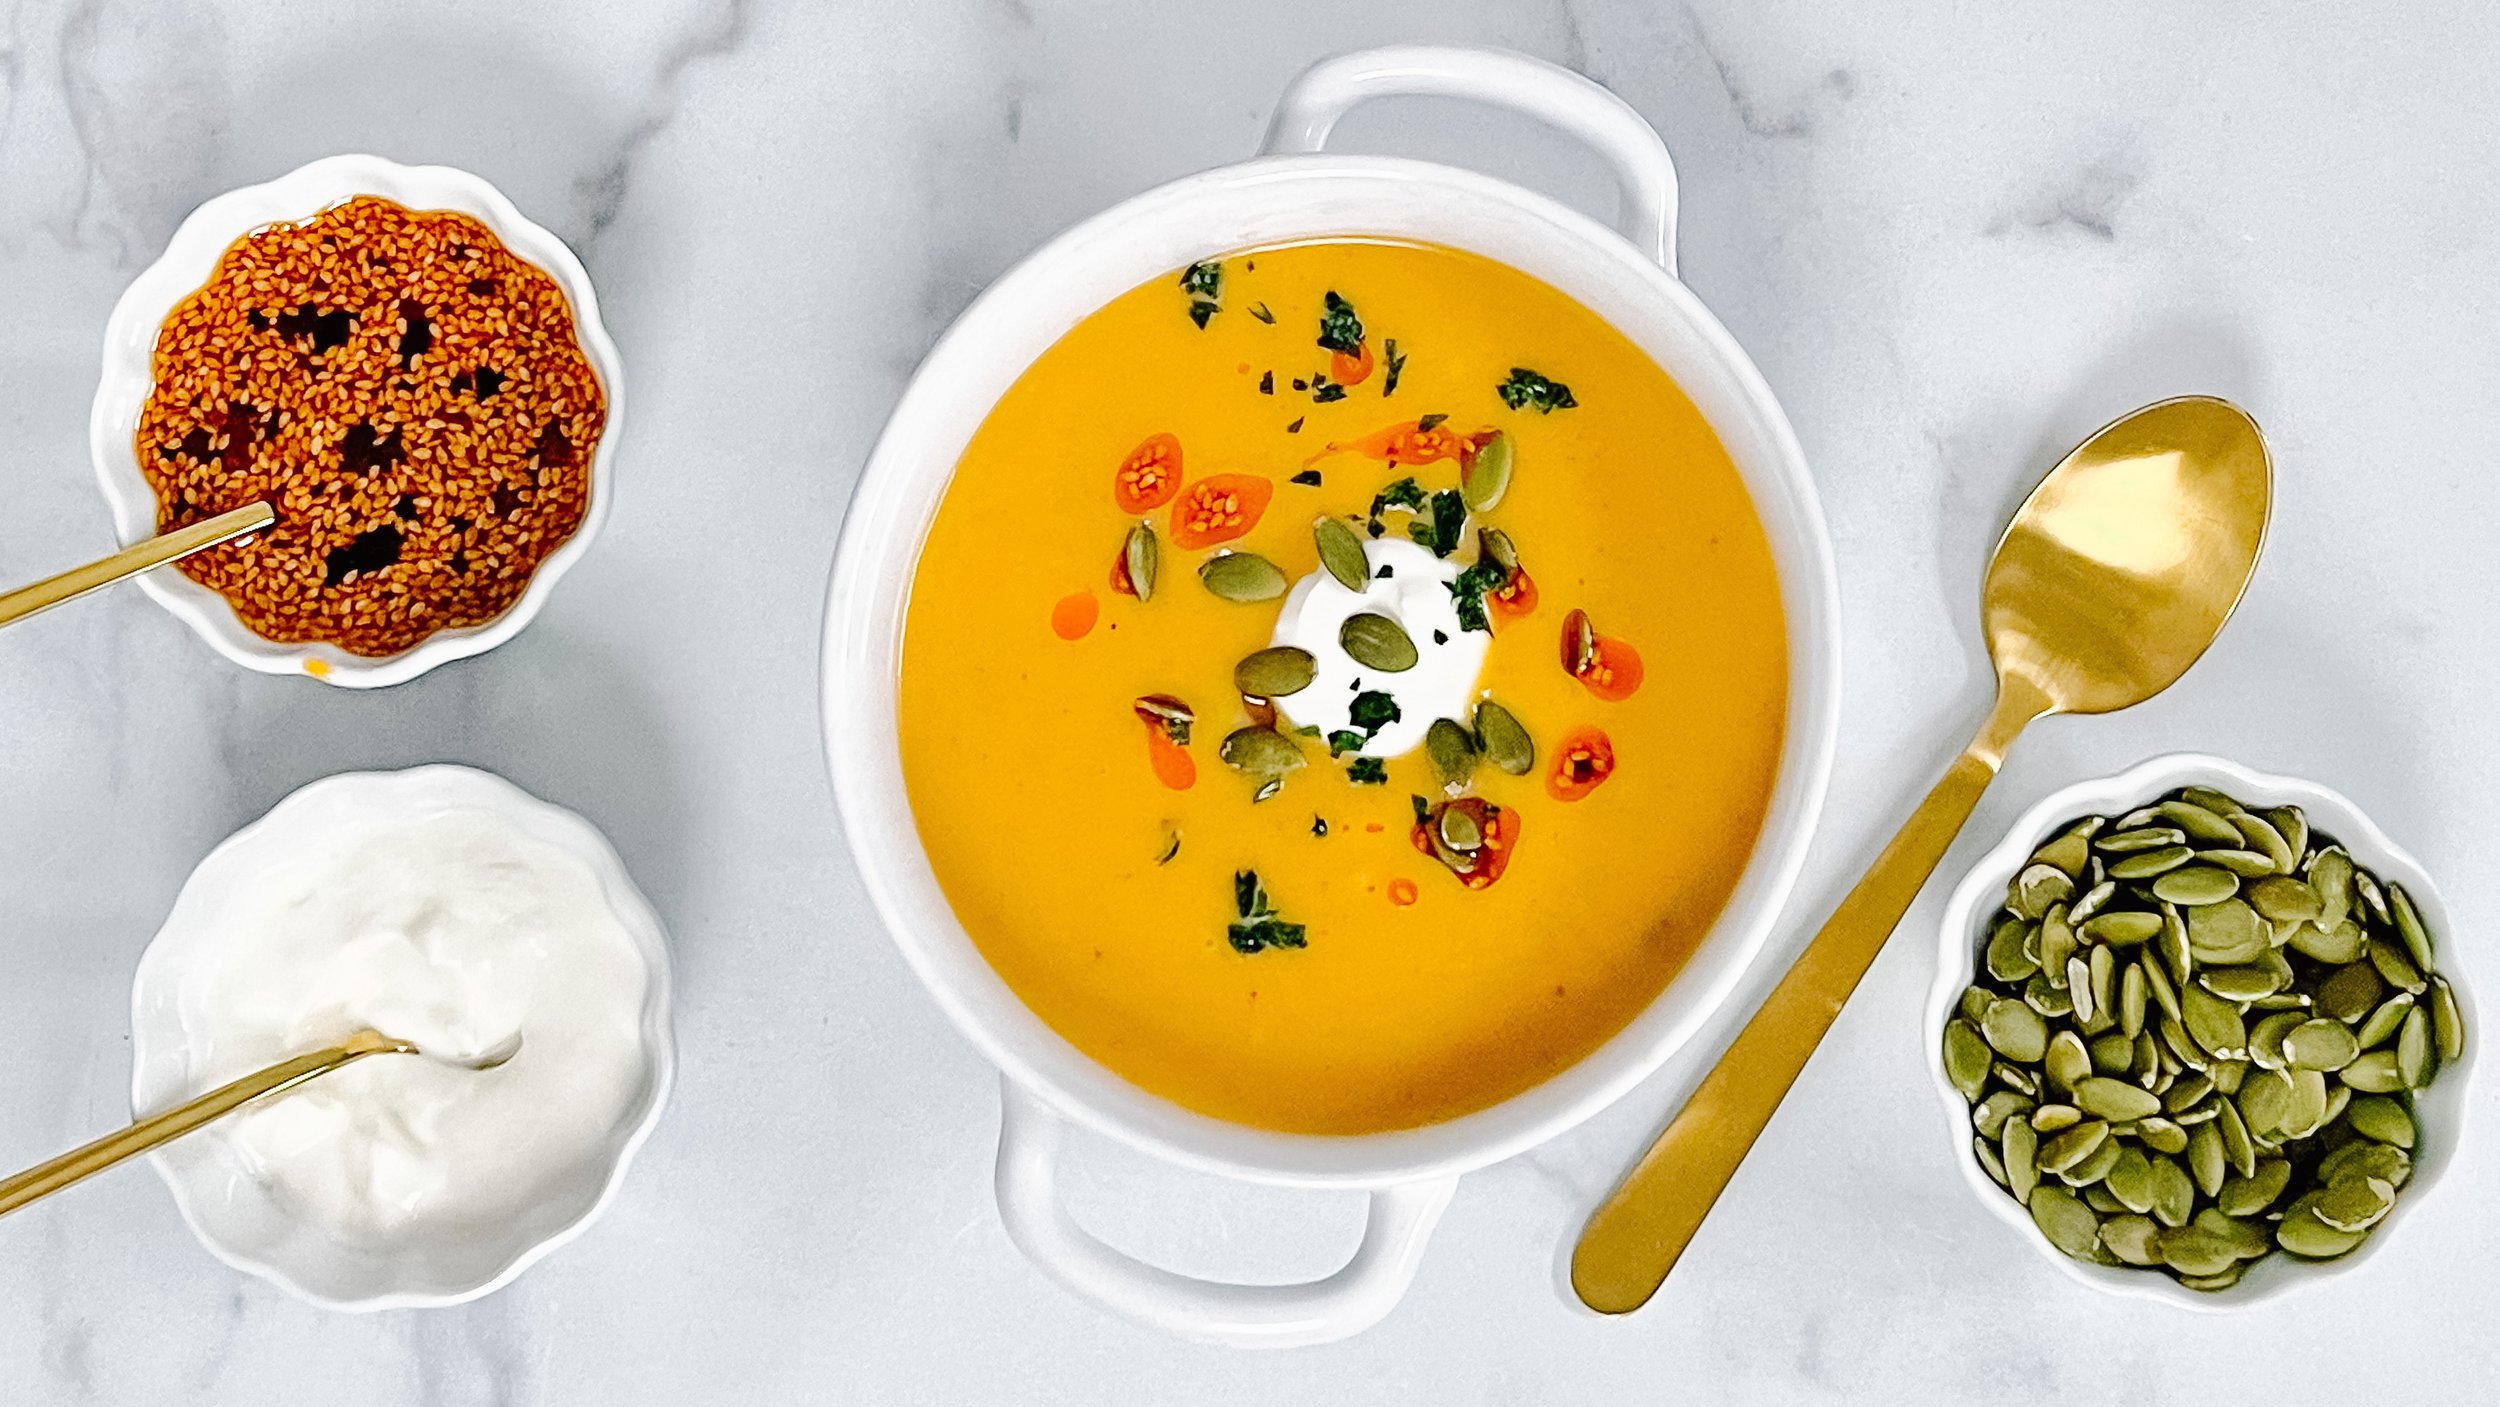
  7. Garnish with a dollop of sour cream, a drizzle of spicy chilli oil, and a sprinkle of pumpkin seeds and serve immediately. 

Author: Mary Mammoliti / Kitchen Confession / kitchenconfession.com

Print Friendly and PDF

Recipe: Quick Chunky Beef Chili

Over the years I’ve made many pots of chili but this quick and chunky chili recipe is my absolute favourite. I like to add fresh jalapeños, cheese, sour cream, green onion, and forget the spoon just use crispy tortilla chips instead!

Frequently Asked Questions:

CAN YOU FREEZE CHILI?

Yes, chili is the perfect freezer meal. Divide the cooked chili it into single portions and let it cool. Label the container with the contents and date, then transfer to the freezer. You can keep your chili in the freezer for about three months.

To reheat, simply let the chili thaw in the refrigerator over night and reheat in a pot over low heat, adding water if needed, until warm, or microwave on high for 2 minutes.


HOW LONG SHOULD YOU COOK CHILI?

You’ll want to let this chili simmer for a minimum of 30 minutes, but it’s something that you can leave simmering gently for up to a couple of hours. Chili is one of those dishes that tastes better the longer it cooks. If you do plan to let your chili simmer for a longer period of time, make sure to cover the pot with a lid so it doesn’t dry out. Check it occasionally to make sure all the liquid hasn’t evaporated. If it has, simply add a little water or beef broth.

Quick Chunky Beef Chili

Prep Time 5 minutes
Cook Time 30 minutes
Total Time 35 minutes
Author Mary Mammoliti | Kitchen Confession

Ingredients

1 1/2 pound lean ground beef
2 tablespoon olive oil
1 medium onion chopped
2 tablespoons tomato paste
1 red bell pepper, diced
1 teaspoon Worcestershire sauce
1 teaspoon soy sauce
1 1/2 teaspoons unsweetened cocoa powder
2 tablespoons chili powder
1 teaspoon garlic powder
1 teaspoon ground cumin
1 teaspoon smoked paprika
1/2 teaspoon cayenne pepper, optional
1 (19 fl oz/540 ml) can red kidney beans, drained & rinsed
1 (19 fl oz/540 ml) can pinto beans, drained & rinsed
1 (28 fluid ounce) can fire-roasted diced tomatoes with juices
1 cup beef broth (add more if you like)
Salt & pepper to taste

Toppings (optional)

Shredded cheddar cheese
Sour cream 
Sweet Potato Tortilla Chips

Instructions

  1. Add olive oil to a large pot over medium-high heat.

  2. Add the beef to the pot and cook for 5 minutes, breaking it up as you go, until brown.

  3. Pour in the onion and red bell pepper and sauté for 5 minutes or until softened.

  4. Stir in the tomato paste, Worcestershire sauce, soy sauce and stir until tomato paste has coated the beef mixture.

  5. Add the beans, diced tomatoes, beef broth, cocoa powder, chili powder, garlic powder, cumin, paprika, and cayenne pepper.

  6. On high heat bring the ingredients to a gentle boil, reduce the heat, cover leaving a slight opening and let it simmer for 30 minutes, stirring occasionally.

  7. Taste and add more salt & pepper if needed, serve with desired toppings and enjoy.

Print Friendly and PDF

Recipe: Roasted Garlic And Butternut Squash Soup

HOLY GOURD! It’s officially “Sweater Weather” here in Canada and that means welcome back soup season! This roasted garlic and butternut squash soup checks all the cozy autumn boxes for me. Drizzle a little chili oil over top and bring that warm comforting hug factor to the dish.

Now go on and make this show stopping soup. If you’re feeling like you need a little crunch, check out my crispy sour dough bread crouton recipe. Enjoy!

A bowl of soup in the centre topped with a drizzle of spicy chilli oil, a dollop of sour cream, a sprinkle of shelled pumpkin seeds and a few flakes of fresh parsley.Three smaller bowls around the soup with topping options and a gold spoon.

Roasted Garlic And Butternut Squash Soup

Prep Time: 10 minutes
Cook Time: 1 hour
Total Time: 1 hour 10 minutes
Serves: 6
Author: Mary Mammoliti / Kitchen Confession / kitchenconfession.com

INGREDIENTS

  • 1 large butternut squash halved, seeded and scored

  • 1 honey crisp apple, halved

  • 1 vidalia  onion, peeled and quartered

  • 2 heads garlic, tops cut off

  • 2 tablespoons extra virgin olive oil, plus extra to drizzle over garlic.

  • 3 sprigs thyme, stems remain ved

  • 1 tsp paprika

  • 1/2 teaspoon nutmeg

  • 1/2 teaspoon ground ginger

  • 3 tablespoons salted butter

  • 5 cups vegetable stock

  • 1/2 cup of heavy cream

INSTRUCTIONS

  1. Preheat oven to 400°F. Line a baking sheet with parchment paper.

  2. To a baking dish or rimmed sheet pan add the squash, onion, garlic to the baking sheet, cut sides facing up. Brush the cut sides of the vegetables with olive oil and season with paprika, salt, pepper and thyme.

  3. Cut the tops off your garlic bulbs and place them onto of a piece of aluminum foil (large enough to warp the garlic). Drizzle some olive oil over top, a pinch of salt and pepper then fold all corners together and twist to seal the package. Place the two garlic parcels onto the baking sheet.

  4. Turn the squash and apple cut-side down onto the sheet pan and roast for 30-40 minutes, until the squash is fully cooked. If the onion and garlic are roasted before the squash, remove them from the sheet pan and return the squash to the oven and allow it to cook for an additional 10 minutes if needed.

  5. Remove from oven and allow to the squash and roasted garlic to cool. Then scoop out the roasted squash, squeeze out the roasted garlic, remove the peel from the apple and add everything including the onion into the bowl of a food processor or powerful blender (I used my Vitamix). Blend until smooth.

  6. In a large stockpot, pour in the squash puree, add butter, ginger, nutmeg, and vegetable stock. Bring to a boil and simmer gently for 15-20 minutes. Remove from heat and whisk in the heavy cream.

  7. Garnish with a dollop of sour cream, a drizzle of spicy chilli oil, and a sprinkle of pumpkin seeds and serve immediately.

Print Friendly and PDF

Recipe: Lemon Garlic Salmon Pasta

Salmon Pasta is what’s happening tonight. Quick, Easy and ready in Under 30 Minutes. ⁣

I’m working on reducing my Simple Carbohydrates so I decided to make this dish with gluten free pasta and vegan butter. ⁣*this recipe serves 6-8

Flaky pink salmon, al dente chickpea fusili, wilted spinach and crisp green capers on a beautiful white double plate on top of a white and grey marble counter.

Flaky pink salmon, al dente chickpea fusili, wilted spinach and crisp green capers on a beautiful white double plate on top of a white and grey marble counter.

Lemon Garlic Salmon Pasta

Prep Time:
Cook Time:
Total Time: 30 minutes
Serves: 6-8
Author: Mary Mammoliti / Kitchen Confession

INGREDIENTS⁣

  • 1 package of Maria’s Homestyle Chickpea Fusilli⁣

  • 1 lb. salmon fillet⁣

  • 1 teaspoon garlic, minced⁣

  • 1 tablespoon @miyokoscreamery vegan butter⁣

  • 1 teaspoon dried basil⁣

  • 1 teaspoon dried oregano⁣

  • Salt and pepper to taste⁣

  • 4 - 5 handfuls of spinach⁣

  • Zest + juice of one lemon⁣

  • 2 teaspoons capers⁣

INSTRUCTIONS

  1. Cook the pasta according to package directions

  2. Add butter to a large pan. Season salmon with salt and pepper and place in pan. On medium low heat cook for 3 minutes. Flip and cook for an additional 3 minutes until done. Remove from pan and set aside. ⁣

  3. Add garlic and spinach to the pan and cook for 1 minute until spinach is wilted. ⁣

  4. Once the pasta is cooked, drain and toss with spinach, garlic, basil and oregano. Season with salt and pepper to taste⁣

  5. Add lemon juice, zest and capers to the pasta and toss to mix⁣

  6. Flake the salmon into bite-size pieces and gently toss salmon with the pasta⁣


Print Friendly and PDF

Recipe: The Best Cheese and Broccoli Soup

In my opinion, Cheese and Broccoli Soup the ultimate comfort food! It’s deliciously cheesy, rich, creamy, and exactly what a warm bowl of comfort food should be. This soup is truly one of the best bowls of cheese and broccoli I’ve had in a long time! Made with minimal ingredients, it’s hearty, loaded with broccoli, brimming with fresh flavours and it’s easy to make. Bring on sweater weather, I’m ready!

Pin this recipe and get ready to make this warm and cozy soup all winter long. Soups really do make the colder months much more bearable - am I right?

For a step by step video on how to make this Tasty Cheese and Broccoli Soup visit my Instagram @kitchenconfession

The Best Cheese and Broccoli Soup

Prep Time: 15 minutes
Cook Time
: 45 minutes
Total Time: 60 minutes
Serves: 3-4 decent sized bowls

INGREDIENTS

  • 1 tablespoon + 4 tablespoons unsalted butter, divided

  • 1 medium onion, finely diced

  • 1 clove garlic, minced

  • 1/4 cup all-purpose flour

  • 2 cups low-sodium chicken stock

  • 2 cups half-and-half cream

  • 3-4 cups broccoli florets and stems, diced into bite-size pieces

  • 2 large carrots, peeled, and sliced into thin rounds, about 1/16th-inch

  • 1 teaspoon kosher salt

  • Freshly ground black pepper to taste

  • 1/2 teaspoon paprika

  • 1/2 teaspoon dry mustard powder

  • pinch cayenne pepper

  • 8 - 10 ounces (280g) grated aged cheddar cheese, reserve a bit to garnish bowls

INSTRUCTIONS

  1. In a large heavy-bottom pot, add 1 tablespoon butter, the diced onion, and sauté over medium heat until the onion is soft and translucent, about 4 minutes.

  2. Add the garlic and cook about 30 seconds. Using a spoon, scoop the onion and garlic mixture from the pot onto a plate and set aside.

  3. In the same pot add 4 tablespoons butter, flour, and cook over medium heat for about 3 to 5 minutes, whisking constantly, until flour is thickened. this is called a roux and it’s a very important step do not skip or soup will not reach the desired thickness.

  4. Continue whisking and slowly add the vegetable stock. and repeat this process for the half-and-half cream.

  5. Stop whisking, and allow the mixture to simmer (not boil) over low heat for about 15 to 20 minutes.

  6. While mixture is simmering, chop the broccoli and carrots. After simmering 15 to 20 minutes, add the broccoli, carrots, the onion and garlic to the pot, mix to incorporate.

  7. Add the salt, pepper, paprika, dry mustard powder, and cayenne (if you are using it). Stir to combine.

  8. Stirring intermittently, while simmering soup over low heat for about 20 minutes, or until it has reduced and thickened.

  9. While soup simmers, grate the aged cheddar cheese. Do not use pre-grated cheese in zip top bags because that cheese is resistant to melting and will change the texture and taste of the soup. After 20 minutes, add grated cheese, reserving a small amount for garnishing the bowls when serving. Give the soup a couple of stirs, the cheese will melt in and transfer soup to bowls, garnish with reserved cheese, and serve immediately.

RECIPE NOTES AND TIPS

  • Store soup in an airtight container for 5 to 7 days in the fridge.

  • Milk alternative, whole milk or 2% milk will work but soup won’t be as creamy.

  • I recommend using fresh broccoli, but if you are tight on time a bag of frozen broccoli florets will work.

  • Keep this soup vegetarian by using vegetable broth in place of the chicken broth and milk alternative in place of the cream.

TOOLS I USED IN THIS RECIPE

Whisk | Heavy Bottom Pot | Wooden Spoon | Soup Bowls | Ladle | Box Grater

Print Friendly and PDF

Recipe: One Bowl Greek Yogurt Pumpkin Bread

 “Beauty is in the eye of the beholder” and that’s how I would describe this photo of a One Bowl Greek Yogurt Pumpkin Bread. There may be slight imperfections on top but that crispy golden imperfect exterior adds an extra layer of flavour with every warm bite. It’s crispy on the outside and soft on the inside (perfect description of myself😁) PERFETTO! .

FullSizeRender.jpg

 One Bowl Greek Yogurt Pumpkin Bread

Ingredients

  • 1 medium-size ripe banana, mashed (1/2 cup)

  • 2 large eggs

  • 1 cup pumpkin pure

  • 1/3 cup plain greek yogurt

  • 1/4 cup melted coconut oil

  • 1/2 cup coconut palm sugar

  • 1/2 cup pure maple syrup

  • 1 tsp vanilla

  • 1 tsp ground cinnamon

  • 1/2 tsp ground ginger

  • 1/4 tsp ground nutmeg

  • 1/4 tsp sea salt

  • 2 cups all purpose flour

  • 1 tsp baking soda

  • 1/2 cup dark chocolate chips

Instructions

  1. Preheat oven to 350° (176ºC), and lightly grease a 9 x 5 (23 x 13 cm) bread pan. Set aside.

  2. Combine the flour, baking soda, cinnamon, and salt, stirring with a whisk.

  3. Place sugar and butter in a large bowl, and mix until well blended

  4. Add the eggs, pumpkin, yogurt and vanilla.

  5. Add flour mixture; mix until blended.

  6. Spoon batter into two loaf pans coated with cooking spray.

  7. Bake at 350° for 50-60 minutes until a toothpick inserted in center comes out clean.

Print Friendly and PDF

Recipe: Roasted Acorn Squash

Just when I thought I had finished cooking for the day this little beauty caught my eye and I just had to bake it up. Perfect addition to any meal and it’s the easiest recipe around.

FullSizeRender.jpg

ROASTED ACORN SQUASH

INGREDIENTS

  • 1 acorn squash, washed

  • 2 tbsp olive oil

  • 1 tsp garlic powder

  • Salt and pepper to taste

.

INSTRUCTIONS

  1. Preheat oven to 400°F * Cut the squash in half, using a spoon scrape out the insides, and slice into 1/2" half moons.

  2. Add the olive oil, garlic powder, salt and pepper. Toss to coat. * Lay the squash out on a baking sheet. Bake for 30 minutes until fork tender and golden in colour.


Print Friendly and PDF

Recipe: Spicy Roasted Pumpkin Seeds

A snacker [someone who eats lightly or between meals], a snack [a small amount of food eaten between meals] .

Raise your have if you’re a snacker! 🙋🏻‍♀️ OH I SEE YOU! Now repeat after me - .

“I like good snacks and I can not lie,

You other snackers can't deny,

That when the food goes in an itty bitty plate,

And goes right in your face

You get sprung..”

.

No reason, I just wanted someone to sing with me. Now sit back and relax with a bowl of SPICY ROASTED PUMPKIN SEEDS

FullSizeRender.jpg

Spicy Roasted Pumpkin Seeds

INGREDIENTS

  • 2 cups pumpkin seeds

  • 1 1/2 teaspoons olive oil

  • 1/2 teaspoon garlic powder

  • 1/2 teaspoon cayenne

  • 1/4 teaspoon sea salt

  • 1/4 teaspoon paprika

  • parchment paper

INSTRUCTIONS

  1. Bake at 300 degrees for 40 minutes, taking them out and stirring/flipping halfway through. Let cool for a minute and enjoy!

Print Friendly and PDF

Recipe: Maple Banana Bread

Take a break from binge watching the news, organizing your closets, virtual deep breathing classes and take a short (social distancing) walk into the kitchen and have a little Bake Sesh ....... mmmkay?

Here’s my latest At Home Kitchen Project - Maple Banana Bread! ⁣ ⁣ This traditional Banana bread recipe got a cozy Canadiana makeover with the addition of dark maple syrup. ⁣ ⁣ ⁣

Happy Baking Friends and comment below or message me with any questions xoxox⁣ ⁣

IMG_8369.jpeg

Maple Banana Bread

Prep Time: 20 minutes
Bake Time: 60 minutes
Total Time: 1hr 20 minutes
Serves: Makes one 8½x4½" loaf
Author: Mary Mammoliti | Kitchen Confession 

Mary’s hand holding a half eaten slice of Maple Banana Bread

Mary’s hand holding a half eaten slice of Maple Banana Bread

INGREDIENTS

  • 1½ cups all-purpose flour

  • 1¼ teaspoons baking soda

  • ¾ teaspoon kosher salt

  • ⅓ cup sour cream

  • ¼ cup unsalted butter, room temperature

  • 1 cup (packed) dark brown sugar

  • 2 large eggs

  • 3 large ripe bananas, mashed

  • 2 tablespoons pure dark maple syrup

  • ½ cup chopped walnuts (optional)

  • Nonstick baking oil spray

INSTRUCTIONS 

  1. Preheat oven to 350°. Lightly spray an 8½x4½" loaf pan with nonstick spray and line with parchment paper, leaving enough on either side to life the load out. In a small bowl whisk flour, baking soda, and salt to combine, set aside.

  2. In the bowl of a stand mixer or if using a hand mixer a large bowl, beat brown sugar, sour cream, and butter until light and fluffy, approximately 3-4 minutes. Add the maple syrup and one egg at a time, mixing to combine after each egg.

  3. Reduce the speed to low on your mixer, slowly add the flour mixture, and mix to form

  4. A smooth batter. Add bananas and mix until combined. Fold in walnuts, if using. Pour batter into the prepared pan and smooth the top. 

  5. Bake the banana bread for 60–65 minutes or until a toothpick inserted into the center comes out clean.

  6. Transfer the pan to a wire rack and let it cool in the pan for 30 minutes to 1 hour. Remove from the pan and get slicing.

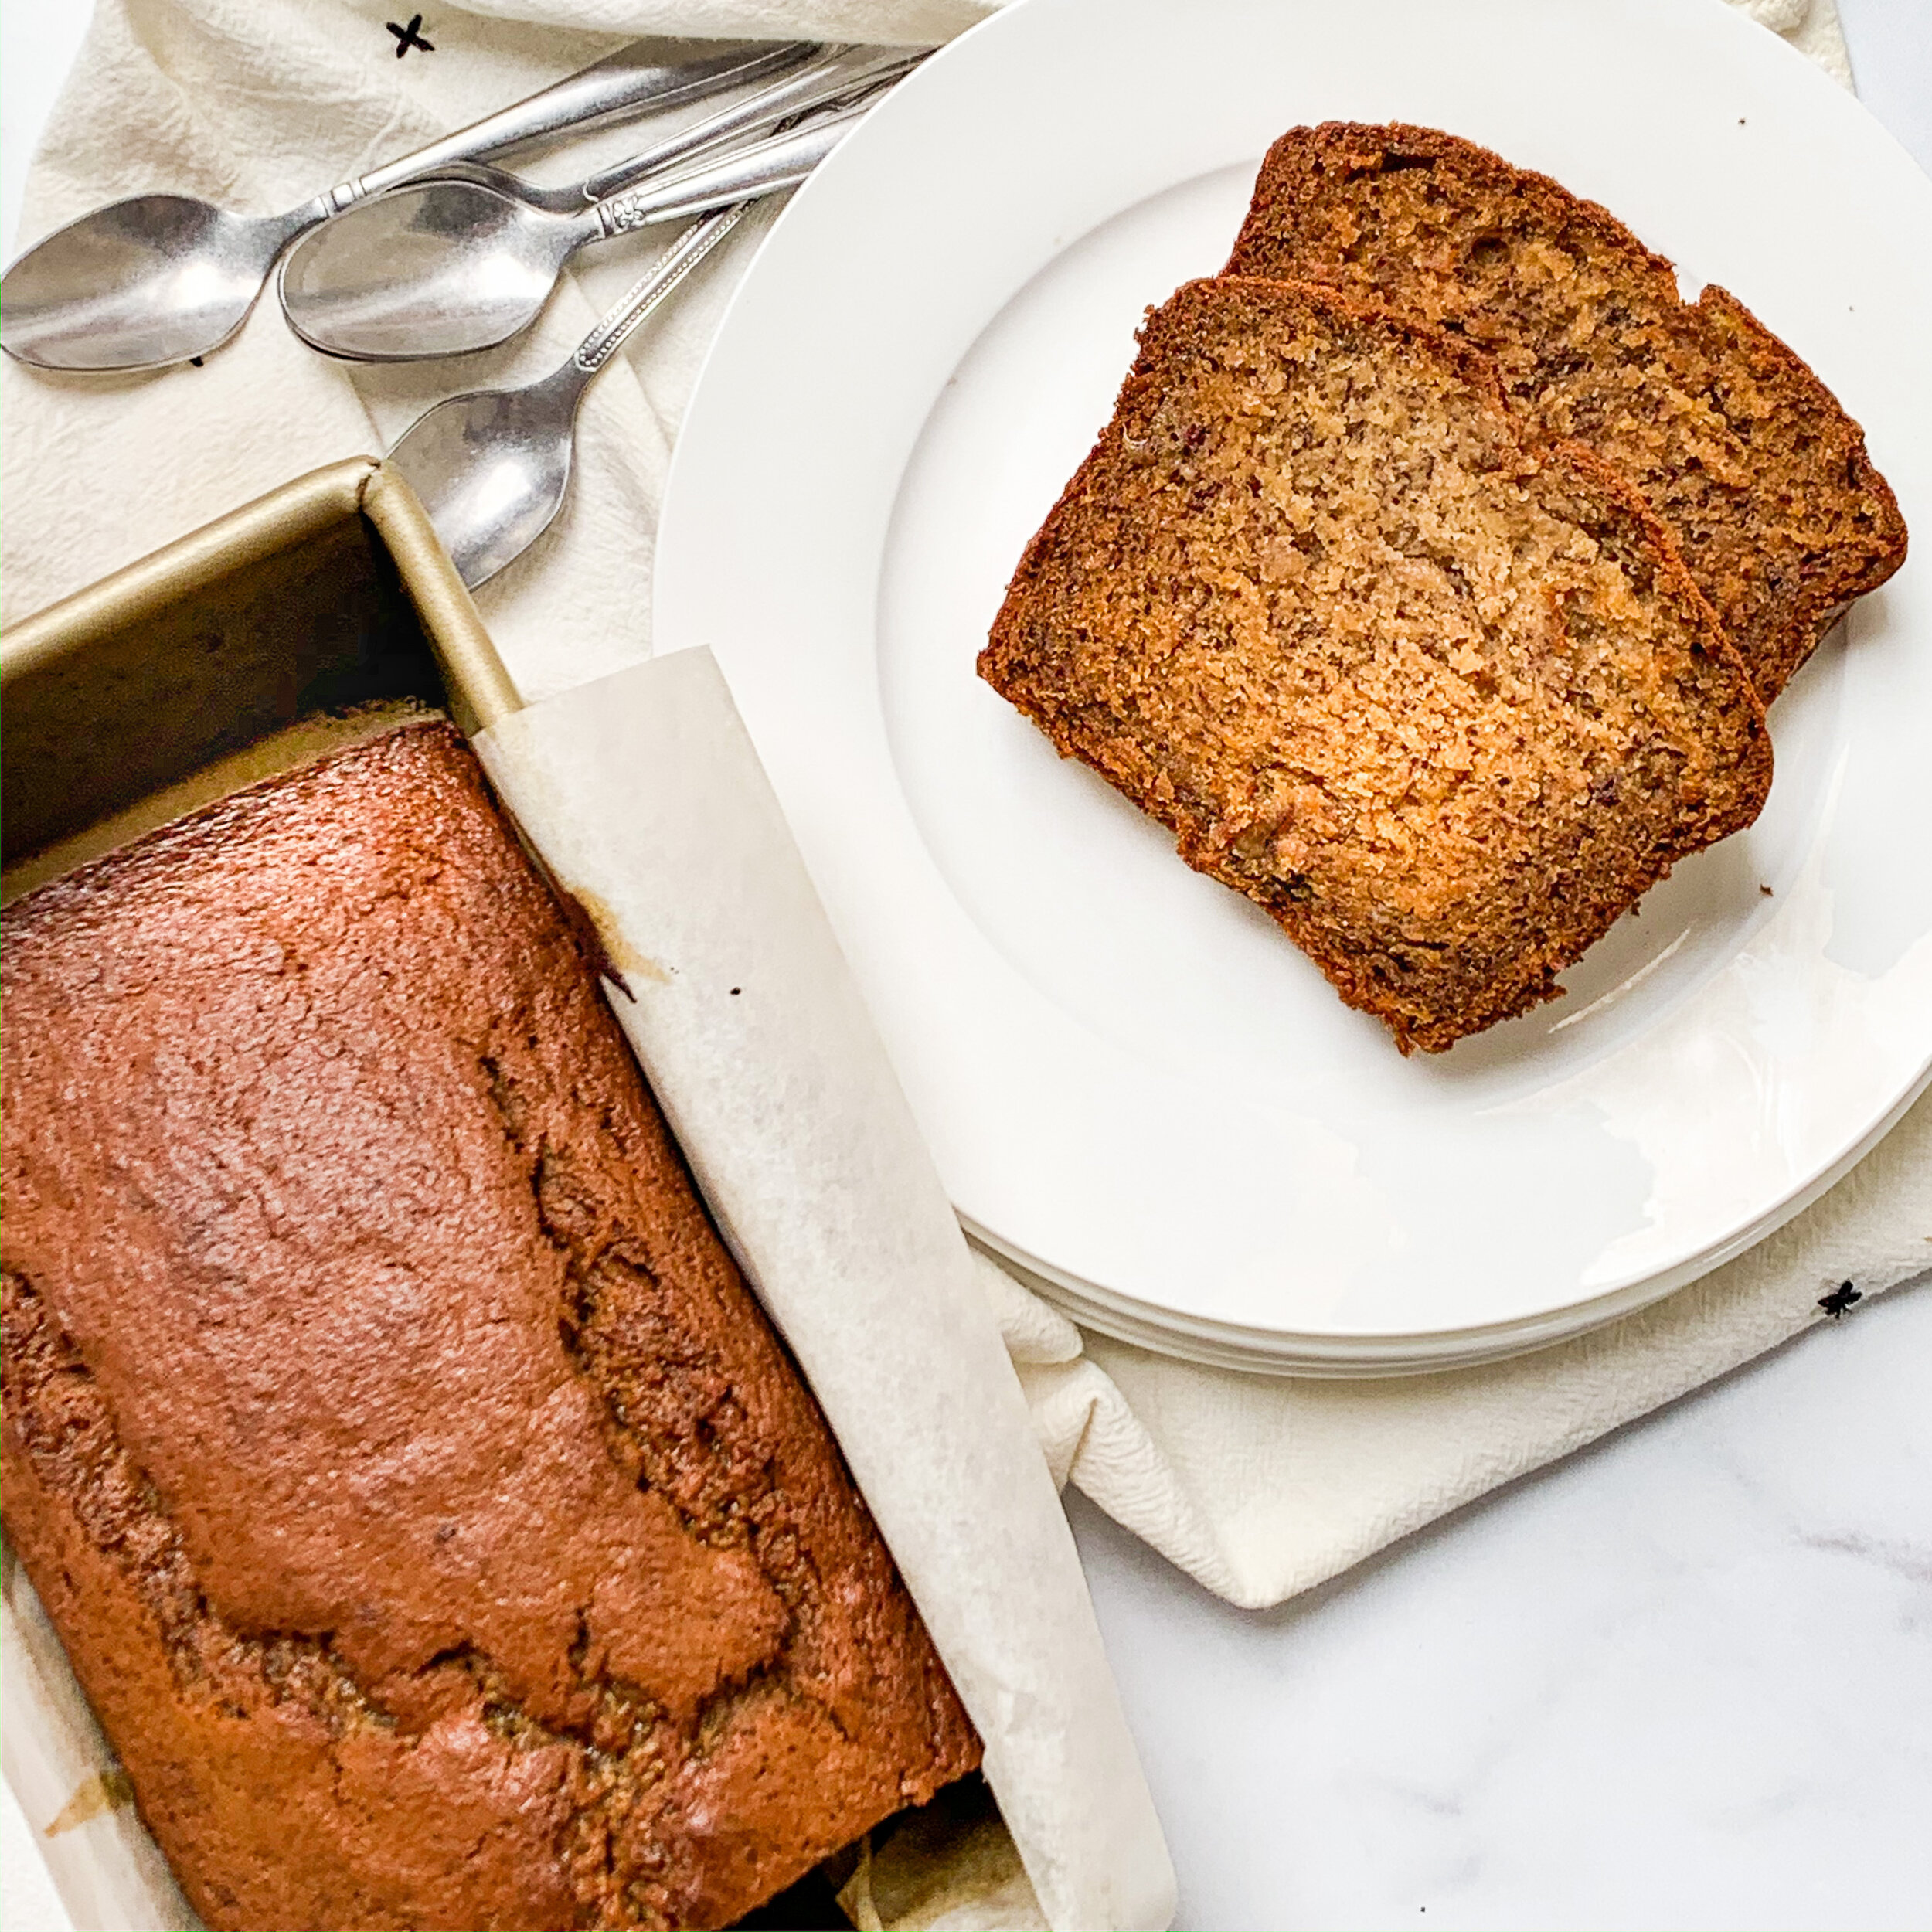
Baked Maple Banana Bread in the loaf pan with two slices on a plate to the right of the loaf

Baked Maple Banana Bread in the loaf pan with two slices on a plate to the right of the loaf

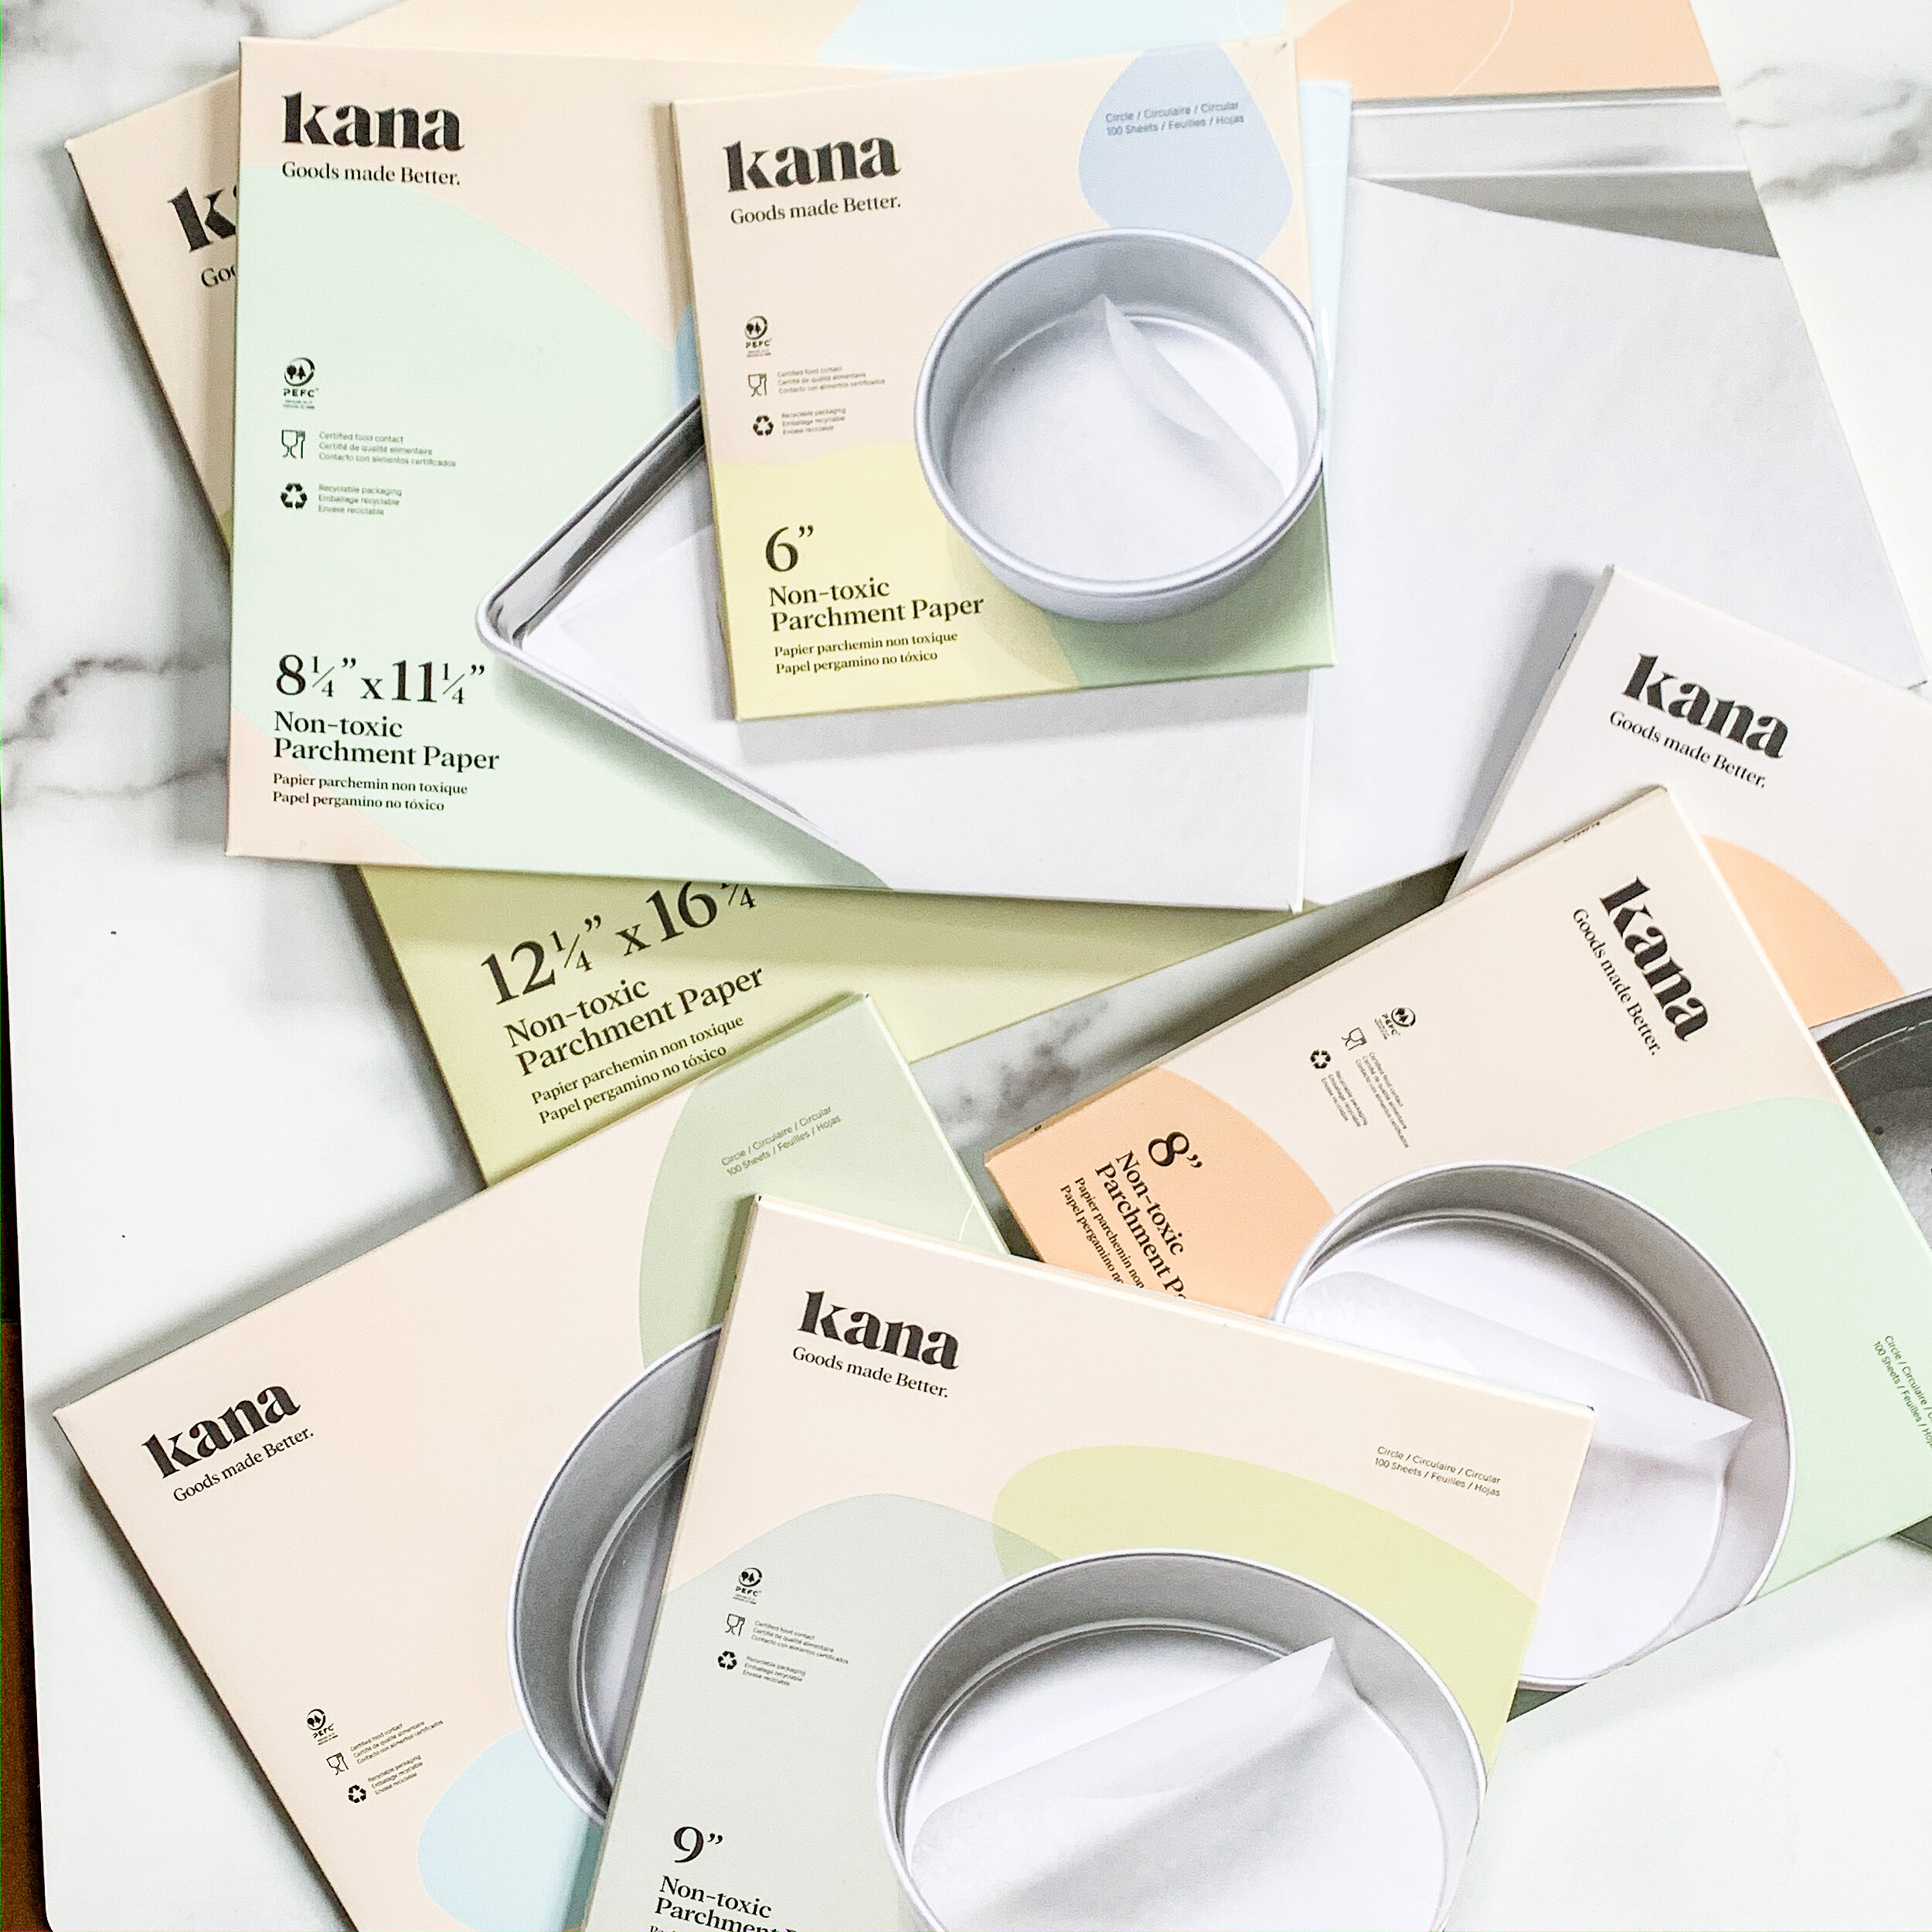
I’ve also been using Kana pre-cut parchment paper for almost 2 months (swipe left to see) and you know I like to try the products before I recommend them and I can’t stop singing the praises of this product and brand! Pre-cut sheets to fit your cake pans, baking sheets (all sizes) and air fryer! They’re environmentally friendly and coated with natural silicone. The finish eliminates any need for greasing your pans, which means less mess, and less cleanup!⁣ ⁣ These pre-cut sheets are made from wood pulp sourced exclusively from sustainably managed forests, are compostable and biodegradable.⁣ ⁣ Packaging: 50% recycled paper and 50% wood pulp sourced from sustainably managed forests.

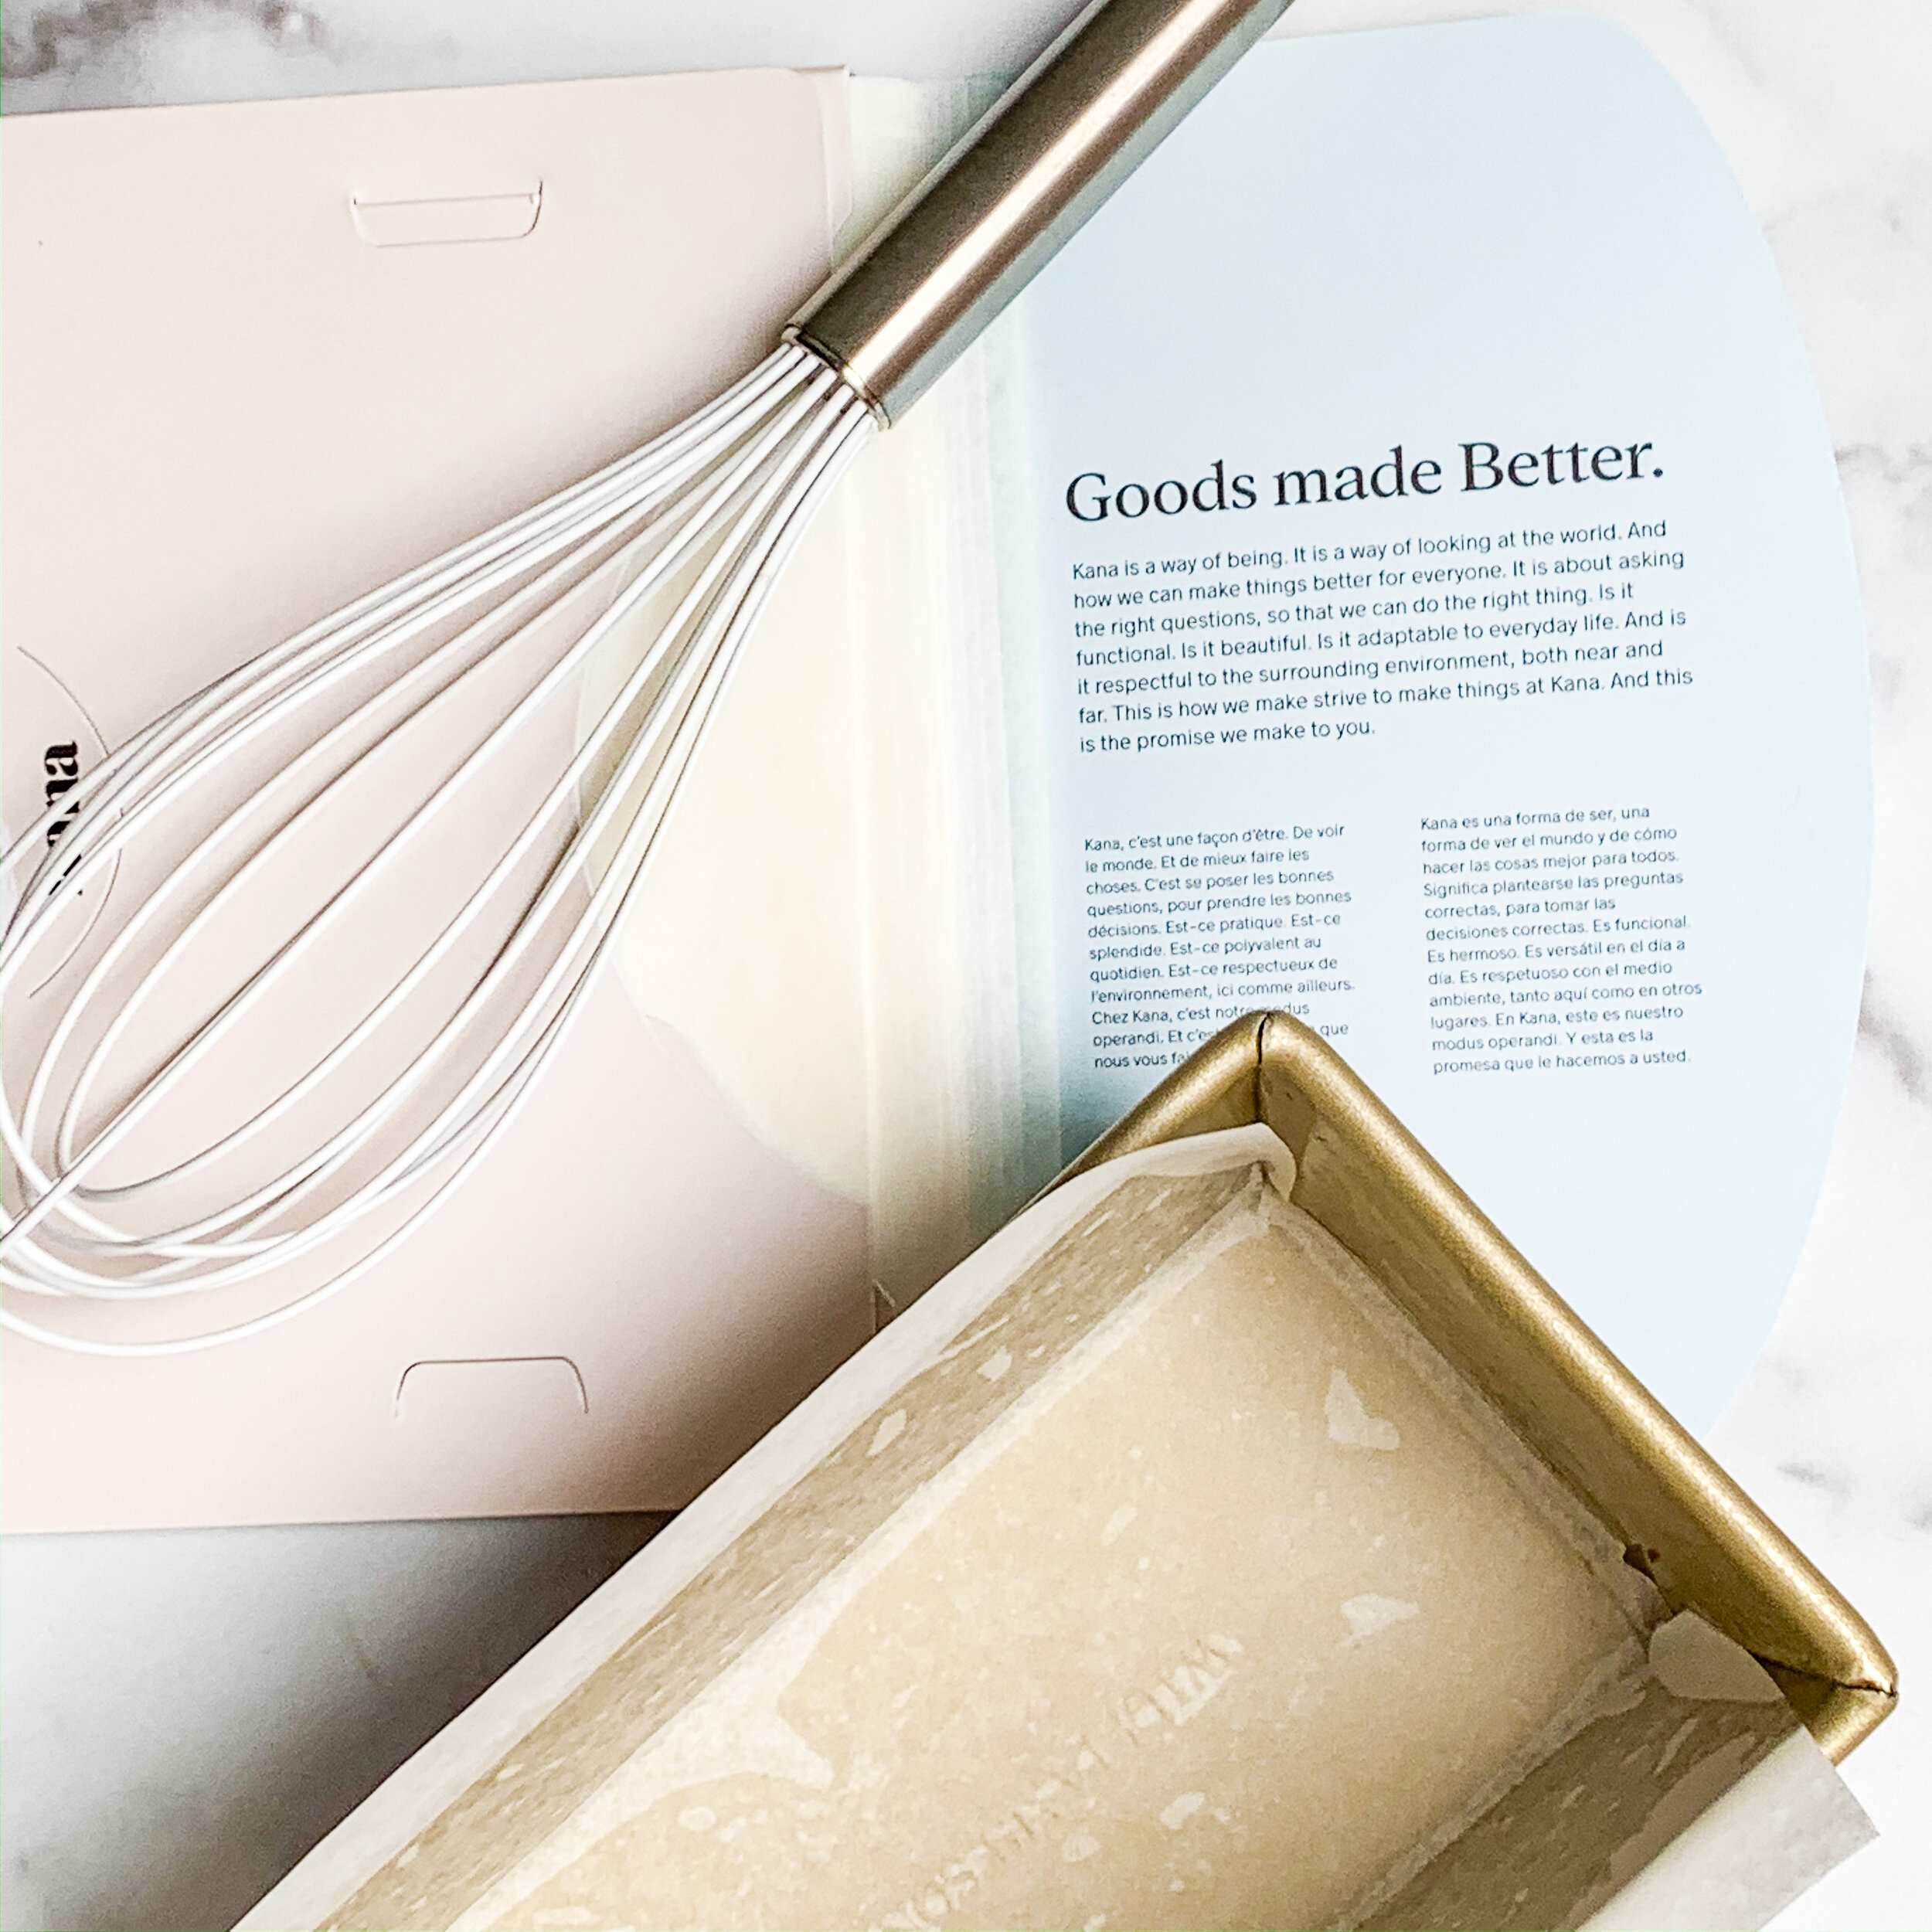
A loaf pan lined with parchment paper with a whisk and the open package of Kana paper

A loaf pan lined with parchment paper with a whisk and the open package of Kana paper

Several packages of pre-cut parchment paper of various sizes

Several packages of pre-cut parchment paper of various sizes

Print Friendly and PDF

Recipe: One Pot Chicken And Rice

Get ready for a flavour explosion! Cajun-inspired Chicken thighs cooked on top of spicy rice and beans, and this all happens in one pot! 

……… Mic Drop

Round white bowl with rice and beans topped with two chicken thighs. A couple chili peppers to the side of the bowl with a fork and spoon.

Round white bowl with rice and beans topped with two chicken thighs. A couple chili peppers to the side of the bowl with a fork and spoon.

ONE POT CHICKEN AND RICE

Prep Time: 10 minutes 
Cook Time: 45 minutes 
Total Time: 55 minutes 
Serves: 4
Author: Mary Mammoliti | Kitchen Confession 


INGREDIENTS

MARINADE:

  • 1 tsp sea salt

  • 1 tsp garlic powder

  • 1 1/2 tsp paprika

  • 1/2 tsp pepper

  • 1/2 tsp dried ground onion

  • 1/2 tsp cayenne pepper

  • 1/2 tsp oregano

  • 1/4 tsp red pepper flakes

  • 1 tsp lemon juice

  • Drizzle enough olive oil over the spices to make a wet paste

REST OF DISH:

  • 2 Tbsp Olive oil

  • 1/4 cup diced pancetta

  • 4 bone-in skin on chicken thighs

  • 1 medium yellow onion diced

  • 1 jalapeno pepper seeded and diced

  • 2 celery stalks diced

  • 1/2 tsp dried oregano

  • 1 tsp dried parsley

  • pinch of red pepper flakes

  • salt and pepper to taste

  • 1 tablespoon tomato paste

  • 1 can red kidney beans, drained and rinsed

  • 1 cup DRY long-grain rice, rinsed

  • 2 1/4 cup chicken stock or broth

  • Minced fresh parsley for garnish

INSTRUCTIONS

  1. Combine all marinade ingredients in a medium sized mixing bowl. Add chicken thighs and turn to coat. Set aside.

  2. Preheat oven to 350 degrees F.

  3. Add drizzle of olive oil to dutch oven and heat over MED-HIGH heat. Brown dices pancetta, then transfer to a plate. 3 min

  4. Add chicken thighs, skin side down, and sear for 2-3 minutes per side, to develop a nice crispy skin.

  5. Transfer chicken to plate with the pancetta.

  6. Lower heat to MED-LOW and add in chopped onion, jalapeno and celery. Saute for about 2-3 minutes, until softened.

  7. Add parsley, oregano, red pepper flakes, tomato paste, salt, pepper and stir.

  8. Add rice, red kidney beans and chicken stock, stir to combine, and let simmer for 1 minute.

  9. Nestle chicken thighs and pancettta on top of the rice (pour in the juices that are left on the plate as well). Return to a simmer, remove from heat, then cover.

  10. Bake at 350 degrees F for 35 minutes (covered).

  11. Remove the lid and bake another 10-15 minutes, until liquid is absorbed into the rice.

  12. Garnish with chopped fresh parsley and serve!

Print Friendly and PDF

Recipe: Golden Delicata Squash Soup with Roasted Garlic Chickpeas

Have you heard of the Delicata or Sweet Potato Squash?

It’s much sweeter than the other squash relatives and the taste reminds me of a mix of sweet corn, and pumpkin.

Today, I’m roasting, blending and simmering it up in my T-Fal 4qt Dutch Oven from their Stackables 10pc Set and whipping up this creamy dairy free soup!

Side note, how gorgeous is the sleek glass lid?!?! Prime real estate in my kitchen is finding a vacant shelve and this T-Fal Stackable 10pc Set has just moved in, taking up minimal space making it perfect for small space storage.

Want the recipe? Keep scrolling.

Golden Delicata Squash Soup with Roasted Garlic Chickpeas

Prep Time: 5 minutes
Cook time: 30 minutes
Total Time: 35 minutes
Serves: 2
Author: Mary Mammoliti / Kitchen Confession

INGREDIENTS

  • 1 delicata squash, cut in half and seeds removed

  • 1 large can of chickpeas (garbanzo beans), drained, rinsed and dried

  • 4 tsp olive oil, divided (plus more to caramelize the onions)

  • 1 medium yellow onion, roughly chopped

  • 3 cloves garlic, minced

  • 1 cup vegetable stock (or chicken stock)

  • 1 tbsp garlic powder

  • 1 tsp onion powder

  • 1/2 tsp cayenne

  • Salt and Pepper to taste

INSTRUCTIONS

  1. Preheat your oven to 400 degrees F.. Cut your delicata squash in half lengthwise and using a spoon scoop out the seeds. Place each half on a baking sheet, and drizzle 2 teaspoons of olive oil over top each fleshy side then sprinkle with salt and pepper. Flip each half cut side down on the baking sheet and roast for 30 minutes or until fork tender.

  2. Toss your drained, rinsed and using a paper towel pat dry the chickpeas to remove some of the moisture and pour them into a bowl. Add the remaining 2 teaspoons of olive oil, garlic powder, onion powder and cayenne until evenly coated. Spread the coated chickpeas onto another baking sheet and roast at the same time as the squash for 20 minutes., mixing the chickpeas halfway to avoid burning them.

  3. While everything is roasting in the oven, roughly chop the onion, mince the garlic. Add a generous amount of olive oil to a large skillet and cook the onions on medium to low heat until soft, fragrant and caramelized - about 5-8 minutes. Add your garlic once the onions are done and cook for a few seconds (careful not to burn). Set aside.

  4. Once your delicata squash is done roasting, let it cool for a few minutes until it’s comfortable to handle and then roughly chop it up. Add your chopped delicata squash, the onions and garlic and the vegetable stock to a heat-safe blender. Blend until creamy and smooth, adding more vegetable stock if needed.

  5. Pour the blended soup to a large pot if desired and let it simmer and heat on the stove until warmed through. Top with the roasted chickpeas and enjoy!

Print Friendly and PDF

Recipe: Tuscan Chicken White Bean and Kale Soup

This is your Friday Fast and Healthy One Pot Meal idea.

Warning - you’re gong to want to pick up a Rotisserie Chicken on the way home and make this TUSCAN CHICKEN WHITE BEAN AND KALE SOUP right away!

I’ve included a BONUS RECIPE. Keep scrolling to the bottom of this post for my Cheesy Garlic Crostini recipe and try not to drool on your screen on the way down :)

Photo Description: A round bowl of soup surrounded by utensils, a napkin, side dish.

Photo Description: A round bowl of soup surrounded by utensils, a napkin, side dish.

Tuscan Chicken White Bean and Kale Soup

Prep Time: 5 minutes
Cook Time: 40 minutes
Total Time: 45 minutes⁣
Serves: 8 ⁣
Author: Mary Mammoliti / Kitchen Confession

INGREDIENTS⁣

1 rotisserie chicken⁣
2 tablespoons olive oil⁣
2 leeks, finely chopped⁣
2 large carrots, finely diced⁣
8 Little Potato Company fingerling potatoes, diced⁣
2 cloves garlic, minced⁣
2 bay leaves⁣
2 (15 ounce)cans white kidney beans, drained and rinsed⁣
1 bag pre cut kale or 2 bunches kale, stems removed and roughly chopped⁣
9-10 cups low-sodium chicken stock⁣
Kosher Salt and Freshly Ground Black Pepper, to taste⁣

INSTRUCTIONS⁣

  1. Pull apart the rotisserie into bite size pieces and set aside⁣

  2. In a large pot, heat 2 tablespoons olive oil over medium heat. Add leeks, carrots, and potato. Season with kosher salt and cook until vegetables begin to soften, stirring occasionally, approximately 7-10 minutes. Add garlic, bay leaves, beans, and cook for 2-3 minutes. Add kale, and cook until it becomes slightly wilted. Add chicken, chicken stock, season with a little more salt, pepper, and cover with lid.⁣

  3. Bring soup to a boil, then reduce heat to a simmer and cook for about 30 minutes. The soup will thicken as the potatoes begin to release their starch into the soup.⁣

    NOTE: This soup tastes even better the next day.⁣

⁣BONUS RECIPE!

CHEESY GARLIC CROSTINI

INGREDIENTS

1 baguette
¼ cup olive oil
1 teaspoon garlic powder
½ teaspoon onion powder
Gruyere and Asiago Cheese, shredded

INSTRUCTIONS

  1. Preheat the oven to 375°F.
    Combine olive oil, garlic powder and onion powder in small bowl. Set aside.

  2. Slice baguette crosswise into approximately ¼-inch pieces. Place baguette slices onto lightly greased baking sheet.

  3. Brush baguette slices with olive oil mixture. Turn over baguette slices and brush opposite side with olive oil mixture.

  4. Bake for 5-7 minutes. Remove from oven and flip baguette slices. Bake for another 5 minutes, top with cheese and broil for 1 minute until the cheese melts but watch it carefully not to burn it. Remove from oven and serve along inside the soup.

Store leftovers in an airtight container.

HOT TIP: If you don’t plan on eating the entire baguette of crostini prepare them and instead of baking them place them in a resealable freezer bag and freeze. 

Print Friendly and PDF

Recipe: Your Complete Thanksgiving Guide

Thanksgiving dinner menus will help you plan a fabulous meal. Build your menu around your traditional favourites or try a new Thanksgiving recipe, having a plan will make your meal prepping run smoothly. 

Question: Where do I begin?

Create Your Menu

Hosting Thanksgiving means you need a plan, and that means a menu. I want you to start planning now, go through your recipes, do a quick head count of how many people are going to attend. Next, start building a list of dishes you plan to make and then eliminate 1/2 of the list. You don’t need hassle back potatoes and mashed potatoes - pick one.

As the host you will always think you don’t have enough food. I’ve always said I would rather have more than not enough, I don’t want my guests to leave hungry. 

I guarantee your guests will only take a bit of each dish so no need for 2 pounds of peas and mushrooms. 

ONE WEEK Prior To The Event

Gather all your serving dishes; or make a list of all the dishes you need for that day and where to find them in your home. If you are missing something it gives you enough time to borrow or pick it up. You don’t want to be scrambling the day of when you have guests over.

Create your checklist; of tasks to be accomplished prior to your event and input them as events in your calendar.

Grocery Shopping; Create 2 grocery lists: 5 days before the meal buy Turkey (if buying frozen) and non-non-perishables, and 3 days before the meal for perishable items and any last minute things you need.

Question: How long does it take to defrost a Turkey? 

For every 5 pounds the turkey will take 24 hours to defrost in the refrigerator.

Example: A 20 pound frozen turkey will need 4 days of thawing in the refrigerator

Question: When should I buy a fresh Turkey?

If buying fresh, purchase your Turkey the day prior to the event.


TWO DAYS Prior To The Event Date

Prepare as much as you can before the big day.

Make your cranberry sauce and cut veggies. wash trim and halve Brussels sprouts, peel and slice carrots, snap green beans, celery, etc. Make salad dressings and wash and dry lettuce/greens for salad.

ONE DAY Prior To The Event

Peel, wash and cut potatoes into cubes. Soak in cold water, cover and place in the refrigerator over night. This eliminates some of the starch in the potatoes and crisp up nicely in the oven or place them in a slow cooker the day of and make mashed potatoes.

Prep your Turkey (step by step instructions below)

Set your table, take out your serving dishes, prepare your stuffing. You can also make your mashed potatoes and reheat them in the slow cooker/crock pot the day of. If you are roasting veggies you can cook them the night before and heat through just before you are serving the meal.

Question: Can I make dessert in advance?

Bake your pies the night before and refrigerate overnight. On the day of, remove the pie from the refrigerator, place on the counter to bring the pie to room temperature. Place the room temperature pie in the oven on low and heat through while you are enjoying your meal.

  • Frozen - ready in an hour, bake while you are having lunch or dinner. hot fresh out of the oven. top with ice cream

  • If you prefer homemade. Make the pie dough and roll out into pie plates 1 week before and freeze them.

  • A few cheats: Williams Sonoma has pre-made stuffing, add your liquid and it’s done. They also have pecan pie filling in a jar. Buy the ready made small tartlet crust from the grocery store and scoop the filing into each one and bake.


How long does it take to cook a Turkey?

Cooking times can vary

Calculate 13 minutes cooking time per pound would be a good estimate. Let me break it down a bit more, It should take a 14 lb. turkey 2 1/2 to 3 hours to cook.

Question: How do I cook a Turkey?

 Prep your turkey the night before

There is always an ongoing debate “do you wash raw meat” and when preparing your Turkey i’ll leave that up to you. I don’t and this is why; washing the turkey can contaminate your kitchen, the water can spray on your back splash, all over your sink. Cooking the Turkey to the right temperature will kill any bacteria that may be lingering in your turkey - you can’t wash that away.

To brine or not to brine? There are people who stand strongly on both sides of this question. So if you brine your turkey go ahead, but for me I don’t bother with the extra step. I get great tasting and moist turkey without.

Stuffing or no Stuffing? I can take it or leave it, I’m not big on stuffing but I do make it in a separate dish. I find the Turkey cooks faster without the stuffing but the stuffing is not as moist as it would be if it were in the turkey. So for this I say do as you want.


Print Friendly and PDF

Recipe: Creamy Broccoli Cheese Soup

Soup season has arrived and I’m here for all of the delicious bowls of heart warming meals. Every time I hear someone say Broccoli I think of Dana Carvey’s SNL Choppin' Broccoli song. If you haven’t heard it or have no idea what I’m talking about Google it. I promise you won’t be disappointed.

So, naturally I was singing it while making this Cheese and Broccoli Soup! Hey Dana, can you add Soup to the song? It could go something like this “she’s Choppin' Broccoli - AND MAKING SOUP”

Well I’m sure that won’t happen but I can tell you this did happen. Probably one of the creamiest Cheese and Broccoli Soups I’ve ever made and I’m sharing it with you today. Enjoy my friends!

PHOTO DESCRIPTION: A rich yellow soup with shredded cheddar cheese as a garnish on a white plate with a silver spoon laying beside the plate over a white and tan linen place mat.

PHOTO DESCRIPTION: A rich yellow soup with shredded cheddar cheese as a garnish on a white plate with a silver spoon laying beside the plate over a white and tan linen place mat.

Creamy Broccoli Cheese Soup

Prep time: 10 minutes
Cook time: 45 minutes
Total time: 55 minutes
AUTHOR: Mary Mammoliti / Kitchen Confession

INGREDIENTS

1 tablespoon + 4 tablespoons unsalted butter, divided
1 medium sweet yellow onion, diced
1 clove garlic, minced
1/4 cup all-purpose flour
2 cups low-sodium vegetable or chicken stock
2 cups fat-free half-and-half (regular half-and-half may be substituted; whole milk or 2% milk will work but soup won’t be as creamy)
3 cups broccoli florets, diced into bite-size pieces + 1 cups stems
2 large carrots, peeled, and sliced into very thin rounds
3/4 teaspoon salt, or to taste
3/4 teaspoon freshly ground black pepper
1/2 teaspoon smoked paprika
1/2 teaspoon dry mustard powder
pinch cayenne pepper, optional
8 ounces grated sharp cheddar cheese, with a small amount reserved for garnishing bowls

NOTE: Do not use pre-grated cheese in ziptop bags because that cheese is resistant to melting and won’t incorporate well. ⁣

DIRECTIONS

  1. In a small saucepan, add 1 tablespoon butter, the diced onion, and sauté over medium heat until the onion is soft and translucent, about 3 minutes.

  2. Stir in the garlic and cook until fragrant, about 30 seconds. Remove from heat and set the pan aside.

  3. In a large stock pot over medium heat add 4 tablespoons butter, flour, and whisk continuously for 3 minutes, or until the mixture has thickened. This is your roux.

  4. Slowly whisk the vegetable stock into the roux (flour mixture), add the cream to your pot and whisk to combine.

  5. Allow mixture to simmer over low heat for 15 minutes, or until it has reduced and thickened. TIP: Whisk intermittently to keep a creamy constancy.

  6. While the mixture is simmering, chop the broccoli and carrots and add the to the soup at the end of your simmering time of 15 minutes and add the onion and garlic you previously set aside to the pot.

  7. Add the salt, pepper, paprika, dry mustard powder, and cayenne and stir to combine, and continue to simmer over low heat for 20 to 25 minutes. Stirring occasionally to avoid burning the soup.

  8. While your soup simmers, grate the cheese and add most of the cheese at the very end of your cooking time, reserving a small amount for garnishing bowls. Stir the cheese into the soup until melted and incorporated.

  9. Transfer soup to bowls, garnish with reserved cheese, and enjoy.

    NOTE: Soup will keep refrigerated in an airtight container for 5 to 7 days.

Print Friendly and PDF

Recipe: Pasta é Fagioli

Today’s plans include serving up a bowl of this Pasta é Fagioli. I haven’t made this in years and to be honest I’m disappointed that I waited so long. I almost forgot how much this dish reminded me of my Dad - or did I? My Dad passed 9 years ago and up until this past year I haven’t been able to think of him without my eyes welling up. Maybe that’s why I haven’t made this dish, hmmm, was I avoiding feeling all the feels that come with losing him? Have I truly accepted the loss? Ugh! Maybe I’m over analyzing this. Whatever the reasons are I’m glad I finally made this dish. It was like a giant hug from my dad, warm and comforting.

The pot simmered as the aromas filled my kitchen and memories folding my thoughts. He was a man of very few words with a sense of humour that would make even the darkest of days brighter. It’s funny how a simple meal can trigger a rush of emotions and even help put unresolved feelings to rest. I guess it’s okay to feel the feels, mourn the loss of a loved one, friend, pet, illness whatever your struggling with at your own pace and don’t avoid feeling it because you may just miss out on the simplest joys of what life has to offer.

I know it’s a pretty deep post for Pasta é Fagioli but it’s amazing how healing food can really be. I hope you read this and find solace in knowing you are not alone and find strength in any struggle you my be facing today. It’s okay to feel all the feels, and take it easy on yourself. Life has a sweet way of surprising you. SMILE and Tag, call or text someone today and let them know you care. I’M TAGGING ALL OF YOU! ❤️

IMG_9692.JPG

 Pasta é Fagioli

PREP TIME: 20 min
COOK TIME: 30 min
TOTAL TIME: 50 min
SERVES: 6 - 8
AUTHOR: Mary Mammoliti / Kitchen Confession

INGREDIENTS

1 tablespoon olive oil
1 tablespoon unsalted butter
1/3 to 1/2 cup pancetta, diced
1 medium onion, diced (approximately 1 cup)
2 teaspoons minced garlic
2 medium carrots, peeled and diced
3 large potatoes, diced
4 cups tomato purée, preferably San Marzano tomatoes if you can get them)
1 cup Ditalini or elbow pasta
1/2 teaspoon dry thyme
1 teaspoon dry rosemary
1 teaspoon celery seeds
1 bay leaf
Salt and pepper to taste
5 cups low-sodium chicken broth
2 (14.5-ounce) cans 1 can red kidney beans and 1 can white kidney beans, drained and rinsed
3/4 cup elbow macaroni
Freshly ground black pepper
Pinch red pepper flakes, optional
Freshly grated parmigiano reggiano to sprinkle on top just before serving

INSTRUCTIONS

  1. Heat 1 tablespoon of olive oil and butter in a large heavy saucepan over medium heat. Add the onion, pancetta, and garlic and saute until the onion is tender, about 3 minutes. Add diced carrots, potatoes and continue cooking for an additional 2-3 minutes.

  2. Add the broth, tomato purée, beans, dried herbs, salt and pepper. Bring to a boil over high heat, then decrease the heat to medium and simmer until the vegetables are tender, about 10 minutes.

  3. Scoop out 1 cup of the bean mixture from the pot and 1/2 cup of the liquid and pour into a blender until smooth and set aside.

  4. Add the pasta to the pot and boil with the already cooked veggie mixture for 8 minutes until tender. Return the puree to the pot of soup and stir well. Season the soup with red pepper flakes for an added kick of heat.

  5. Serve warm with a sprinkle of freshly grated parmigiano reggiano


Print Friendly and PDF