Recipes

Recipe: One Pot Spicy Sausage Penne

Well hello you sexy bowl of Spicy Penne and Sausage. Picture it, feel it, make it :) This ONE POT SPICY SAUSAGE PENNE PASTA is what we need on a Monday and the first day back to work after losing an hour of sleep. I’m an exhausted mess this morning. I was still awake at 11:30pm and “rave” hours for me! Then 5:30 am rolls around and I can’t find the snooze button on the alarm because he’s up and calling first dibs on the shower - love you Frank (kisses) Can we go back please? I already miss that hour. Tell me your thoughts on daylight savings time because I.JUST.CAN’T!


IMG_5722.jpeg

One Pot Spicy Sausage Penne

Prep time: 15 minutes 
Cook time: 15 minutes 
Total time: 30 minutes 
Author: Mary Mammoliti | Kitchen Confession 

Ingredients 

  • 2 tbsp olive oil

  • 4 Italian Sausage links

  • 1 onion, diced

  • 2 cloves garlic

  • 1 tsp salt

  • 1/2 tsp black pepper 

  • 1/2 to 1 tsp red chili flakes

  • 1 (796mL) can diced tomatoes

  • 1 (680mL) jar tomato purée 

  • 1 1/2 cups low sodium beef broth 

  • 1 lb dried penne rigate

Topping Options

  • Chopped fresh basil 

  • Grated Parmesan 

Instructions 

  1. In a large pot, heat 2 tbsp olive oil on med-high heat. Add turkey sausage, searing for about 2-3 minutes per side. This step maintains the shape of the sausage when slicing it in the next step.

  2. Using tongs, remove sausage and when cool, slice into bite-sized pieces. Meanwhile, add the onion to the pot and sauté for 1-2 minutes until translucent and garlic and continue to cook for about a minute or until fragrant.

  3. Add sausage pieces back into pan, add salt, pepper and red chili flakes and sauté for another 2-3 minutes. Add diced tomatoes, tomato sauce and beef broth and bring to a boil, cover, lower heat to simmer and cook for 15 minutes.

  4. Add penne to the pot, stir and cover with a lid and cook, stirring occasionally, for another 8-10 minutes until pasta is al dente - fork tender and most of the liquid is absorbed.

  5. Plate your pasta, top with a generous amount of freshly grated parmesan and fresh basil

Print Friendly and PDF

Recipe: The Best Cheese and Broccoli Soup

In my opinion, Cheese and Broccoli Soup the ultimate comfort food! It’s deliciously cheesy, rich, creamy, and exactly what a warm bowl of comfort food should be. This soup is truly one of the best bowls of cheese and broccoli I’ve had in a long time! Made with minimal ingredients, it’s hearty, loaded with broccoli, brimming with fresh flavours and it’s easy to make. Bring on sweater weather, I’m ready!

Pin this recipe and get ready to make this warm and cozy soup all winter long. Soups really do make the colder months much more bearable - am I right?

For a step by step video on how to make this Tasty Cheese and Broccoli Soup visit my Instagram @kitchenconfession

The Best Cheese and Broccoli Soup

Prep Time: 15 minutes
Cook Time
: 45 minutes
Total Time: 60 minutes
Serves: 3-4 decent sized bowls

INGREDIENTS

  • 1 tablespoon + 4 tablespoons unsalted butter, divided

  • 1 medium onion, finely diced

  • 1 clove garlic, minced

  • 1/4 cup all-purpose flour

  • 2 cups low-sodium chicken stock

  • 2 cups half-and-half cream

  • 3-4 cups broccoli florets and stems, diced into bite-size pieces

  • 2 large carrots, peeled, and sliced into thin rounds, about 1/16th-inch

  • 1 teaspoon kosher salt

  • Freshly ground black pepper to taste

  • 1/2 teaspoon paprika

  • 1/2 teaspoon dry mustard powder

  • pinch cayenne pepper

  • 8 - 10 ounces (280g) grated aged cheddar cheese, reserve a bit to garnish bowls

INSTRUCTIONS

  1. In a large heavy-bottom pot, add 1 tablespoon butter, the diced onion, and sauté over medium heat until the onion is soft and translucent, about 4 minutes.

  2. Add the garlic and cook about 30 seconds. Using a spoon, scoop the onion and garlic mixture from the pot onto a plate and set aside.

  3. In the same pot add 4 tablespoons butter, flour, and cook over medium heat for about 3 to 5 minutes, whisking constantly, until flour is thickened. this is called a roux and it’s a very important step do not skip or soup will not reach the desired thickness.

  4. Continue whisking and slowly add the vegetable stock. and repeat this process for the half-and-half cream.

  5. Stop whisking, and allow the mixture to simmer (not boil) over low heat for about 15 to 20 minutes.

  6. While mixture is simmering, chop the broccoli and carrots. After simmering 15 to 20 minutes, add the broccoli, carrots, the onion and garlic to the pot, mix to incorporate.

  7. Add the salt, pepper, paprika, dry mustard powder, and cayenne (if you are using it). Stir to combine.

  8. Stirring intermittently, while simmering soup over low heat for about 20 minutes, or until it has reduced and thickened.

  9. While soup simmers, grate the aged cheddar cheese. Do not use pre-grated cheese in zip top bags because that cheese is resistant to melting and will change the texture and taste of the soup. After 20 minutes, add grated cheese, reserving a small amount for garnishing the bowls when serving. Give the soup a couple of stirs, the cheese will melt in and transfer soup to bowls, garnish with reserved cheese, and serve immediately.

RECIPE NOTES AND TIPS

  • Store soup in an airtight container for 5 to 7 days in the fridge.

  • Milk alternative, whole milk or 2% milk will work but soup won’t be as creamy.

  • I recommend using fresh broccoli, but if you are tight on time a bag of frozen broccoli florets will work.

  • Keep this soup vegetarian by using vegetable broth in place of the chicken broth and milk alternative in place of the cream.

TOOLS I USED IN THIS RECIPE

Whisk | Heavy Bottom Pot | Wooden Spoon | Soup Bowls | Ladle | Box Grater

Print Friendly and PDF

Recipe: Quick Chunky Beef Chili

When I make a dish that I love it immediately goes on repeat. Get ready to see this QUICK CHUNKY BEEF CHILI on my instastory all.winter.long. It’s hearty, packed with warm flavourful spices and it’s ready in only 30 minutes! .

.

WHAT’S YOUR GO TO DISH? 😊

IMG_9514.JPG

Quick Chunky Beef Chili

Ingredients

  • 1 1/2 pound lean ground beef

  • 2 tablespoon olive oil

  • 1 medium onion chopped

  • 2 tablespoons tomato paste

  • 1 red bell pepper, diced

  • 1 teaspoon Worcestershire sauce

  • 1 teaspoon soy sauce

  • 1 1/2 teaspoons unsweetened cocoa powder

  • 2 tablespoons chili powder

  • 1 teaspoon garlic powder

  • 1 teaspoon ground cumin

  • 1 teaspoon smoked paprika

  • 1/2 teaspoon cayenne pepper, optional

  • 1 (19 fl oz/540 ml) can red kidney beans, drained & rinsed

  • 1 (19 fl oz/540 ml) can pinto beans, drained & rinsed

  • 1 (28 fluid ounce) can fire-roasted diced tomatoes with juices

  • 1 cup beef broth * Salt & pepper to taste

toppings (optional)

  • Shredded cheddar cheese

  • Sour cream

  • Sweet Potato Tortilla Chips

Instructions

  1. Add olive oil to a large pot over medium-high heat. Sauté the onion for 5-7 minutes or until it's softened.

  2. Add the beef to the pot and cook for 5 minutes, breaking it up as you go, until brown

  3. Stir in the tomato paste, Worcestershire sauce, soy sauce, cocoa powder, chili powder, garlic powder, cumin, paprika, and cayenne pepper.

  4. Add the diced red pepper, beans and diced tomatoes, and beef broth. Increase heat to high and bring it to a gentle boil, then reduce heat and let it simmer for 20 minutes, stirring occasionally.

  5. Season with salt & pepper and serve with desired toppings and enjoy. 

Print Friendly and PDF

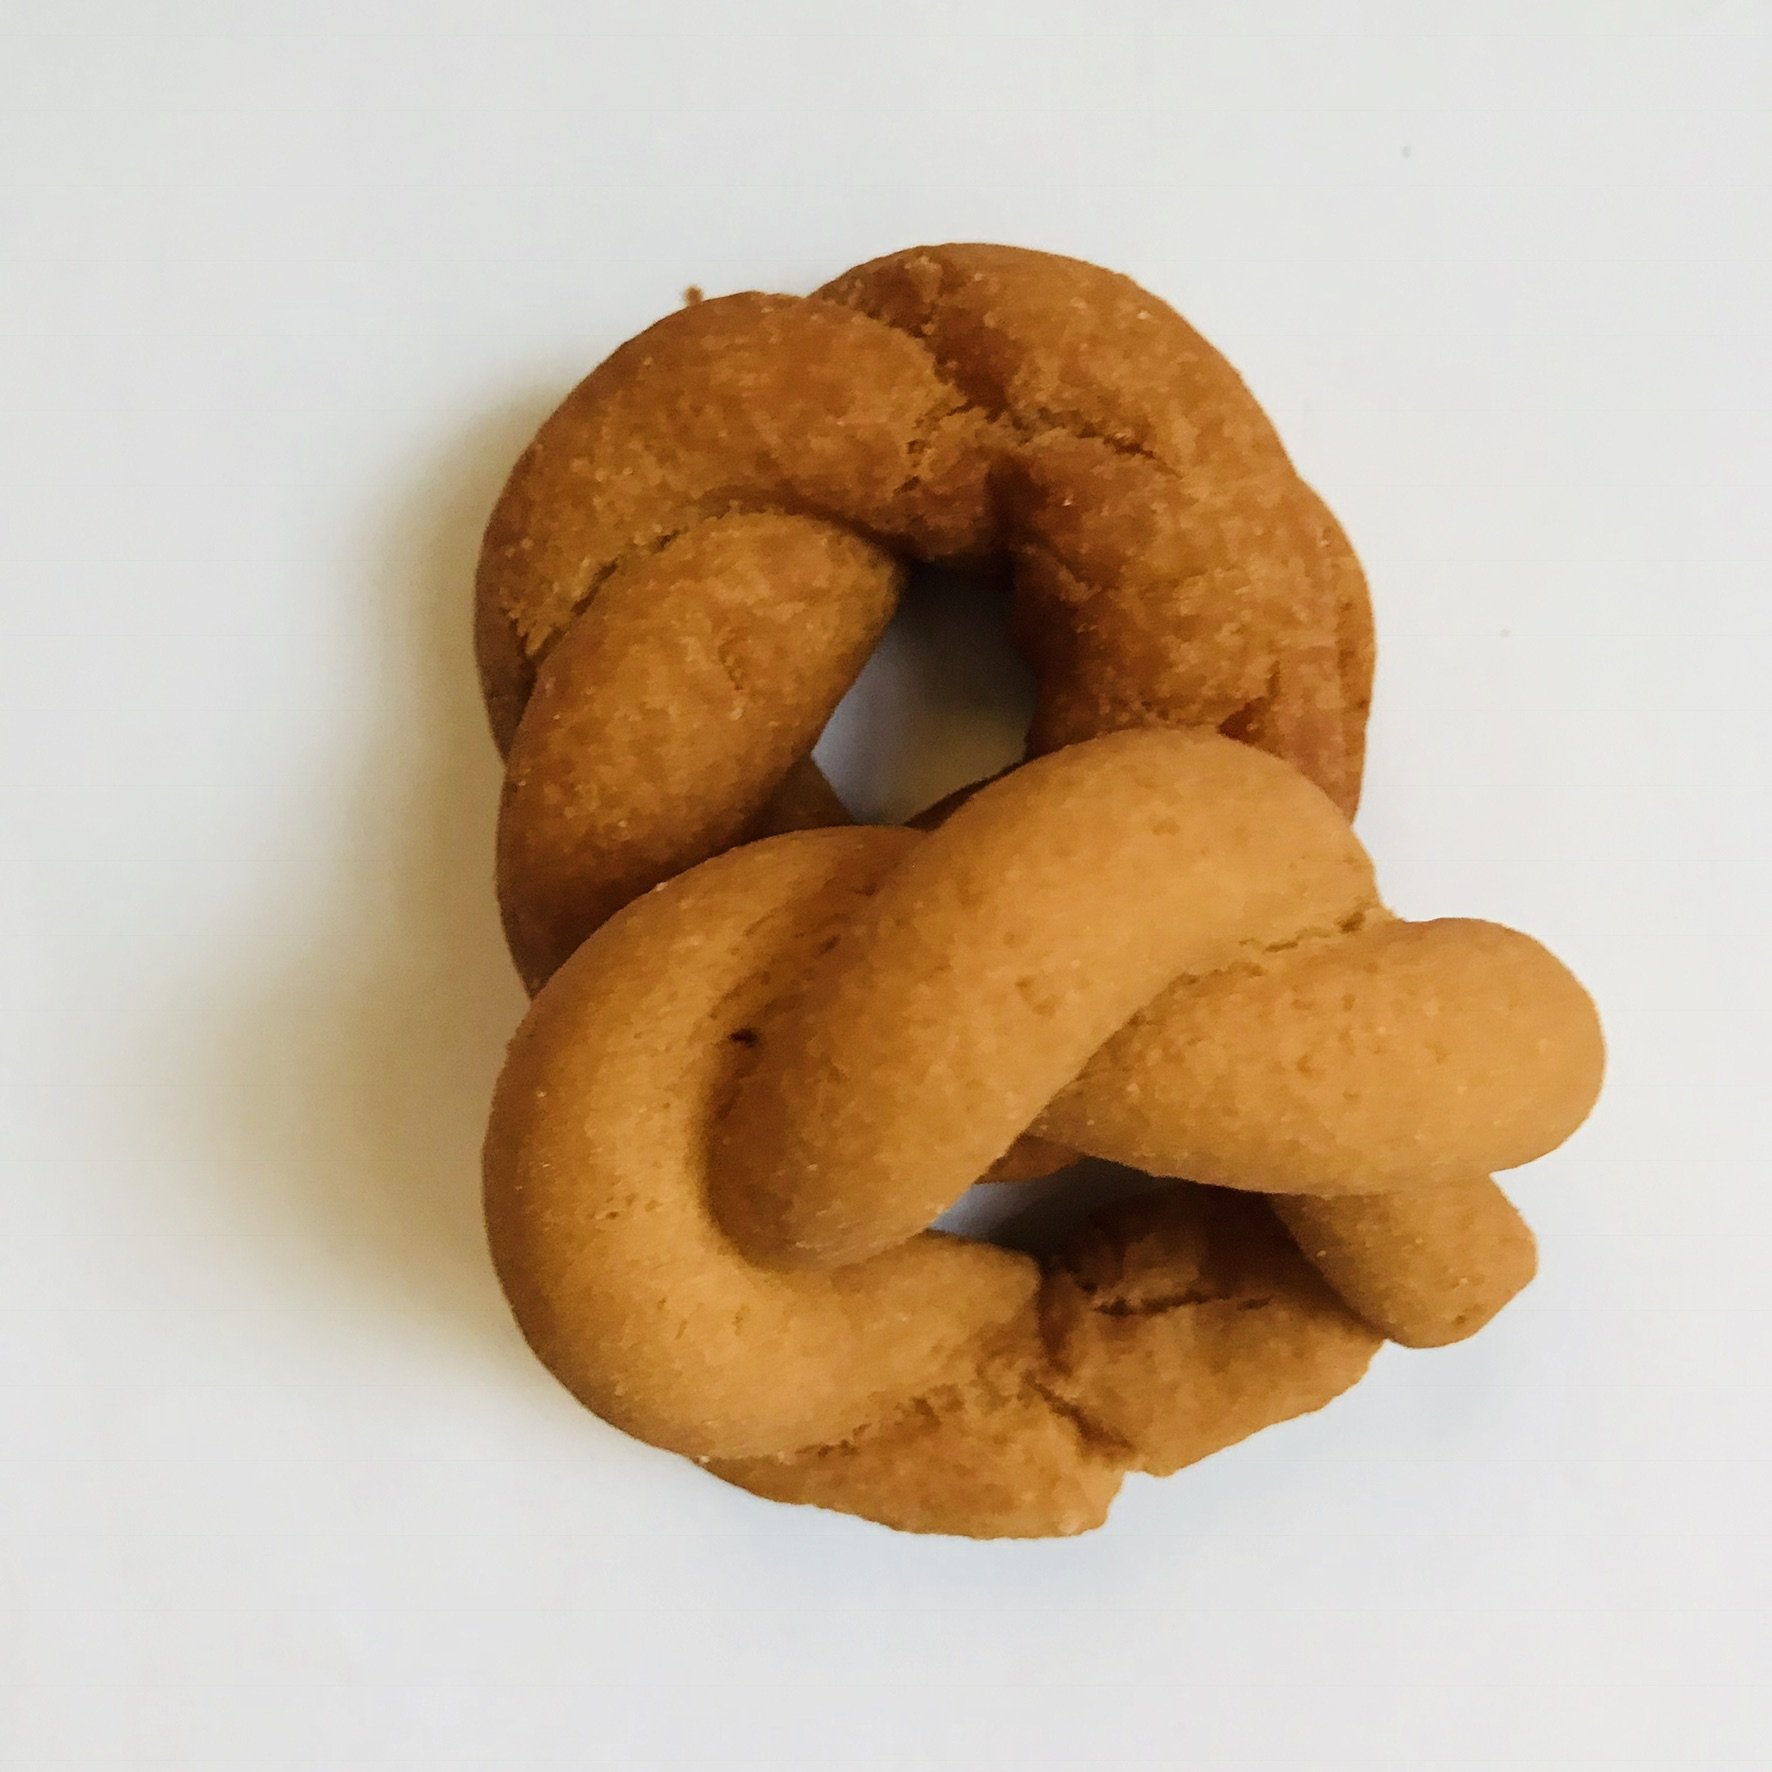
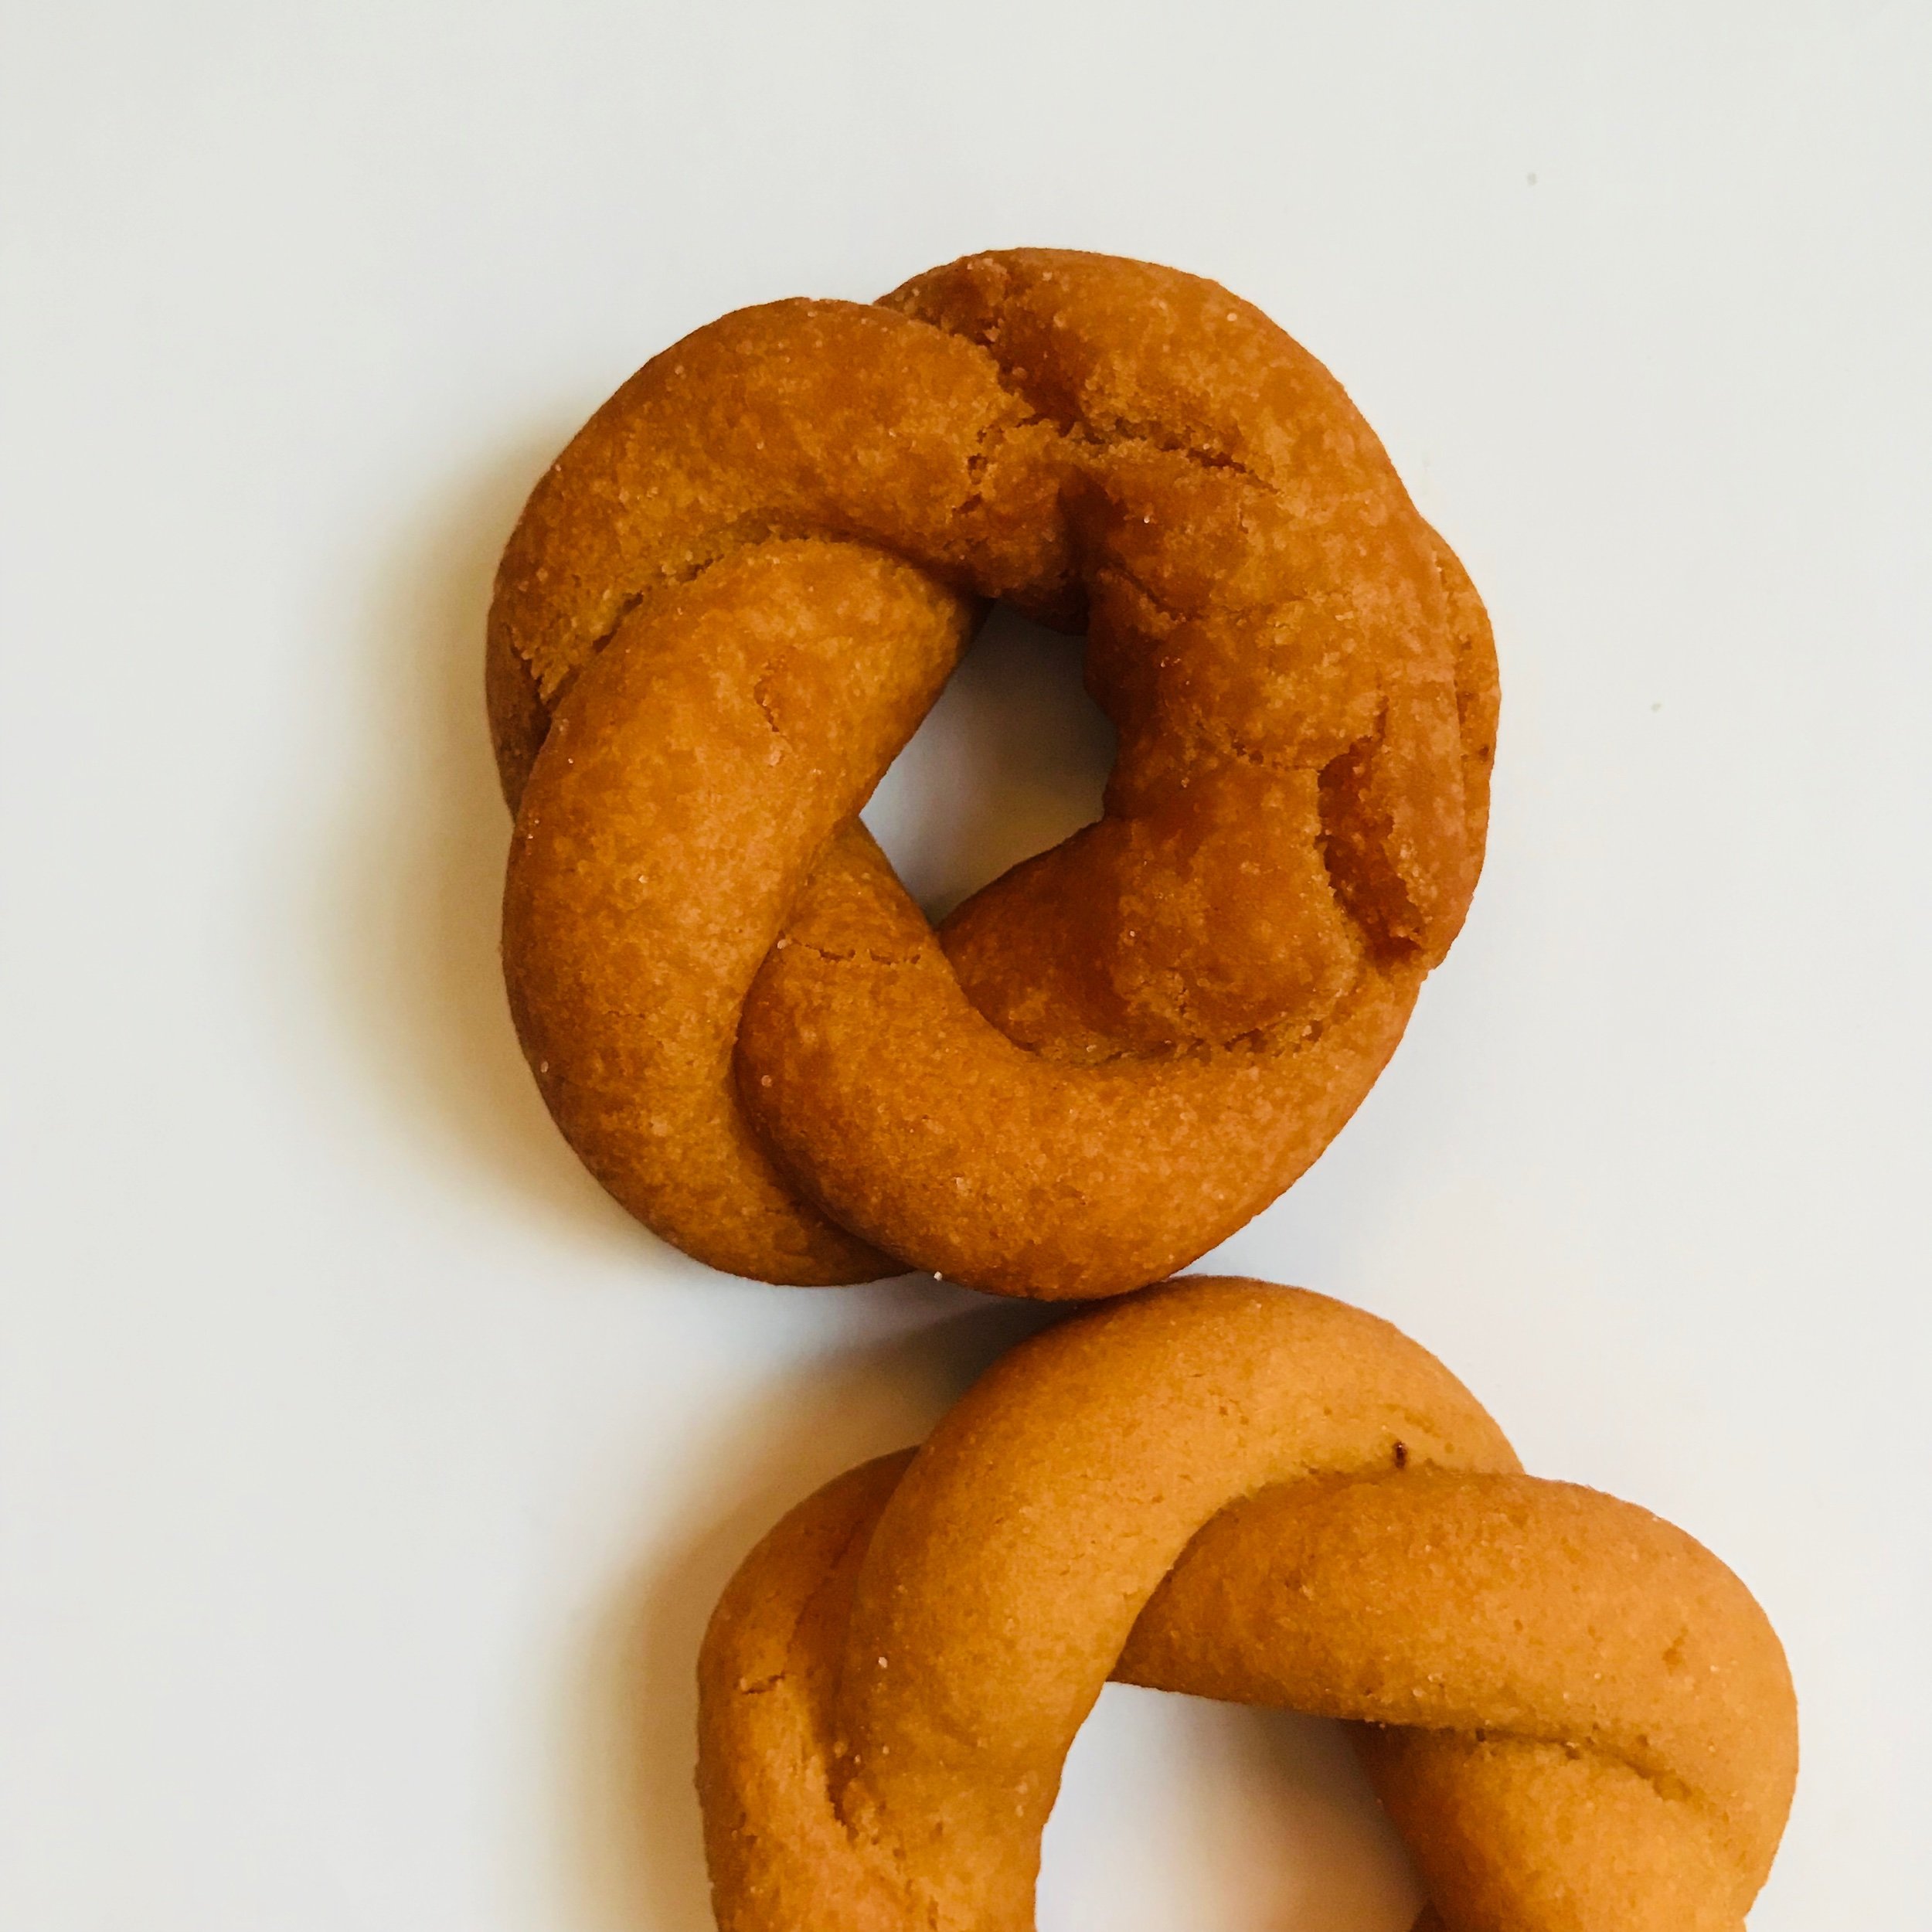
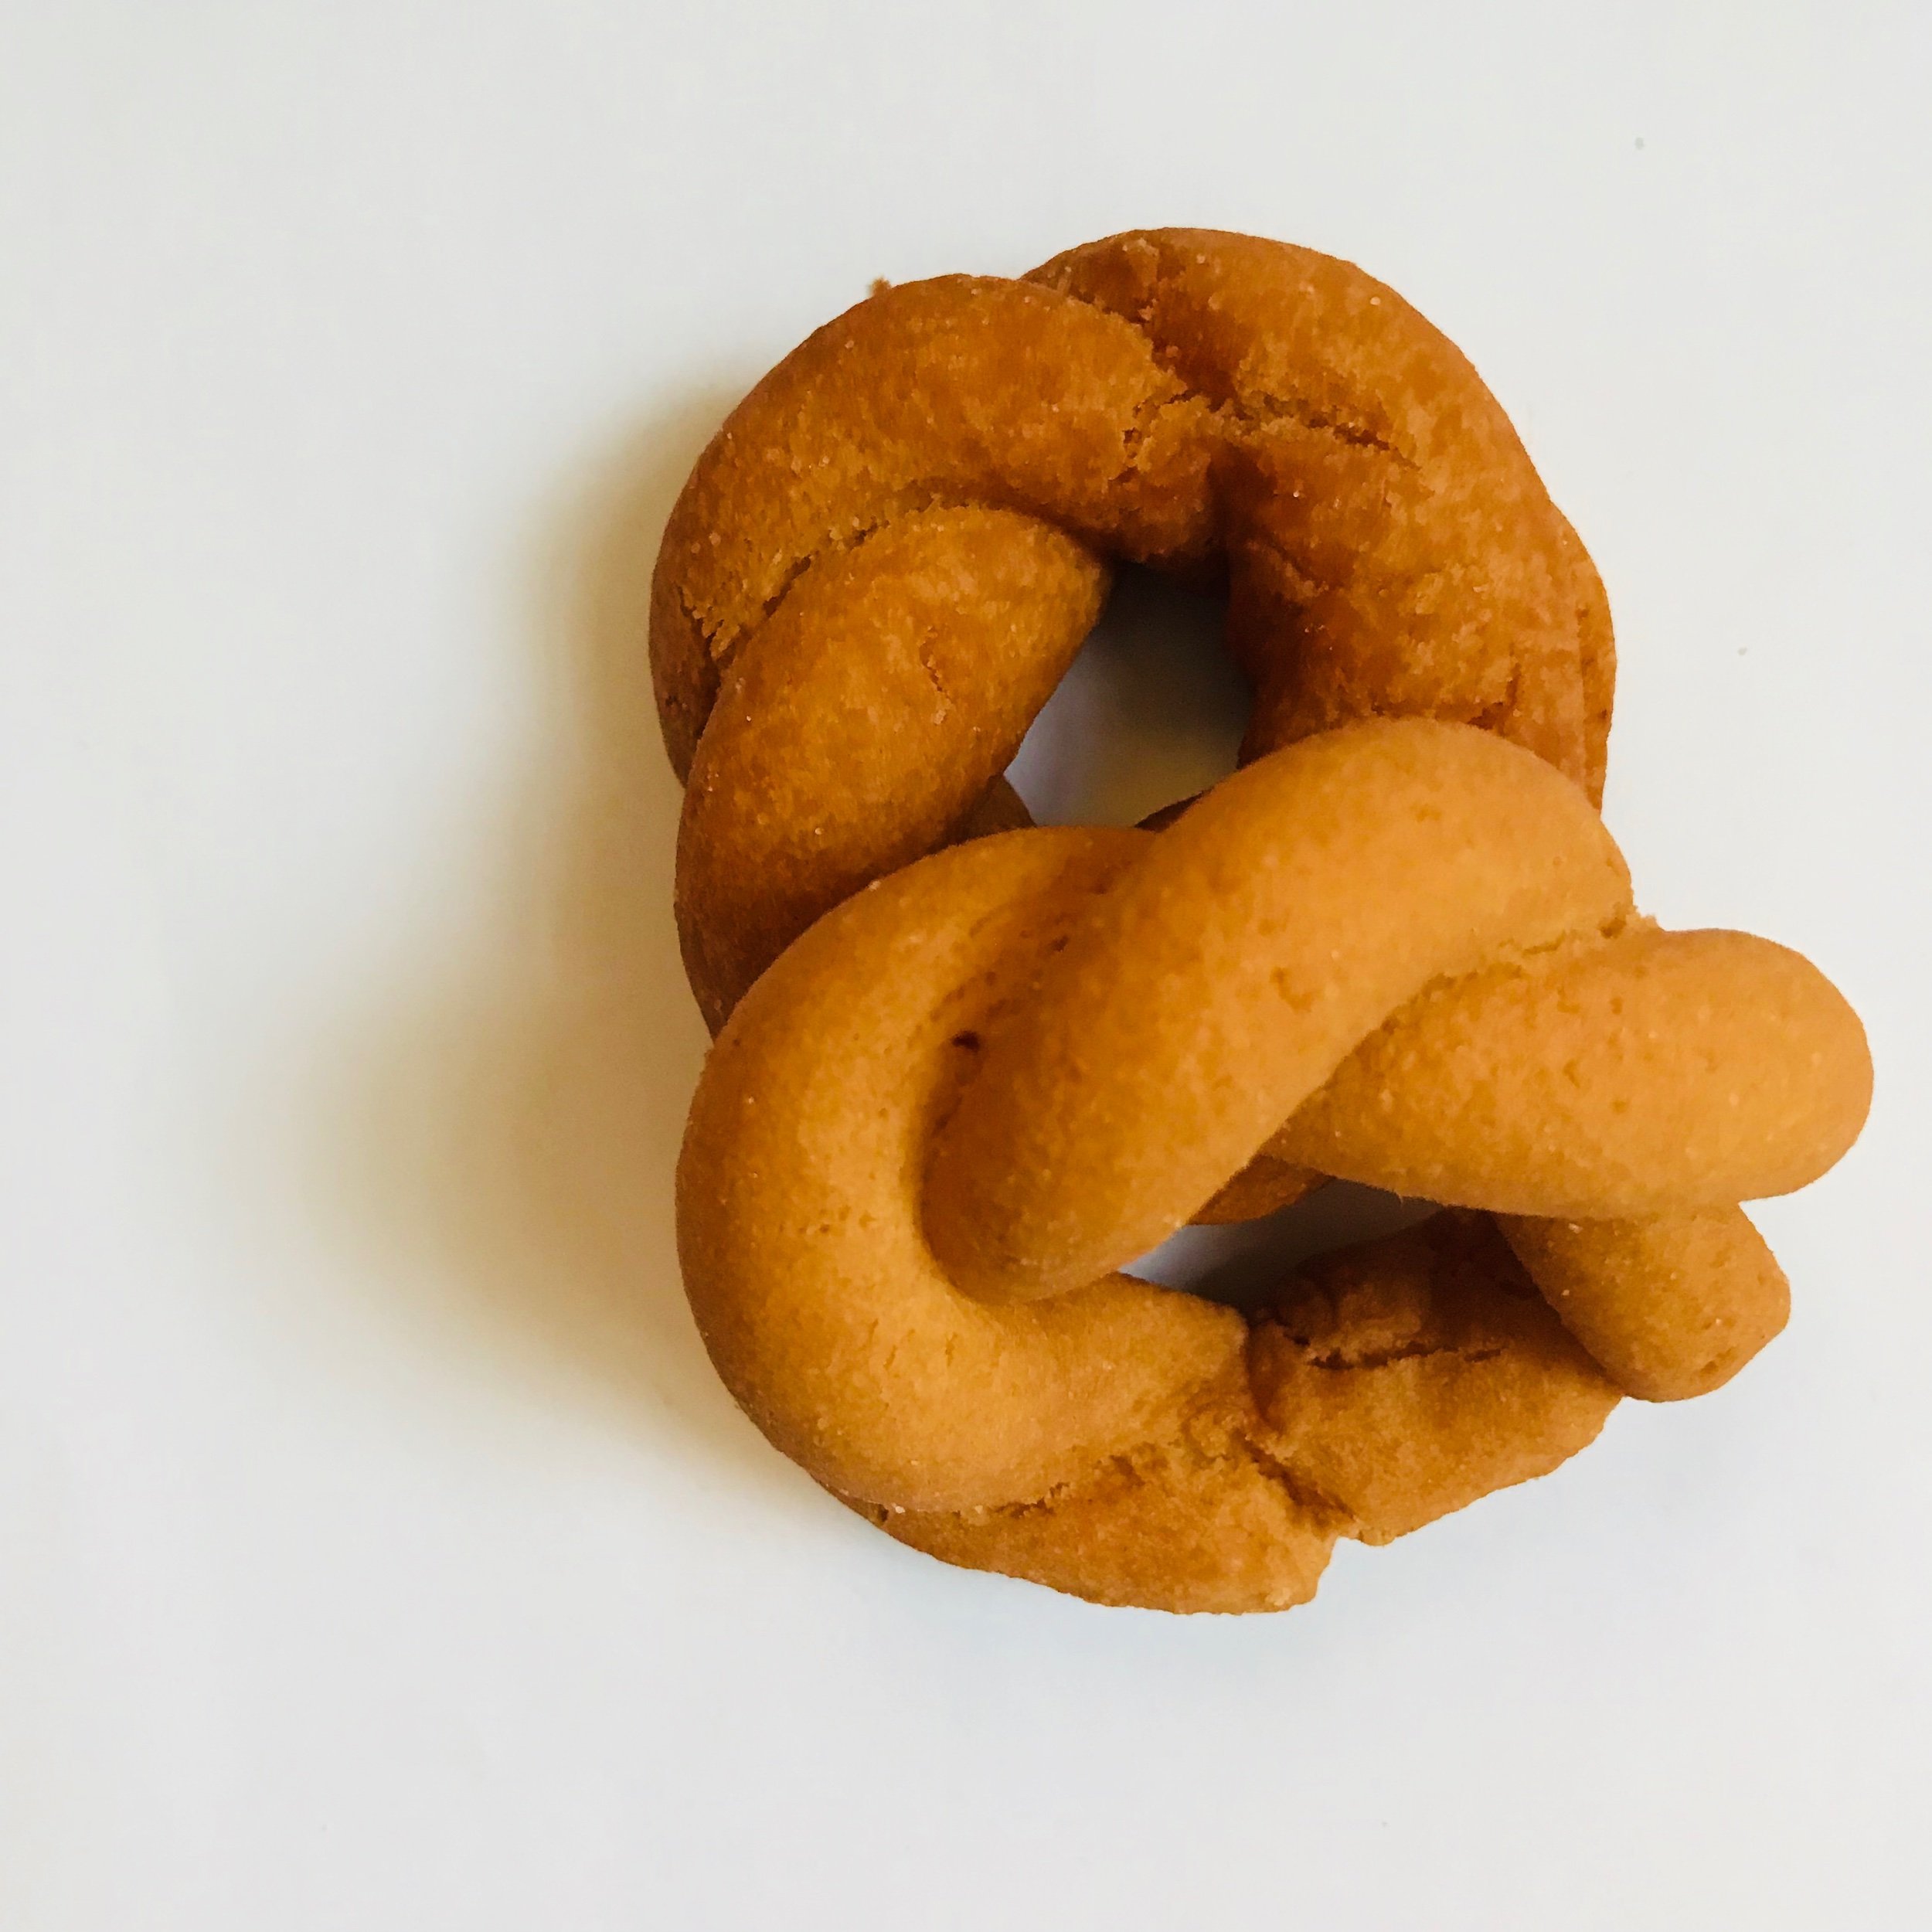
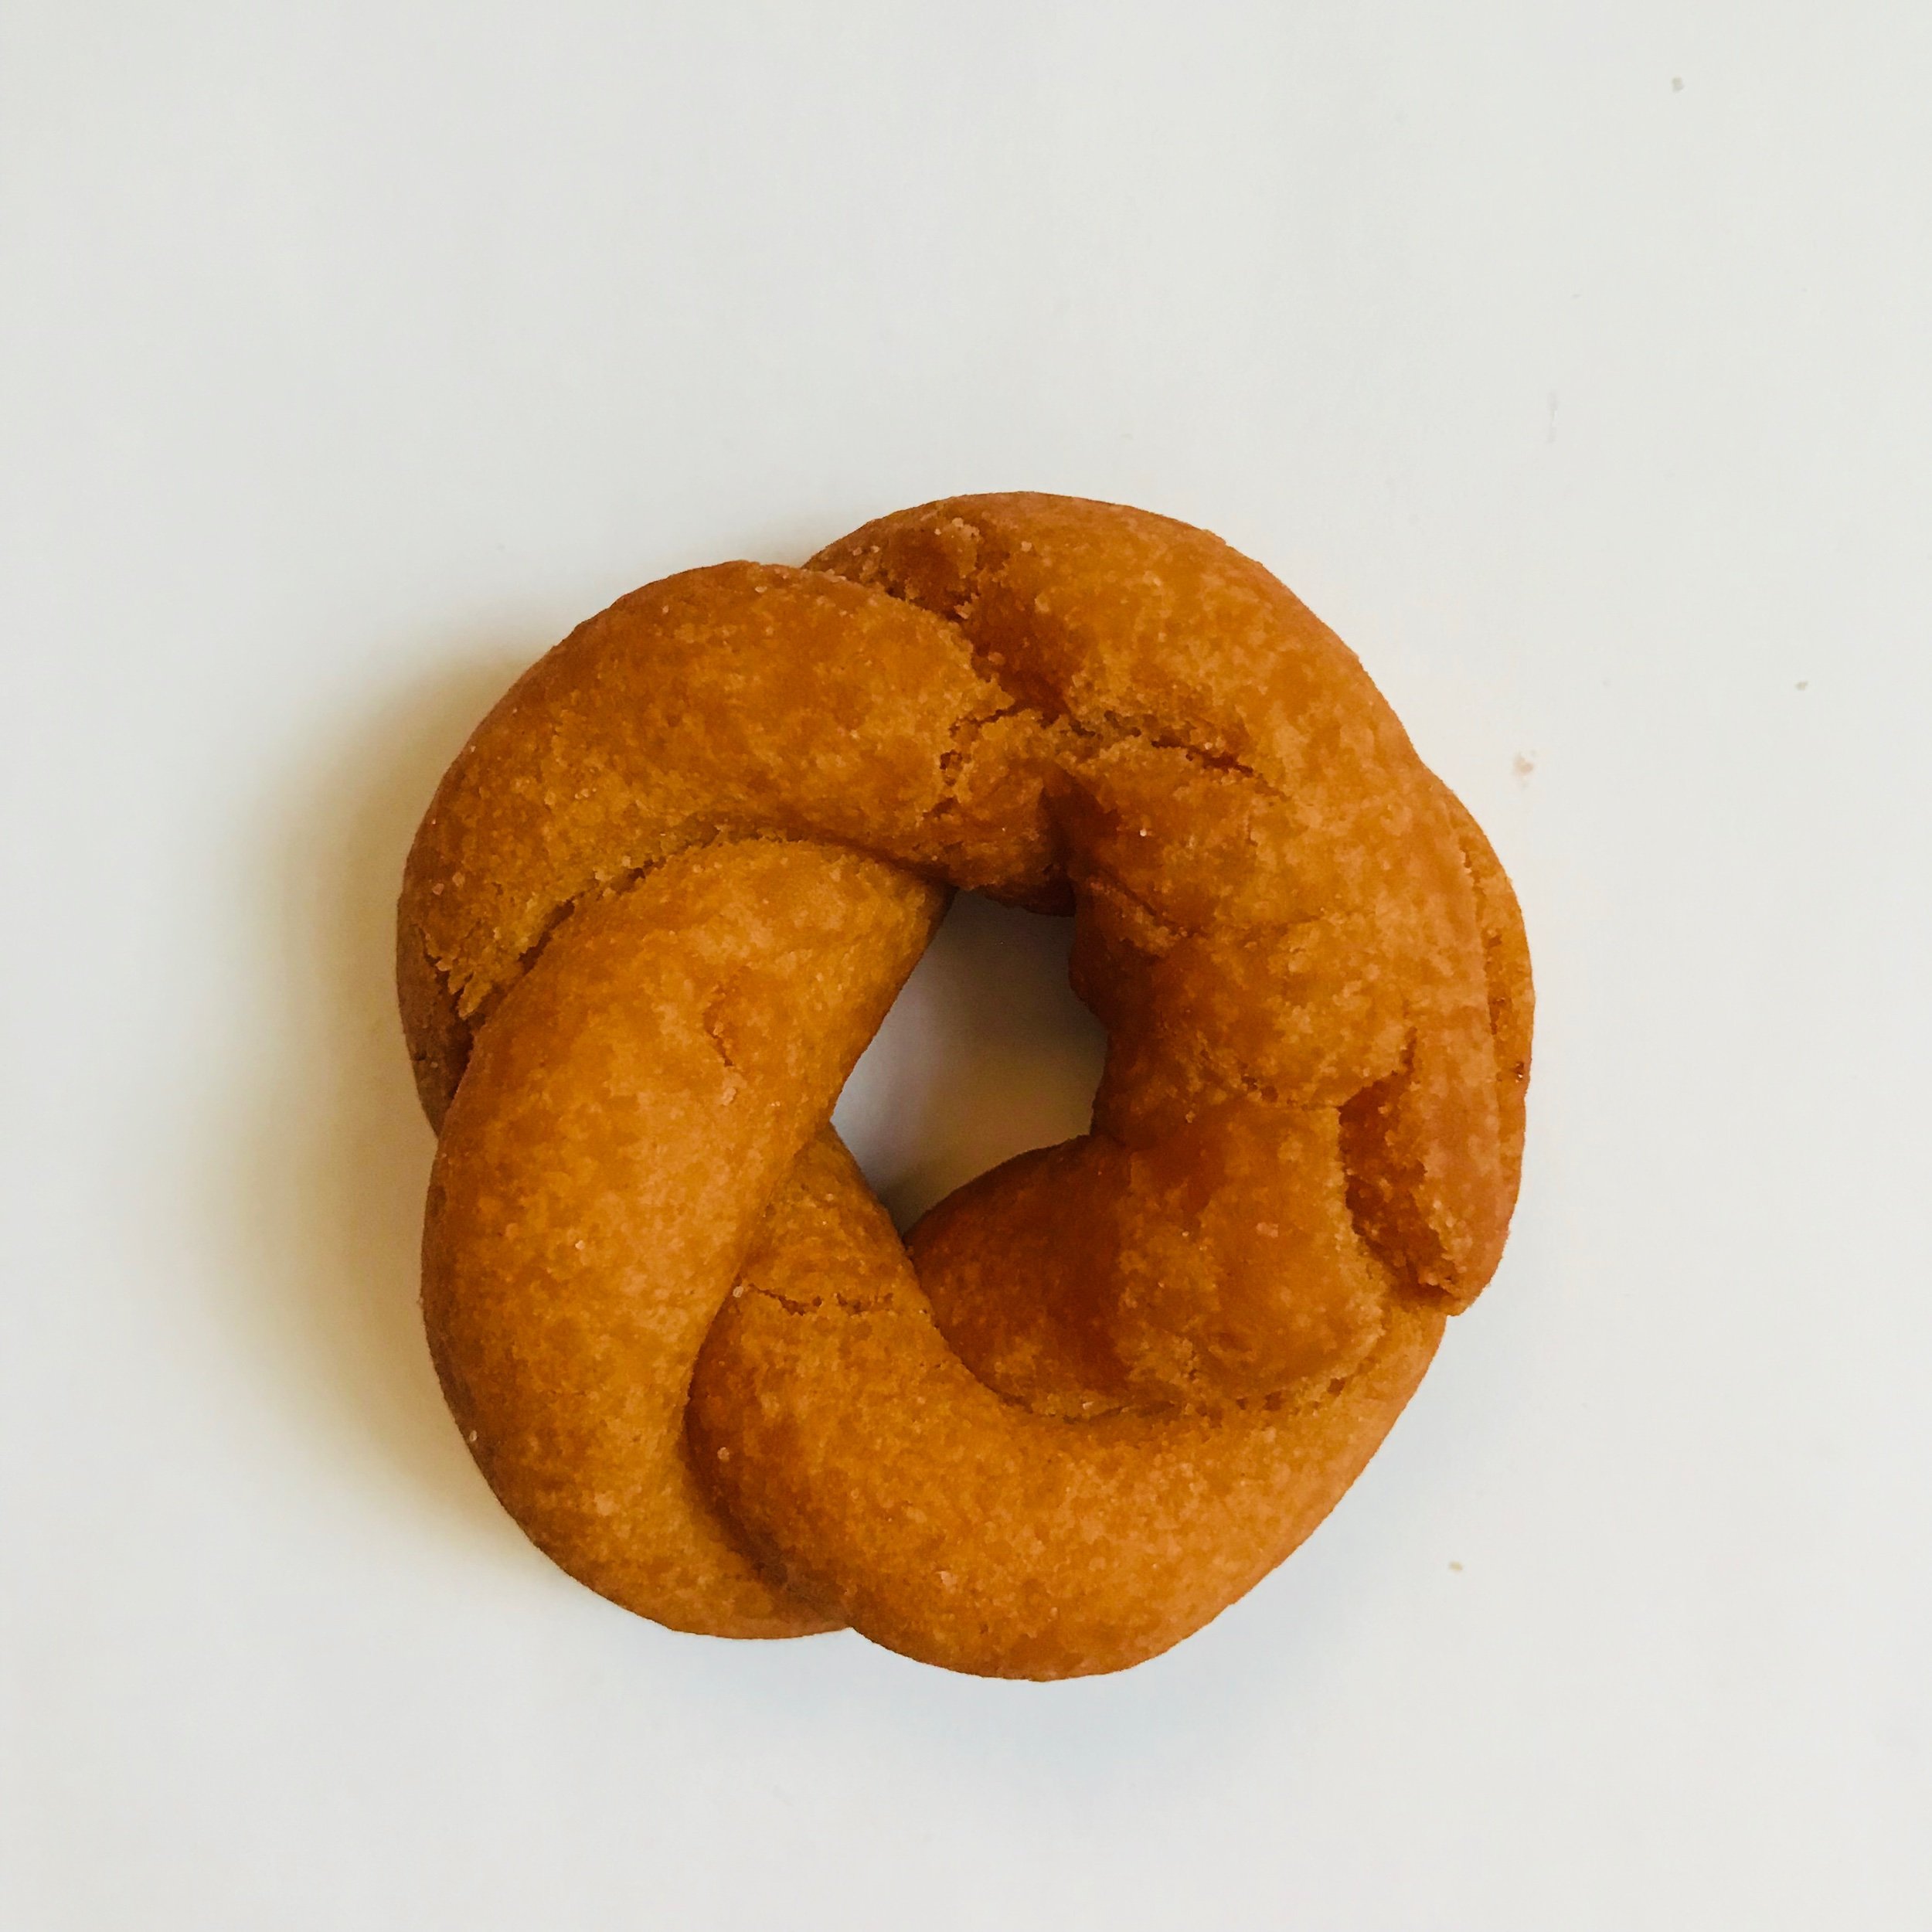
Recipe: Nacatole (Traditional Calabrese Cookies)

My parents were from the southern part of Italy - Calabria, and my Aunts/Cousins would make batches of these traditional cookies and deliver them to our home every Christmas.

I am now carrying on tradition and delivering them to you - virtually of course. I hope you enjoy them as much as we do.

Nacatole (An Italian Calabrese Traditional Cookie)

Serves: 45 - 55 wreaths

INGREDIENTS

  • 2 cups sugar

  • .6 large eggs

  • ¾ cup grapeseed oil

  • 5-6 cups all purpose flour

  • Grapeseed oil for deep frying

INSTRUCTIONS

  1. Add grapeseed oil to a large pot to about half full or a deep fryer and heat to 350 degrees F.

  2. In the bowl of a stand mixer add eggs and sugar. Using the whisk attachment whip until light and fluffy. Pour in the oil and mix to incorporate.

  3. Switch to the dough hook and begin adding flour on low speed until the dough pulls away from the sides of the bowl and easy to roll.

  4. Using 1 1/2 tablespoon scoop measure dough, roll into a long straw like shape, fold in half and twist. Connect the two ends to form a circular wreath.

  5. Using a slotted spoon, submerge one cookie at a time into the preheated oil and deep. The cookie should float to the top and turn golden in colour when ready.

  6. Use a slotted spoon to remove the golden wreath from the oil and place in a paper towel lined colander to cool. Allow to cool completely and enjoy! Cookies should be crispy on the outside, soft and fluffy on the inside.

NOTE

The traditional recipe uses vegetable oil, I use grapeseed oil because it’s a neutral-flavoured oil with a medium-high smoke point (390°F). You can use any oil as long as it has a high smoke point and neutral flavour, which means it won’t overwhelm or alter the taste of the cookies. Happy baking friends!

Print Friendly and PDF

Recipe: Citrusy Amaretti

To quote Janet Jackson “I'm in control, never gonna stop, Control, I like to have a lot. Control, ....”

Ah, forget it! I don’t have control when it comes to these light and citrusy cookies. So freaking good!

It’s rude to talk with my mouth full so here ya go! Full recipe below :)

Citrusy Amaretti

Prep Time: 10 minutes
Total Time: 25 minutes
Serves: 23 to 25 cookies
Author: Mary Mammoliti | Kitchen Confession

Ingredients

  • 3 cups medium ground blanched almonds , (do not use almond flour)
    2/3 cup granulated sugar, and additional 1/3 cup for coating the cookies before baking.
    1 tbsp orange or lemon zest
    2 large egg whites
    1 tsp almond extract
    25 whole almonds for garnish

Instructions

  1. Position rack in centre of oven and preheat to 350F. Line a large baking sheet with parchment or use a slip mat.

  2. Pour egg whites into the bowl of a stand mixer, add 2/3 cup sugar and using the whisk attachment beat until light and fluffy and white in colour.

  3. Remove the bowl from the stand mixer and add the almond extract. Using a silicone spatula or wooden spoon stir.

  4. Mix citrus zest and ground almonds together and add it to your egg and sugar fluff. Mix all the ingredients together just until combined. (Dough will be sticky.)

  5. Pour 1/3 cup granulated sugar into a small bowl and scoop almond mixture and roll into approximately 1 inch balls then roll around in sugar to coat.

  6. Place cookies on a prepared baking sheet, 1 inch apart, gently push a whole almond in the centre of the ball and bake until edges are golden brown, 10 to 12 min. Transfer to a rack to cool.

Print Friendly and PDF

Recipe: One Bowl Greek Yogurt Pumpkin Bread

 “Beauty is in the eye of the beholder” and that’s how I would describe this photo of a One Bowl Greek Yogurt Pumpkin Bread. There may be slight imperfections on top but that crispy golden imperfect exterior adds an extra layer of flavour with every warm bite. It’s crispy on the outside and soft on the inside (perfect description of myself😁) PERFETTO! .

FullSizeRender.jpg

 One Bowl Greek Yogurt Pumpkin Bread

Ingredients

  • 1 medium-size ripe banana, mashed (1/2 cup)

  • 2 large eggs

  • 1 cup pumpkin pure

  • 1/3 cup plain greek yogurt

  • 1/4 cup melted coconut oil

  • 1/2 cup coconut palm sugar

  • 1/2 cup pure maple syrup

  • 1 tsp vanilla

  • 1 tsp ground cinnamon

  • 1/2 tsp ground ginger

  • 1/4 tsp ground nutmeg

  • 1/4 tsp sea salt

  • 2 cups all purpose flour

  • 1 tsp baking soda

  • 1/2 cup dark chocolate chips

Instructions

  1. Preheat oven to 350° (176ºC), and lightly grease a 9 x 5 (23 x 13 cm) bread pan. Set aside.

  2. Combine the flour, baking soda, cinnamon, and salt, stirring with a whisk.

  3. Place sugar and butter in a large bowl, and mix until well blended

  4. Add the eggs, pumpkin, yogurt and vanilla.

  5. Add flour mixture; mix until blended.

  6. Spoon batter into two loaf pans coated with cooking spray.

  7. Bake at 350° for 50-60 minutes until a toothpick inserted in center comes out clean.

Print Friendly and PDF

Recipe: Roasted Acorn Squash

Just when I thought I had finished cooking for the day this little beauty caught my eye and I just had to bake it up. Perfect addition to any meal and it’s the easiest recipe around.

FullSizeRender.jpg

ROASTED ACORN SQUASH

INGREDIENTS

  • 1 acorn squash, washed

  • 2 tbsp olive oil

  • 1 tsp garlic powder

  • Salt and pepper to taste

.

INSTRUCTIONS

  1. Preheat oven to 400°F * Cut the squash in half, using a spoon scrape out the insides, and slice into 1/2" half moons.

  2. Add the olive oil, garlic powder, salt and pepper. Toss to coat. * Lay the squash out on a baking sheet. Bake for 30 minutes until fork tender and golden in colour.


Print Friendly and PDF

Recipe: Spicy Roasted Pumpkin Seeds

A snacker [someone who eats lightly or between meals], a snack [a small amount of food eaten between meals] .

Raise your have if you’re a snacker! 🙋🏻‍♀️ OH I SEE YOU! Now repeat after me - .

“I like good snacks and I can not lie,

You other snackers can't deny,

That when the food goes in an itty bitty plate,

And goes right in your face

You get sprung..”

.

No reason, I just wanted someone to sing with me. Now sit back and relax with a bowl of SPICY ROASTED PUMPKIN SEEDS

FullSizeRender.jpg

Spicy Roasted Pumpkin Seeds

INGREDIENTS

  • 2 cups pumpkin seeds

  • 1 1/2 teaspoons olive oil

  • 1/2 teaspoon garlic powder

  • 1/2 teaspoon cayenne

  • 1/4 teaspoon sea salt

  • 1/4 teaspoon paprika

  • parchment paper

INSTRUCTIONS

  1. Bake at 300 degrees for 40 minutes, taking them out and stirring/flipping halfway through. Let cool for a minute and enjoy!

Print Friendly and PDF

Recipe: 5 Ingredient Almond Butter Cookies


Photo Description: Mary's hand holding 4 stacked Almond Butter Cookies between her index finger and thumb.

Photo Description: Mary's hand holding 4 stacked Almond Butter Cookies between her index finger and thumb.

5 Ingredient Almond Butter Cookies

Prep Time: 10 minutes
Cook time: 10 minutes
Total Time: 20 minutes
Serves: 16-20 cookies
Author: Mary Mammoliti / Kitchen Confession

INGREDIENTS

  • 1 cup almond butter, room temperature

  • 1 cup coconut palm sugar

  • 1 large egg, room temperature

  • 1 teaspoon baking powder

  • 1 teaspoon pure vanilla extract

INSTRUCTIONS

  1. Preheat oven to 350º with 2 oven racks closest to the centre. Line 2 cookie sheets with parchment paper.

  2. Combine all ingredients in a medium size bowl and stir to combine.

  3. Use a medium size cookie scoop to scoop out the dough (1.5 tablespoon balls), placing 8 cookies on each sheet (4 rows of 2 that are staggered).

  4. Bake for 9-10 minutes, until the edges are set and the centres are puffed. (The cookies will flatten and “crackle” as they cool) Cool for 10 minutes and enjoy! Cookies will keep in an airtight container for 1 week, or in the freezer for 1 year.

Print Friendly and PDF

Oven Roasted Chestnuts

HOW TO ROAST CHESTNUTS

Ahh, the roasted chestnut! The quintessential winter treat!

Chestnuts are crunchy and bitter when raw, but become sweet, buttery, and soft when roasted. The scent of roasting chestnuts triggers so many wonderful food memories for me.

It’s comfort, love and laughter wrapped in a mahogany coloured shell. It does and will always remind me of the holiday’s sitting around a long table cloth topped dinner table with endless dishes of warm comforting foods served family style in the centre, and ending the meal with warm, out of the oven roasted chestnuts.

What does the charbroiled scent of a sweet roasted chestnut remind you of?

⁣Do you roast chestnuts or do you boil them? Do you love them, or hate them?

⁣If you LOVE them like we do then you’re in luck! I have the perfect oven roasted chestnut recipe for you to try. Frank and I have tried so many different ways to get the perfect roast and we finally did it (to be fair, he did it. I was quality control - someone had to taste test them :)

This recipe delivers easy to peel, sweet chestnuts every single time!

Oven Roasted Chestnuts

When choosing your chestnuts, make sure they are firm, solid and don’t give when squeezed. Take care when cutting the chestnuts. It’s easier if you use a serrated knife and work slowly. Peel chestnuts when they are still warm, as they become near impossible once cold.

Prep Time: 10 minutes
Cook Time: 26 minutes, and let them rest for 5 minutes
Total Time: 41 minutes
Serves: Well this my friends is up to you :)

Author: Mary Mammoliti | Kitchen Confession

INGREDIENTS

2 1/2 lbs fresh chestnuts
8 cups cold water
1/4 cup kosher salt, to soak chestnuts and more to sprinkle overtop prior to roasting

INSTRUCTIONS

  1. Preheat oven to 400°F.

  2. Using a sharp paring knife, cut a slit across the round side of each chestnut⁣.

  3. Add water and salt to a medium bowl and mix the salt well until it's dissolved a bit (doesn't need to be fully dissolved).

  4. Add the chestnuts to the water and mix them in the water for a few seconds. Using a slotted spoon scoop out the chestnuts and place onto a rimmed baking sheet and lightly sprinkle with kosher salt.

  5. Place the baking sheet in the oven on the middle rack and roast for 20 minutes. Remove from oven, shake the pan, return to the oven and roast for 5 minutes and then switch the oven to broil and continue to roast for 1 minute longer.

  6. Remove the roasted chestnuts from the oven, place them into a bowl and cover with a clean tea towel for 5 minutes.⁣ Peel and enjoy!

Why the salt water bath?

The salt water bath adds a nice subtle salty flavour to the finished roasted chestnuts.

Print Friendly and PDF

Recipe: Oven Baked Salmon

Recipe: Oven Baked Salmon

Every year on Good Friday I was told "don't forget, you can't eat meat today" and as a good little girl I never questioned my parents I simply went along with it.

Print Friendly and PDF

Recipe: Homemade Flakies

Raise your hand if the mention of a Flakie, Jos Louis, 1/2 Moon make you crave one instantly. 

I’m raising both hands ;)

Image Description: Mary’s hand holding a homemade Flakie with a bite taken out of it.

Image Description: Mary’s hand holding a homemade Flakie with a bite taken out of it.

My gosh, how many Vachon Flakies did I eat as a kid? Is this even a number I want to remember? Too many to count and I bet I’m not alone here. 

I was feeling nostalgic yesterday and decided to recreate the Vachon Flakie, and boy was I happy I did! 

So•Friggin•Good

For those that aren’t familiar, a Flakie is made from puff pastry filled with a layer of apple raspberry jam and a vanilla frosting cream at the centre that made a delicious mess with every bite taken. 

What’s your favourite Vachon Cake? 

Did you eat your Flakie whole of did you pop the top off and eat separately?

If you had a choice which would you choose? Flakie, Jos Louis, Vanilla 1/2 Moon, or other.

Photo Description: A full square Homemade Flakie on top of a plate with two small jars of raspberry compote and a bowl of the vanilla cream filling int he background.

Photo Description: A full square Homemade Flakie on top of a plate with two small jars of raspberry compote and a bowl of the vanilla cream filling int he background.

Homemade Flakies

Prep Time: 20 minutes
Cook Time: 20 minutes
Total Time: 40 minutes
Serves: 9
Author: Mary Mammoliti/Kitchen Confession

INGREDIENTS

THE PASTRY

  • 2 - 12 inch square sheets puff pastry

  • Granulated sugar to sprinkle overtop

  • 1 egg + 1 tbsp water, (to make an egg wash)

THE RASPBERRY FILLING

  • 2 cups fresh or frozen raspberries

  • 1/2 cup granulated sugar

  • 2 tsp corn starch dissolved in 1/4 cup water

THE VANILLA CREAM FILLING

  • 1 1/2 cups icing sugar

  • 1/3 cup unsalted butter, softened

  • 3 tbsp whipping cream

  • 1 tsp vanilla extract

INSTRUCTIONS

STEP 1: PREPARE THE PASTRY PART 1

  1. Whisk the egg and water together, set aside

  2. Line a rimmed baking sheet with parchment paper..

  3. Lay out one of the sheet of puff pastry on the lined baking sheet and lightly brush it with the egg wash. Note: do not pour it all on top, you are not going to use all of the egg wash but will need more just before it goes into the oven.

  4. Lay the second sheet of puff pastry on top and chill in the freezer for 10-15 minutes. This will allow for an easy and evenly cut into squares later.

STEP 2: PREPARE THE RASPBERRY FILLING

  1. If using fresh raspberries, gently rinse and add them to a medium stock pot. Add the sugar and slowly simmer together stirring every so often for about 10 minutes.

  2. In a operate bowl add the cornstarch and water together and stir to dissolve. Pour the mixture in with the raspberries and sugar, stir and cook for an additional minute. Cool completely to room temperature until the pastry is ready to be assembled.

STEP 3: PREPARE THE PASTRY PART 2

  1. Remove the pastry sheets from the freezer and using a sharp knife, trim the edges square if there was any uneven overlap, then cut the pastry into 9 squares (I’ve also cut them into 16 squares for a mini versions.)

  2. Spread the squares apart on the parchment lined baking sheet to allow a gap between each square.

  3. Lightly brush the tops with the egg wash and sprinkle granulated sugar over the tops of each square. You can use as little or as much as you like here but the sweet spot is a iight sprinkle overtop)

  4. Bake for 15-20 minutes at 400 degrees F until the tops are golden brown. (If you are using a convection oven 15-17 minutes will be your perfect cooking time) Cool on a wire rack.

STEP 4: PREPARE THE VANILLA CREAM FILLING

  1. Add icing sugar, butter, whipping cream, and vanilla to the bowl of a stand mixer and beat all ingredients together until light and fluffy. This step can also be done with a hand held mixer.

STEP 5: ASSEMBLE THE FLAKIES

  1. With a serrated knife, cut each of the baked pastries in half horizontally.

  2. Spread a heaping tablespoon of vanilla cream on the bottom half of the pastry and a rounded tablespoon of the raspberry compote on top of the vanilla cream and use the back of the tablespoon to spread it out, bring the two halves together to form a sandwich and take a giant bite! Enjoy :)

  3. Store in an airtight container.

Print Friendly and PDF

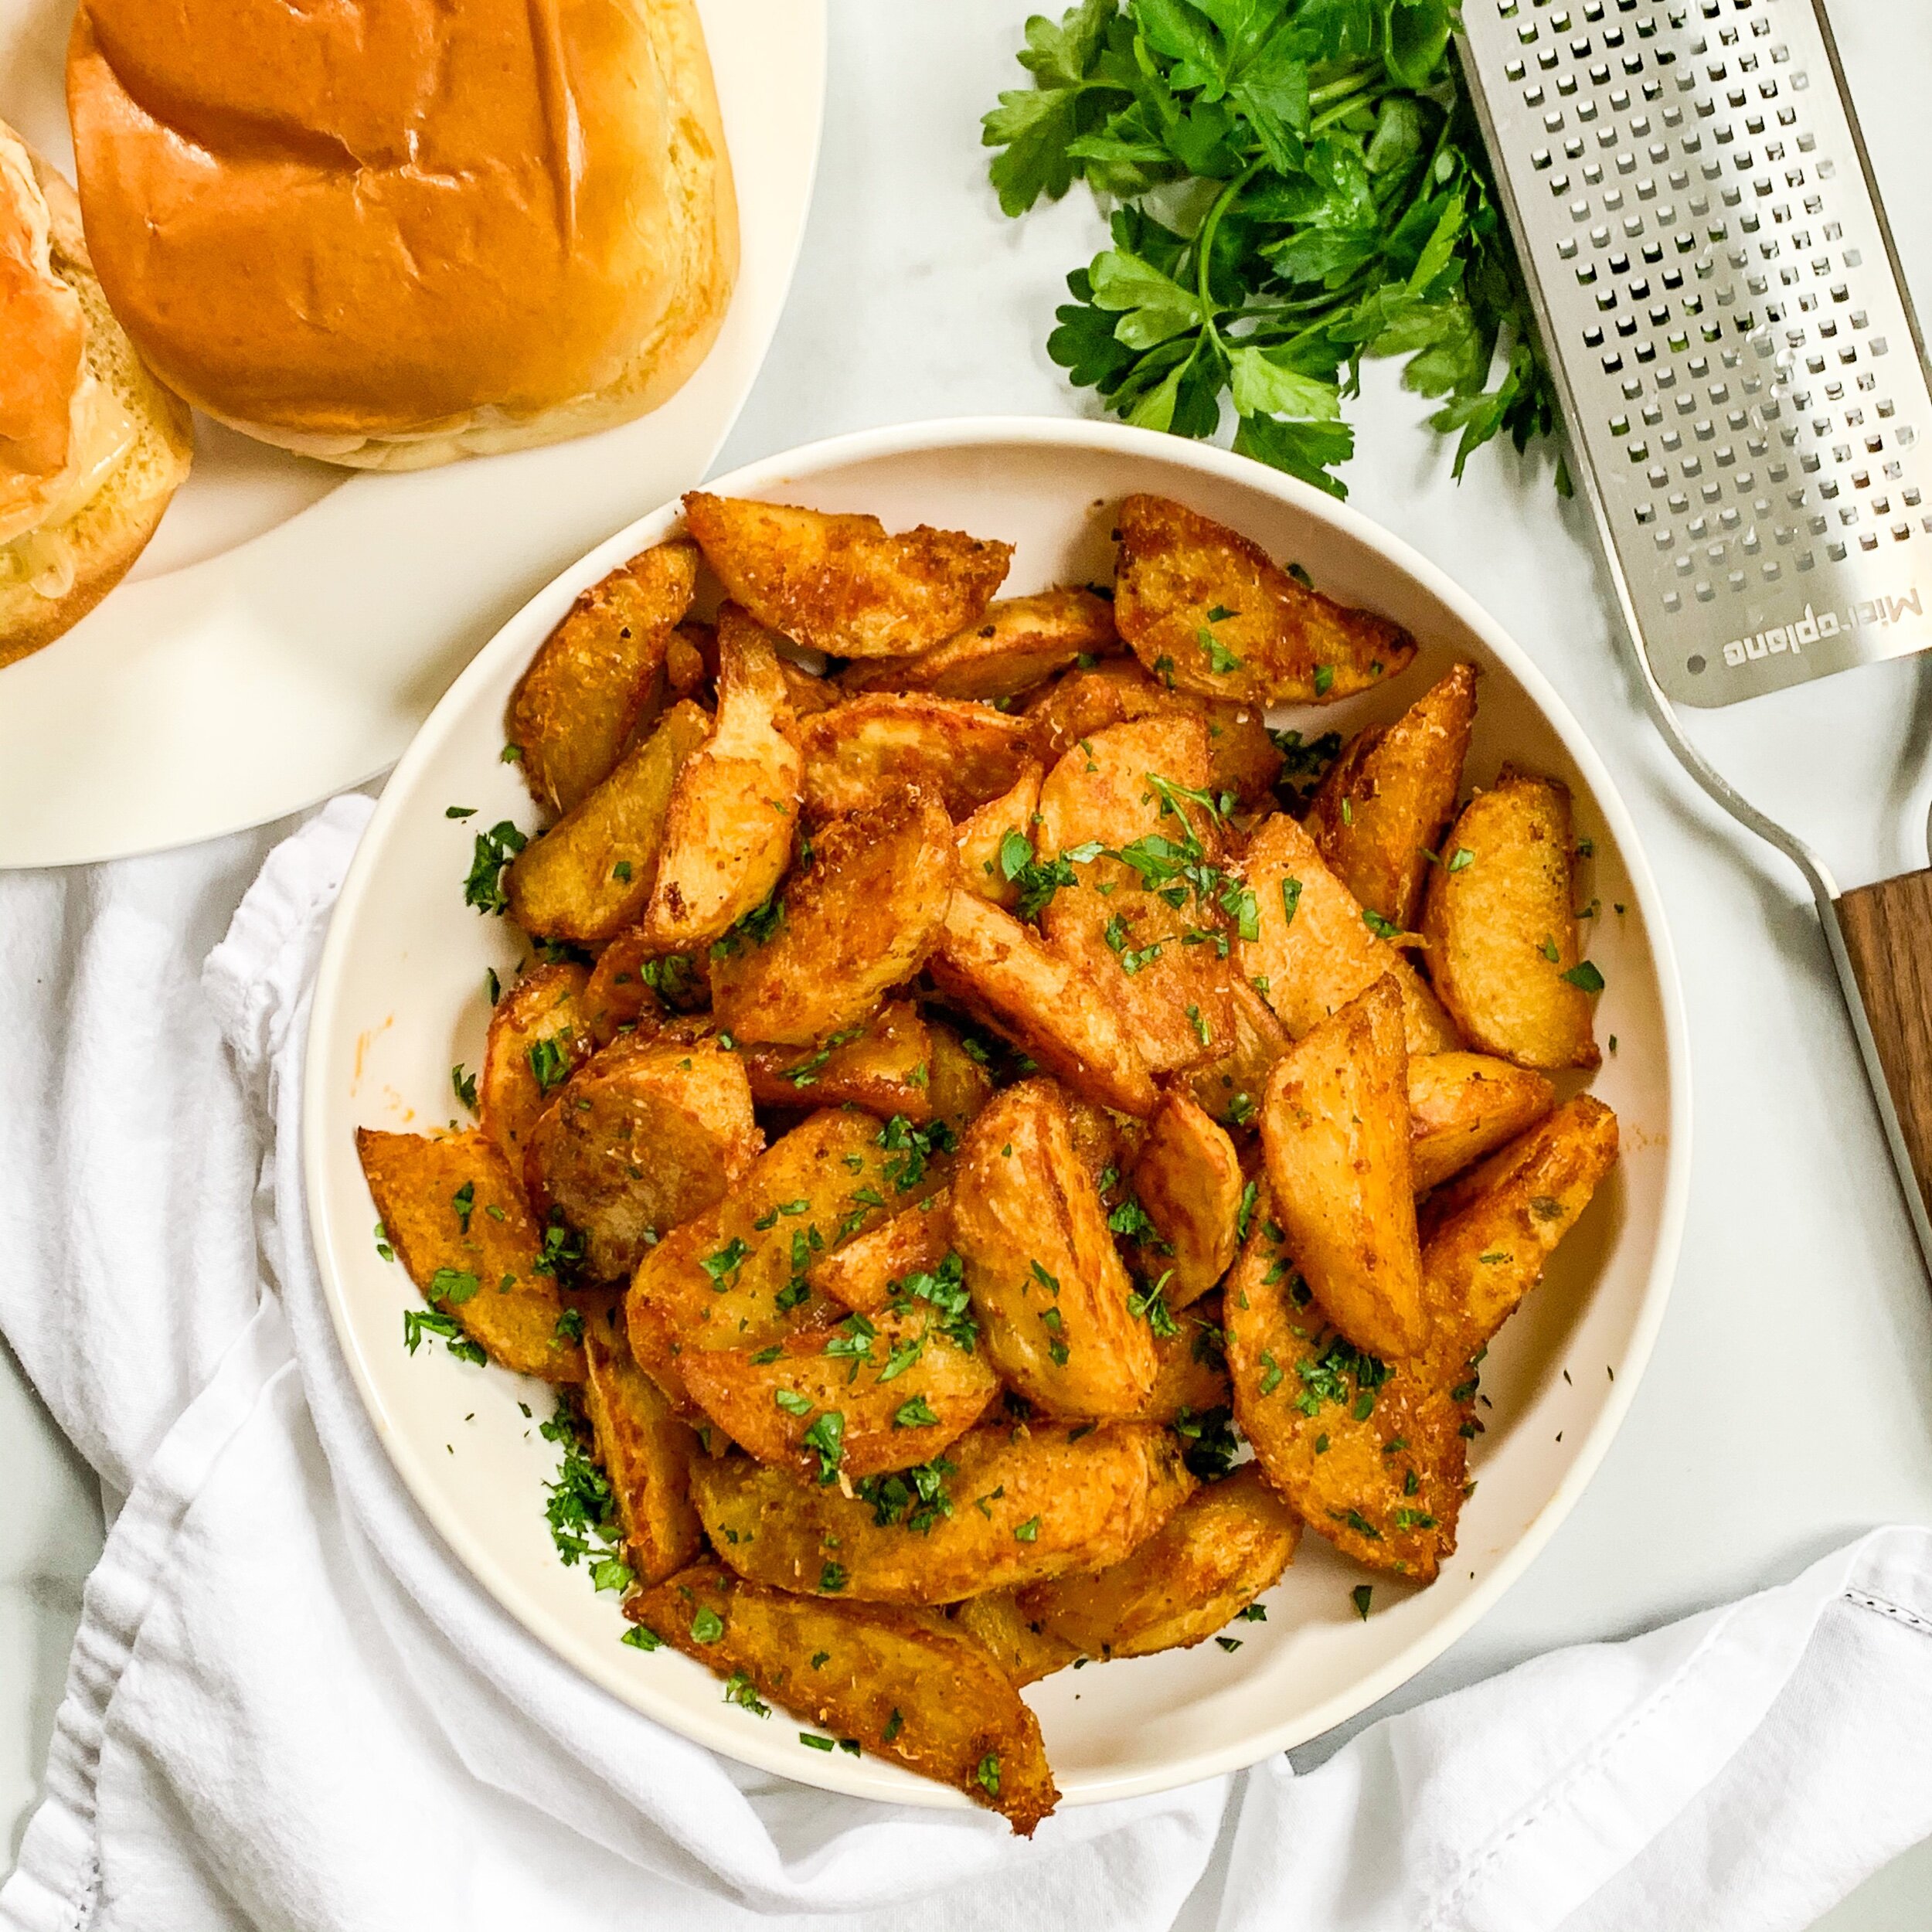
Recipe: Crispy Oven Roasted Garlic Potato Wedges

What if I said this was the BEST Roasted Potato Recipe and the only one you will ever need. Would you believe me?

If you said no, it’s okay I’ll change your mind by the end of this post. These potatoes are perfect mix of soft and creamy on the inside, crunchy and salty on the outside with a hint of garlic and Parmesan on the outside.

Stay with me here. You can add them as a trusty side, make a spicy aioli dip and serve them as appetizers or grab a plate and have them as a snack.

Still on the fence? Just make them, and try for yourself. I guarantee you and the family will love them.

IMG_2001.jpeg

Crispy Oven Roasted Garlic Potato Wedges

Prep Time: 15 minutes 
Cook Time: 35 minutes 
Total Time: 50 minutes 
Serves: 6
Author: Mary Mammoliti / Kitchen Confession 

INGREDIENTS

  • 6 large yellow potatoes, peeled and rinsed

  • 1/4 cup olive oil

  • 1 tablespoon minced garlic, (or 3 teaspoons garlic powder)

  • 1/2 teaspoon onion powder

  • 2 teaspoons sea salt

  • 1 teaspoon paprika

  • Fresh cracked black pepper to taste

  • 2/3 cup finely grated parmegiano reggiano cheese, divided

  • 2 tablespoons chopped fresh parsley

INSTRUCTIONS

  1. Preheat oven to 390°F (200°C). Line 2 large baking sheets with parchment paper; set aside.

  2. Cut each potato in half lengthways, then cut each half in half lengthways again, and then cut each half in half lengthways again until you have 8 wedges. (Make sure they are about the same thickness and size). 

  3. In a large bowl, add the cut potatoes, oil, garlic, onion powder, salt, paprika and pepper and toss to coat. 

  4. Arrange potato wedges in a single layer on a large baking tray. Sprinkle with half of the parmesan cheese. 

  5. Bake for 35 minutes, turning wedges half way through baking time, until golden, crisp and cooked through when tested with a fork.

  6. Sprinkle with parsley. OPTIONAL: Sprinkle remaining parmesan cheese to serve.

Print Friendly and PDF

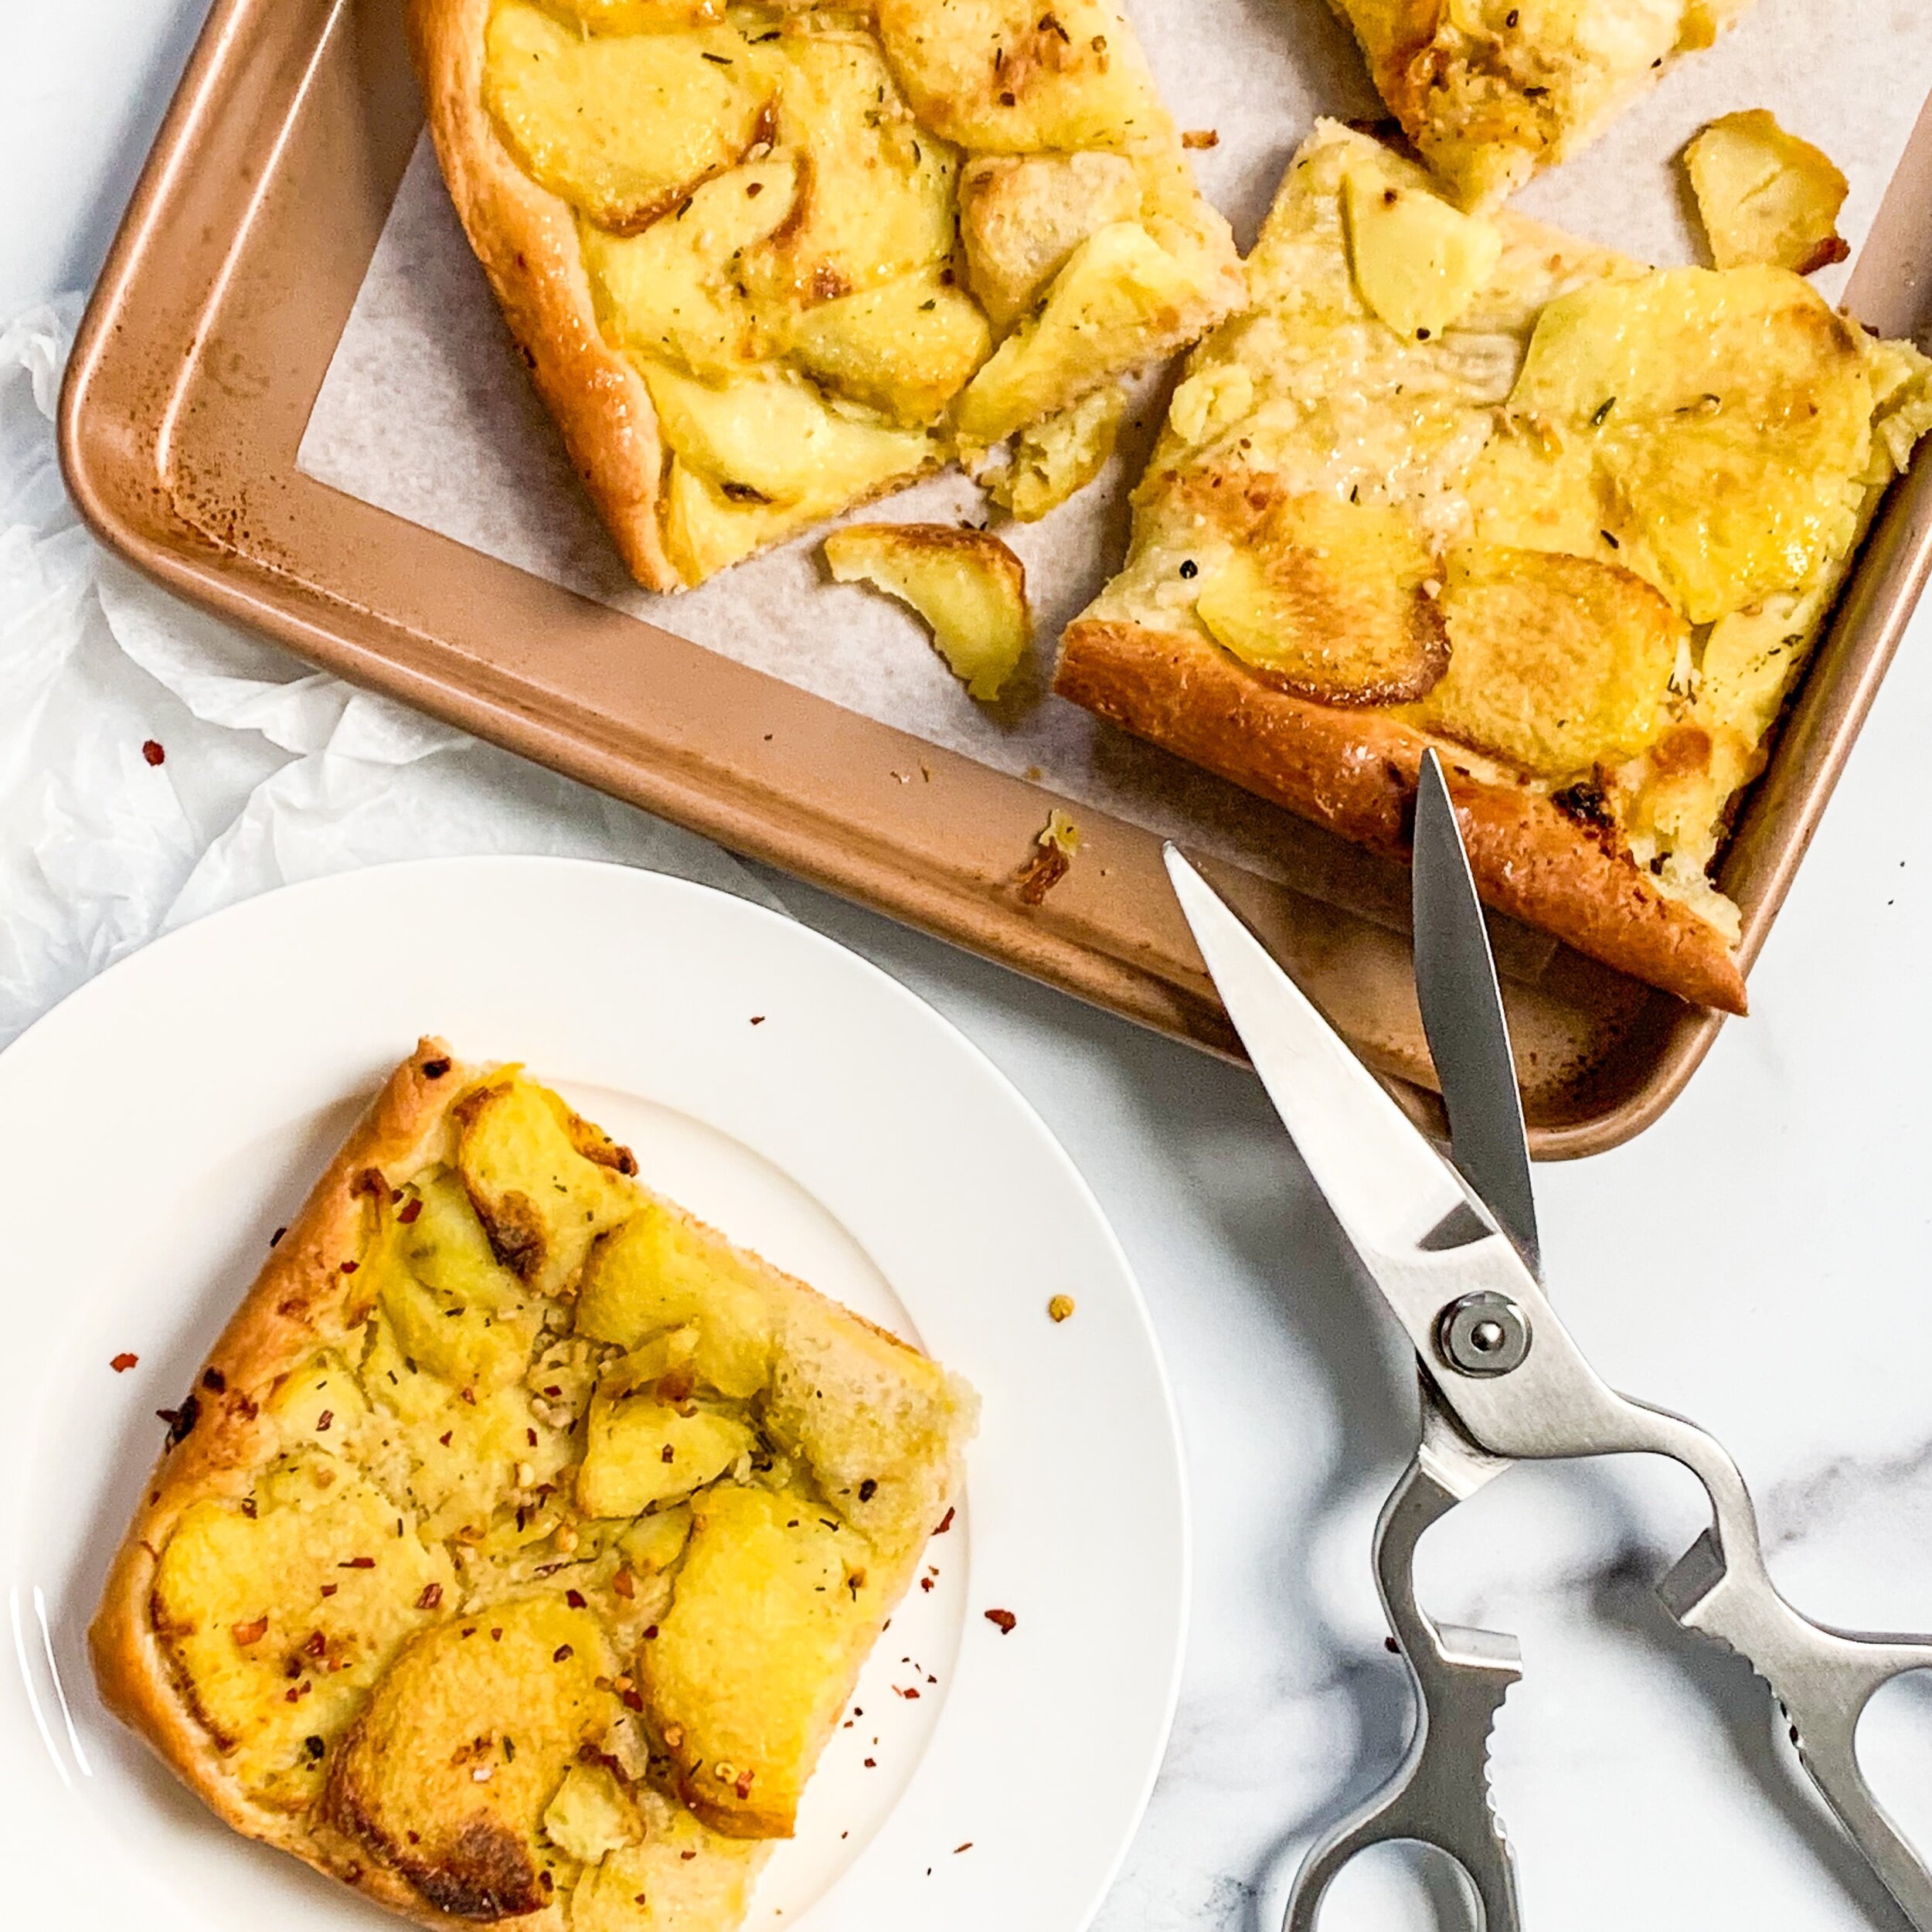
Recipe: Potato Pizza

You NEED this pizza in your life!

The thinly sliced potatoes, fragrant thyme top a crispy homemade pizza dough with dollops of fresh cheese ….. it doesn’t get much better than this.. This pizza is easy to assemble, highly addictive and the perfect addition to pizza night!

I know what you're thinking - HELLO carb load!  Well . . . yes, but If you go to Italy, you’ll see potato pizza in many of the trattorias. Stay with me here, picture yourself sitting at a tiny cast iron bistro table on a patio in Rome, with a fresh out of the wood burning oven potato pizza with a glass of chilled white or ruby red vino. Buon Appetito Tesoro!

Need the perfect homemade pizza dough recipe for this pizza click here.

IMG_9979.jpeg

Potato Pizza

Prep Time: 30 minutes 
Cook time: 30 minutes 
Total Time: 1 hour 
Serves: 1 (13”x18”) sheet pan
Author: Mary Mammoliti | Kitchen Confession 

INGREDIENTS 

  • 1 prepared pizza dough or make my quick and easy pizza dough 

  • 7 medium yellow potatoes 

  • 1 tablespoon kosher salt

  • 1 ball mozzarella cheese (see Options below for a substitution)

  • 5 tbsp olive oil

  • 3-4 cloves garlic, minced 

  • 1 teaspoon dry thyme

  • Salt and pepper to taste

INSTRUCTIONS 

  1. Preheat your oven to 425°F

  2. Prepare your pan with a tablespoon of olive oil and using a paper towel spread to coat the pan. 

  3. Peel the potatoes and add them to a large pot and cover with cold water with 1 tablespoon kosher salt and bring to a boil, reduce heat to. simmer and cook the potatoes for about 20 minutes, until fork tender. You should be able to pierce the potato with no resistance.

  4. In a small bowl, combine the olive oil, garlic, thyme, salt and pepper.

  5. With your fingers, begin to press the dough to the sides of the pan. If your dough resists and won’t cooperate, let it rest for a bit while you work on the potatoes. Your dough should eventually cover the entire pan. If holes develop, simply pinch them together. 

  6. Drain the potatoes, allow them to cool to the touch and slice each one. Slice them as thin as you can get them.

  7. Start layering the potato slices over the pizza dough, overlapping the slices slightly until the dough is covered, all the way to the edges of the pan. 

  8. Drizzle the olive oil mixture over the pizza and spread carefully or evenly over the potatoes, using a brush.

  9. If using mozzarella, cut or tear the it into small pieces and place on the pizza.

  10. Place the pizza onto the middle of the oven  and bake for 20-30 minutes until the potatoes begin to brown. 

  11. Remove from the oven, drizzle with 1 tablespoon oil and enjoy. 

    OPTIONS: You can also top the pizza with fresh ricotta in place of the mozzarella. Do not bake the pizza with the ricotta. When the pizza is ready, remove from oven, dollop with 1 cup ricotta; drizzle with oil and top with several grinds of pepper.

Print Friendly and PDF

Recipe: Quick And Easy Pizza Dough

This really is the perfect Pizza Dough recipe when you have to get dinner on the table in a hurry.

This crust has a nice bit of crunch. It’s the perfect backdrop to whatever toppings you want to layer on top. One of my favourite toppings are potato, and without sounding dramatic it’s probably one of the best pizzas you will ever have!

Raw eggs, for and smooth round ball of fresh pizza dough lightly floured  on the kitchen counter

Raw eggs, for and smooth round ball of fresh pizza dough lightly floured on the kitchen counter

Quick And Easy Pizza Dough

Prep Time: 10 minutes
Proof Time: 2 hours
Total Time: 20 minutes 
Serves: 1 Rectangular Sheet Pan
Author: Mary Mammoliti | Kitchen Confession

INGREDIENTS

  • 1 cup warm water (about 110°C)

  • 1 tablespoon honey

  • 1 tablespoon oil

  • 1 tablespoon dry instant yeast

  • 1 teaspoon sea salt

  • 2 cups all purpose flour

INSTRUCTIONS

  1. In a large bowl or the bowl of an electric stand mixer fitted with the dough hook, add the warm water, honey, oil, salt, and sprinkle the yeast overtop. Let it sit for 5 minutes and allow it to bloom. There should be a foamy later on the top of the liquid mixture in the bowl. 

  2. If using a stand mixer turn it on low and slowly add the flour until a soft dough forms and begins to pull away from the sides of the bowl. NOTE: Use your fingers and touch and the dough. The dough should feel soft, smooth and not sticky.

  3. Continue to knead the dough for 2-3 minutes longer.  NOTE: If kneading by hand or if using whole wheat flour, continue to kneed 5-6 minutes longer. 

  4. Cover the bowl with plastic wrap and let sit until doubled in size, 1-2 hours. 

  5. Remove the plastic wrap and punch the dough down and place the it onto the center of your prepared sheet pan. With your fingers, begin to press the dough to the sides of the pan. If your dough resists and won’t cooperate, let it rest for a bit. Your dough should eventually cover the entire pan. If holes develop, simply pinch them together. 

  6. Continue with pizza toppings of your choice and bake in a preheat oven 425°F for 20-30 minutes.

Print Friendly and PDF